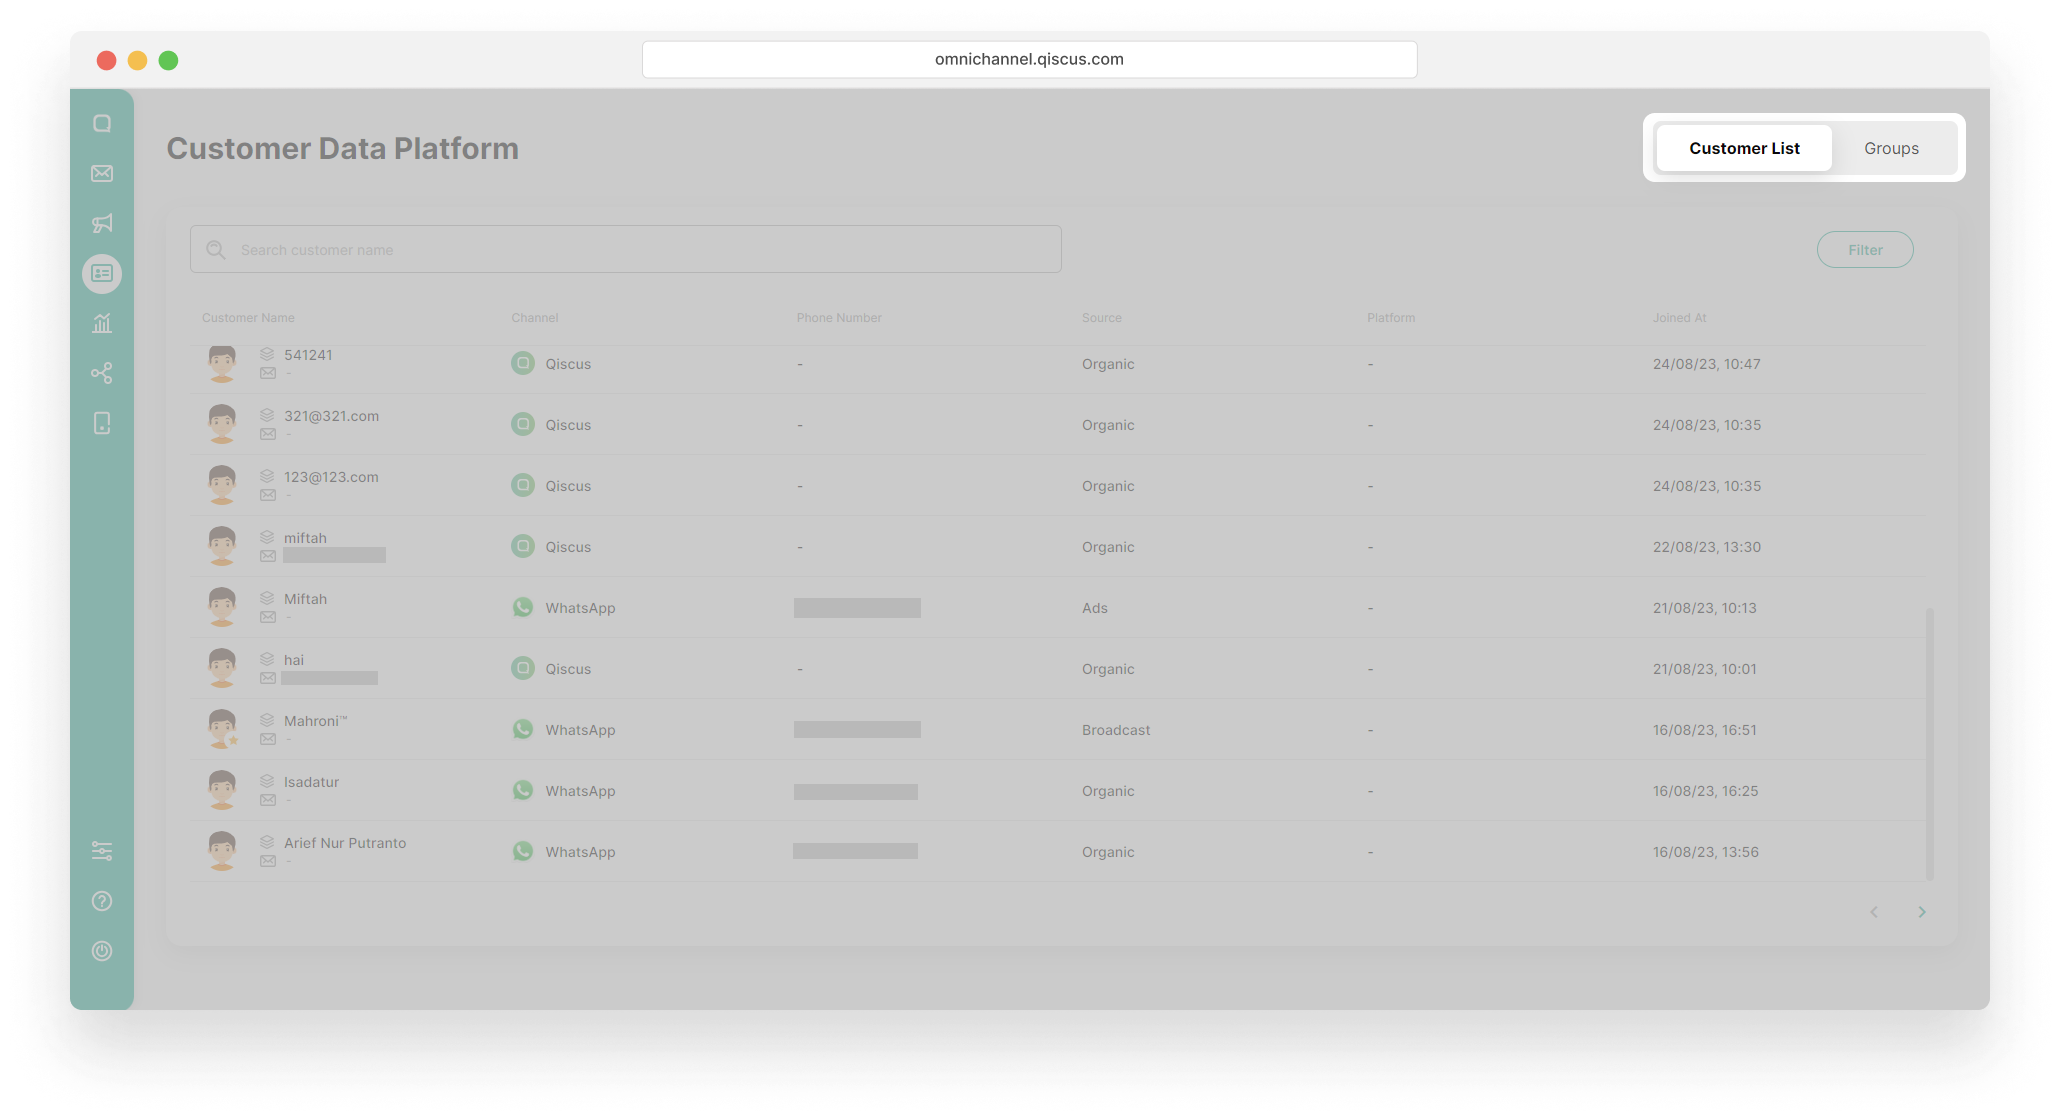
Customer Groups page is a place where you can create a group of customers based on the customer properties. Customer properties can be used for any data, such as website, interest, address, etc. Before getting started, here are a few things to know:
- You need to fill the value of customer properties in your customer information
- You can only have customers in a group of up to 10000 members. You can contact us to have more than 10000 members in one group.
- There is no limit to the number of group creation,
- The conditions (OR/AND) in the filter group apply to all customer properties. You can use filters for up to 5 customer properties,
- You can set the filter based on channel, customer properties, OR/AND source.
Create Customer Group
You can create customer group with the following steps:
- Click the Groups tab,
- Click Create Group button,
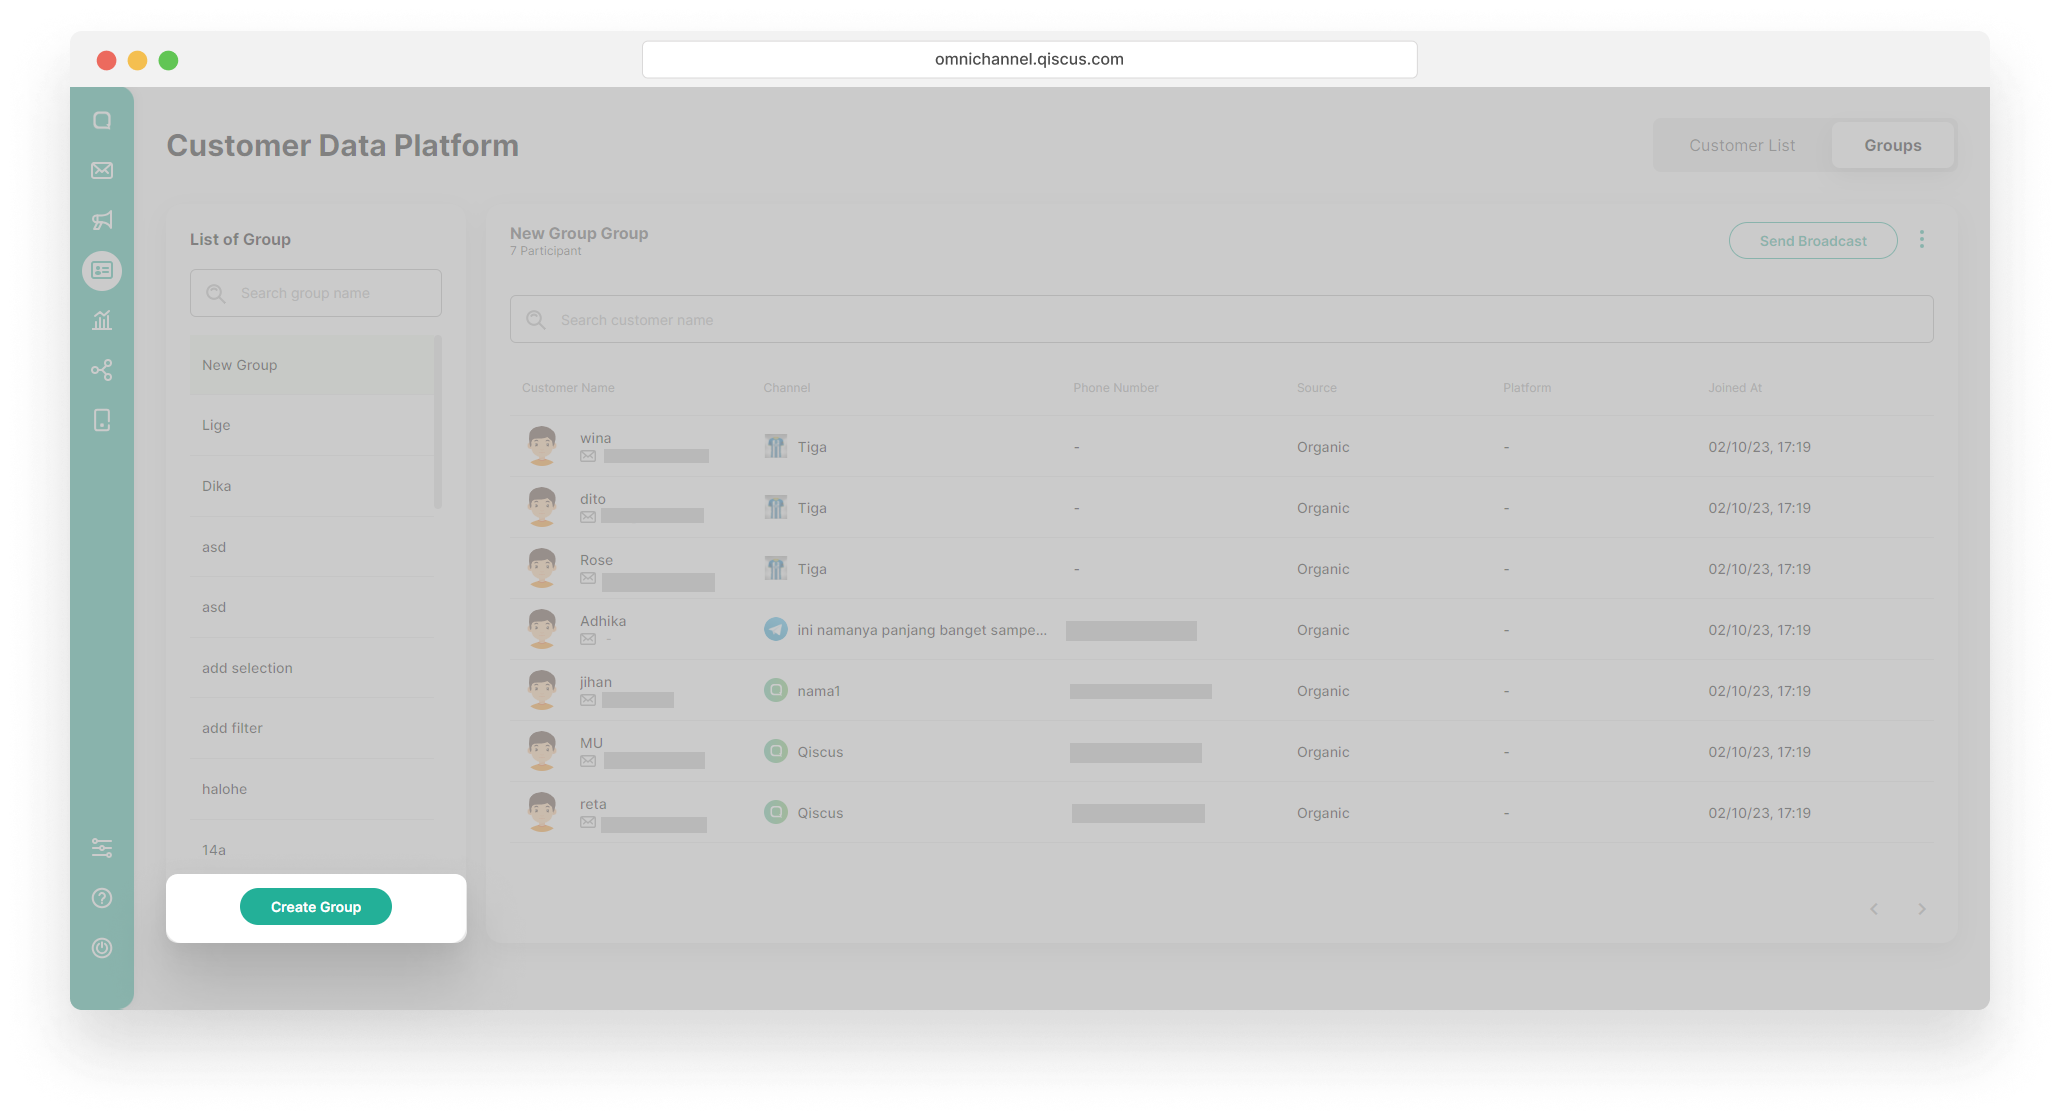
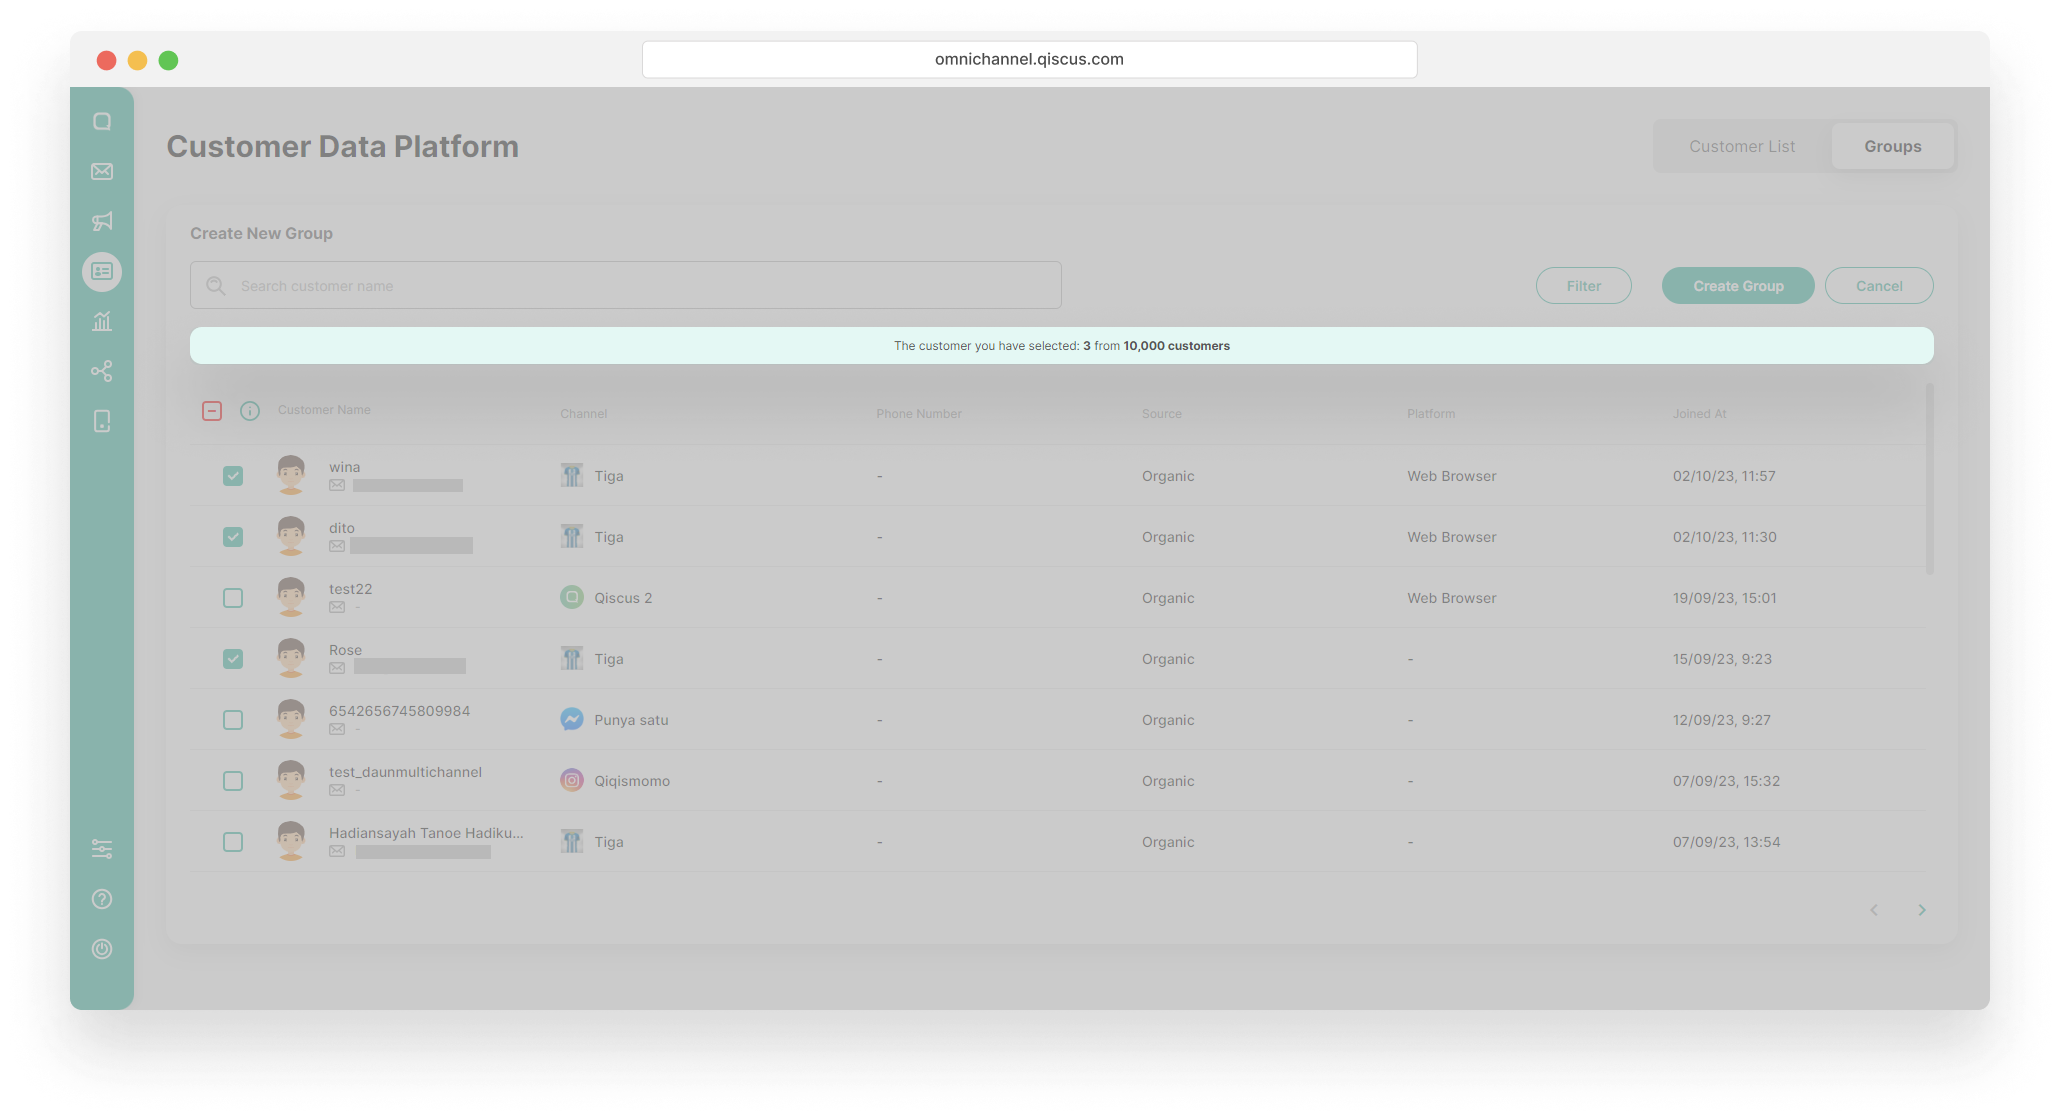
- You can choose one of two methods to create a customer group.
- Using the checkbox to the left of the customer list
- Select the customers you want to be in a group,
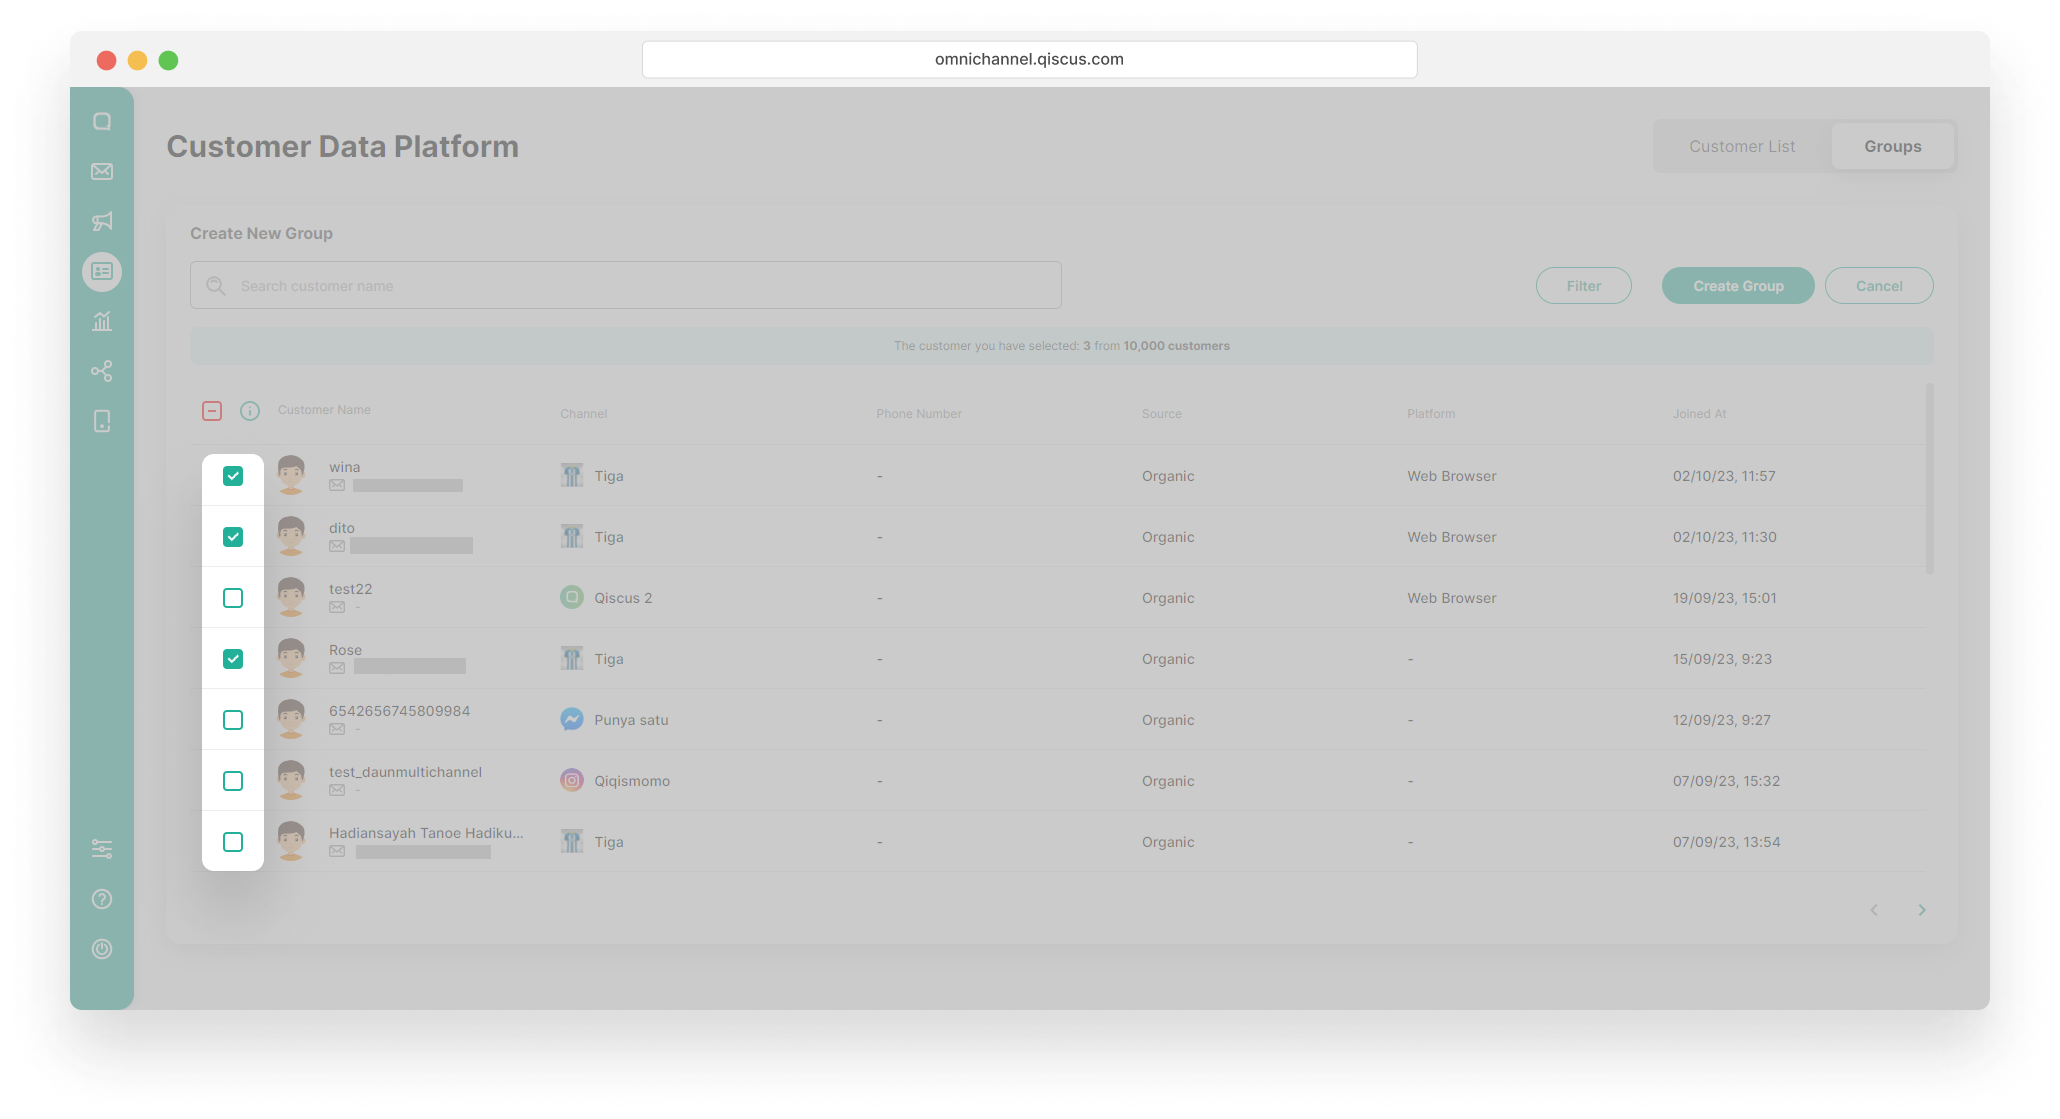
- You will get a notification about how many customers have been selected,
- Click Create Group button,
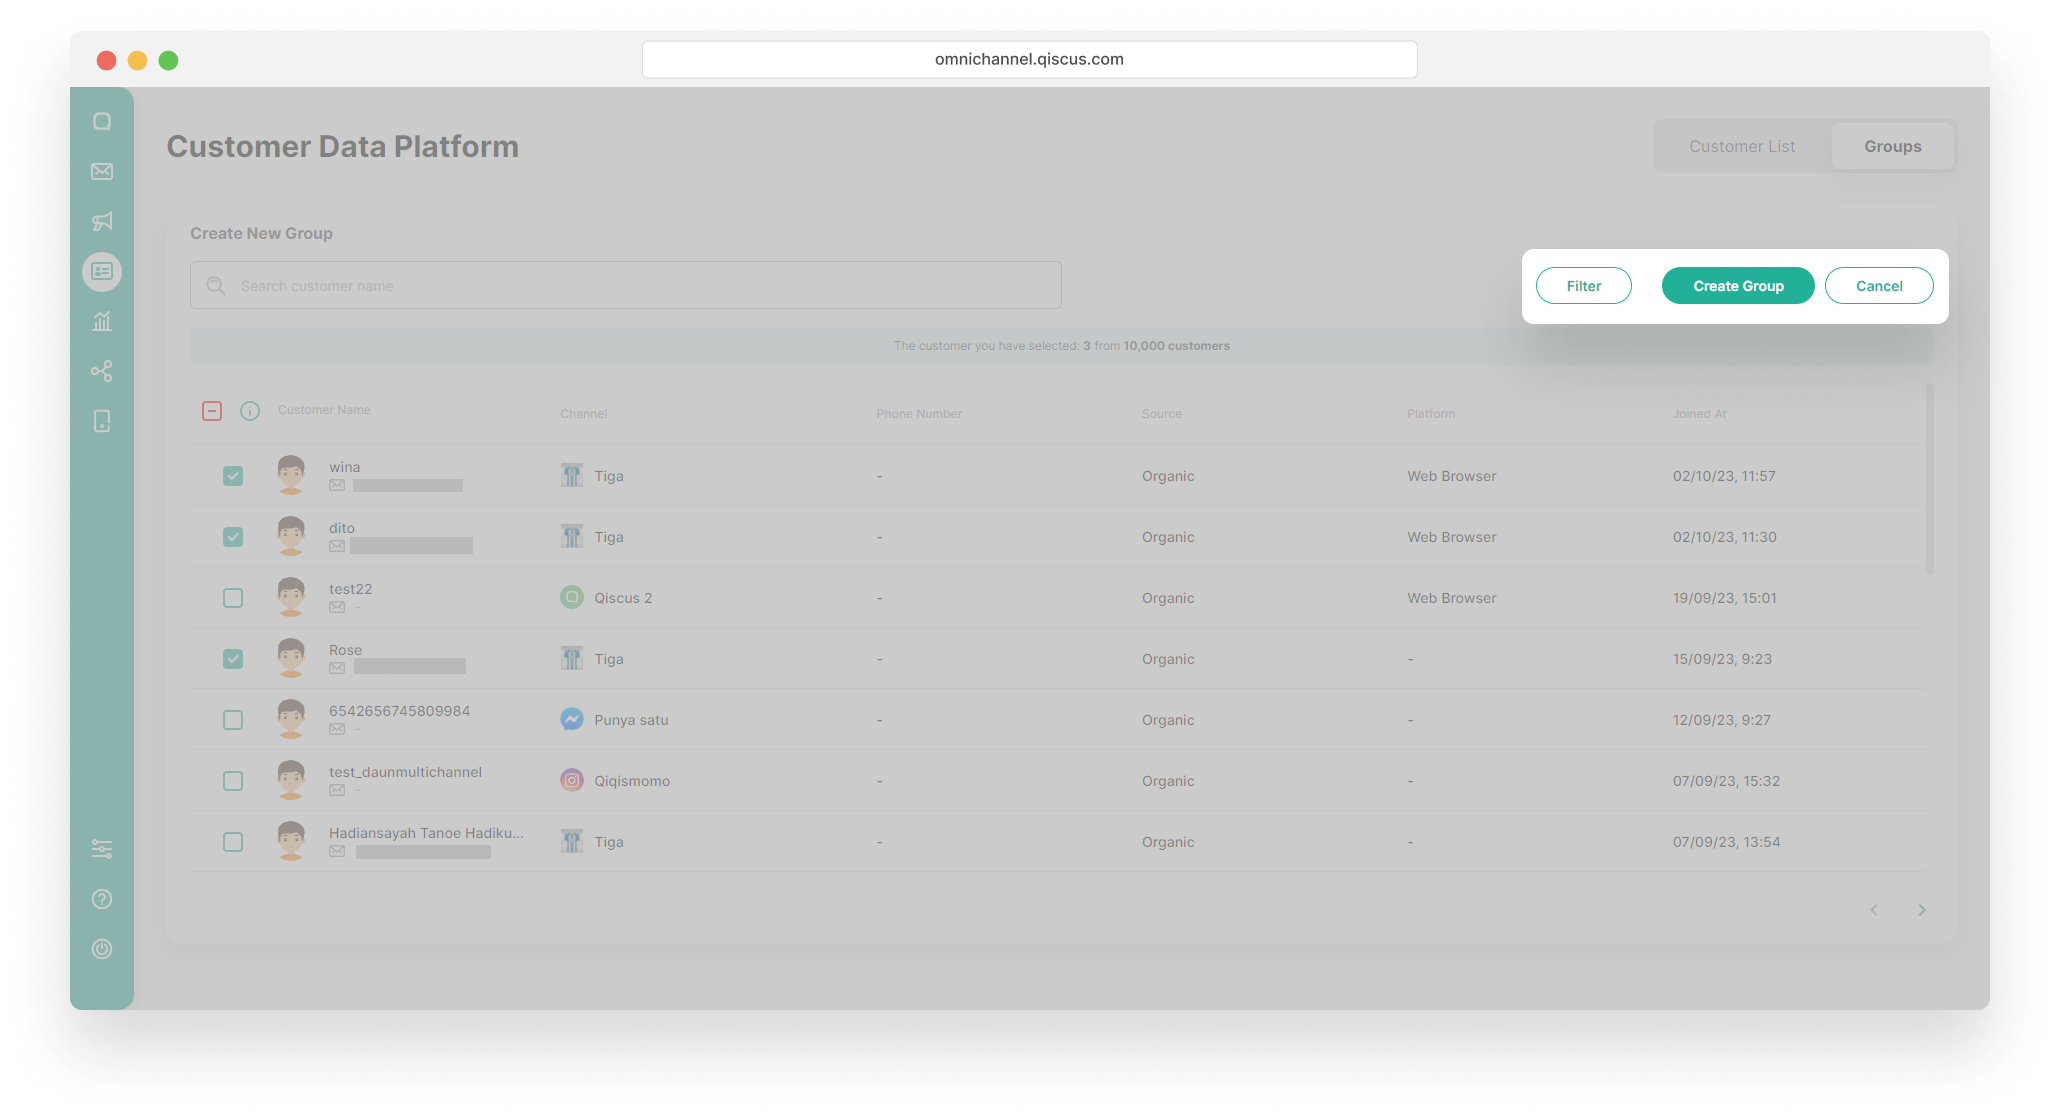
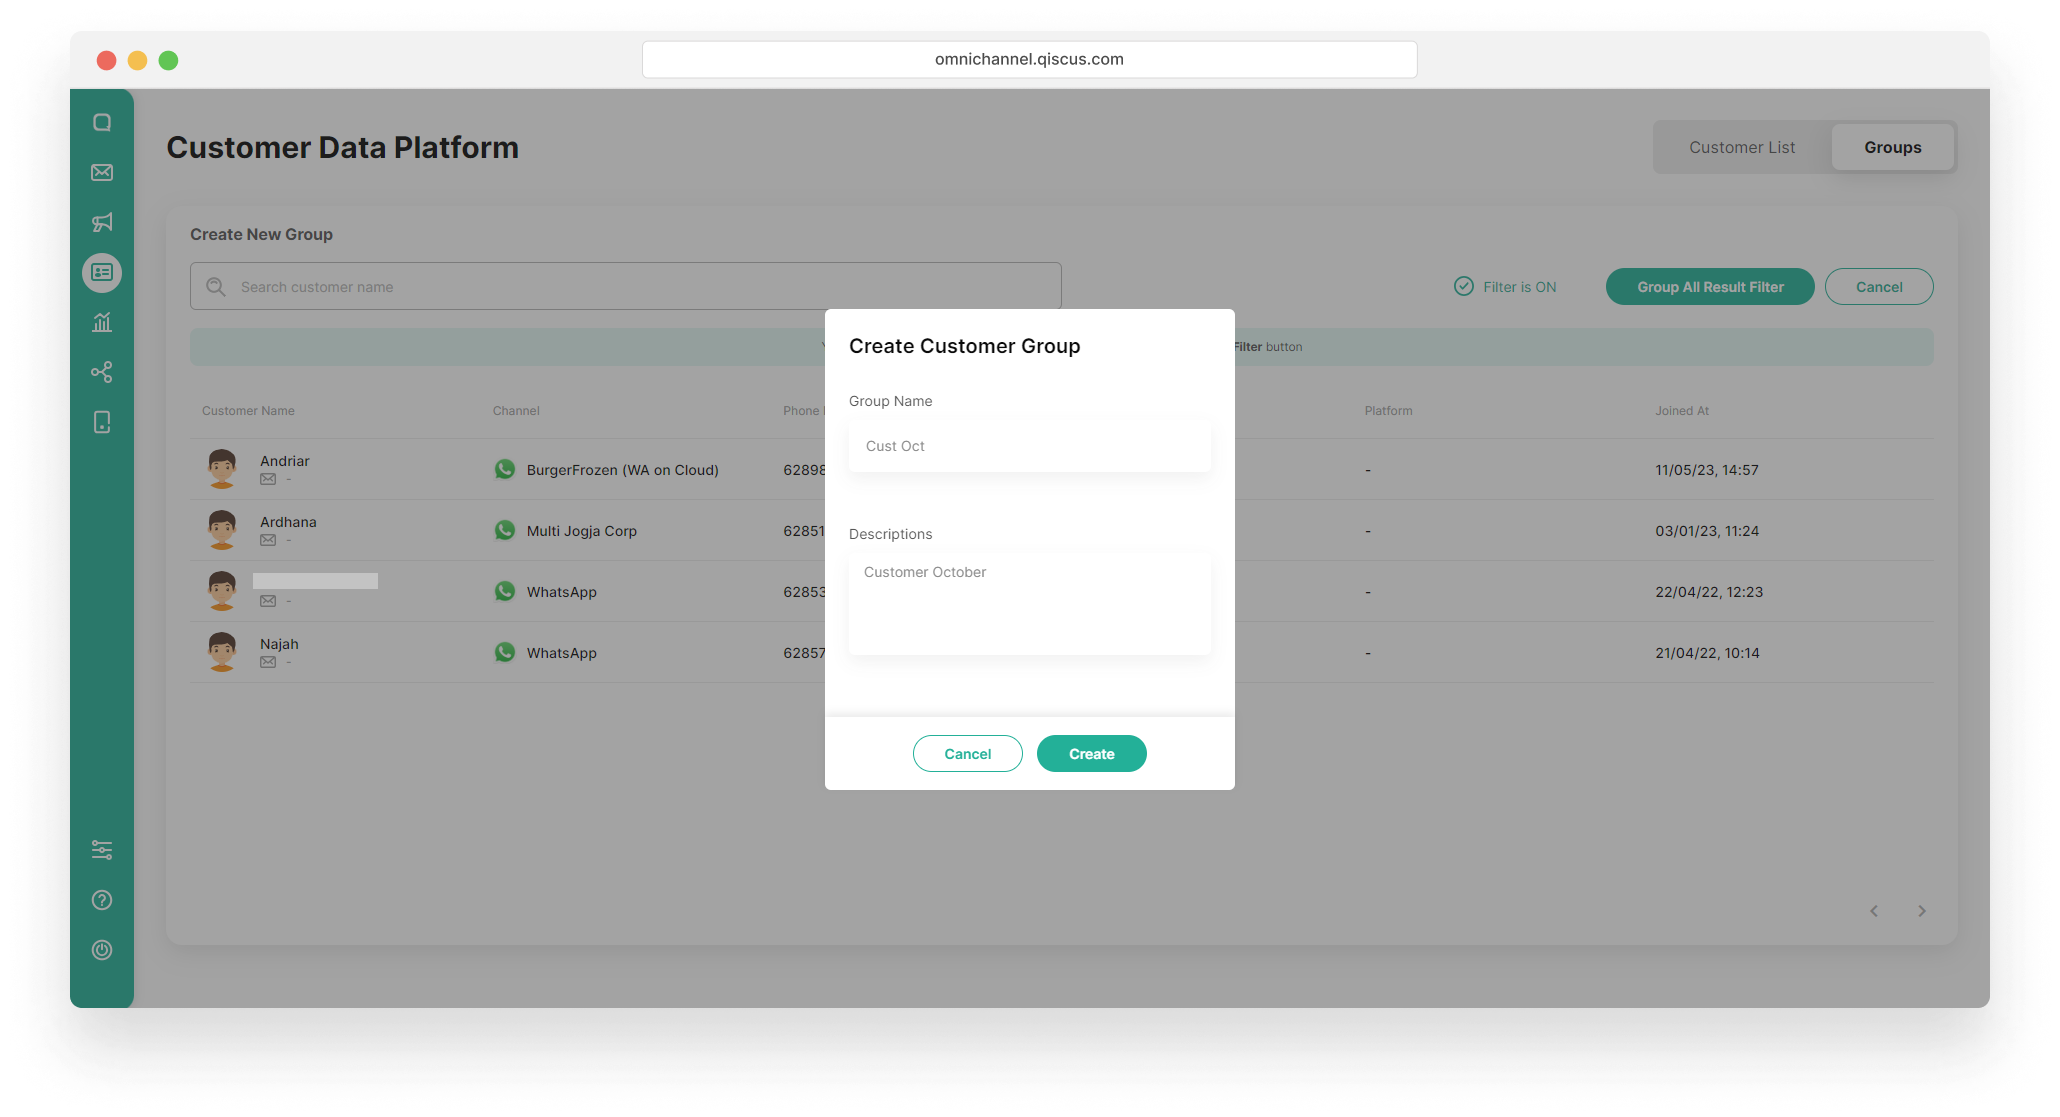
- Fill in the Group Name and the Descriptions, and click the Create button.

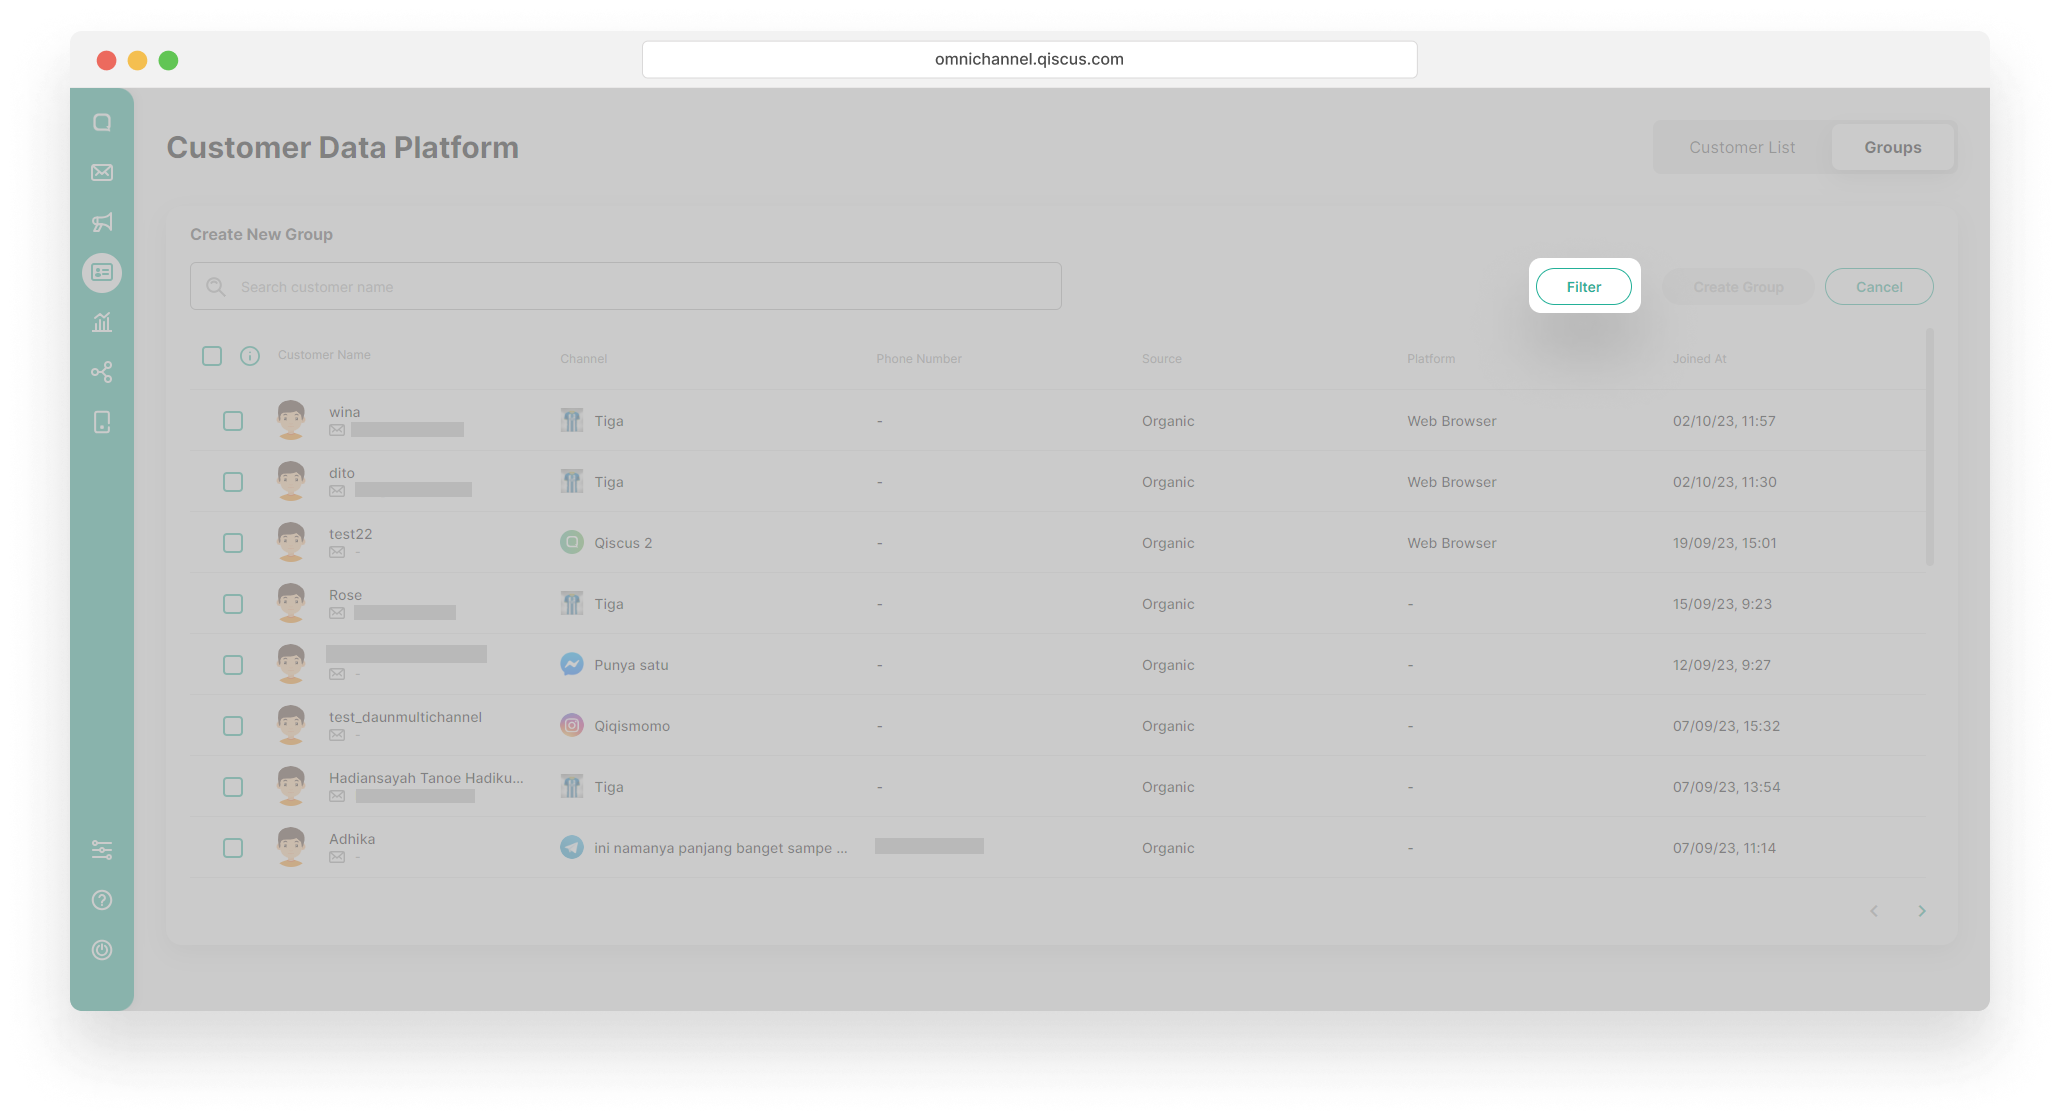
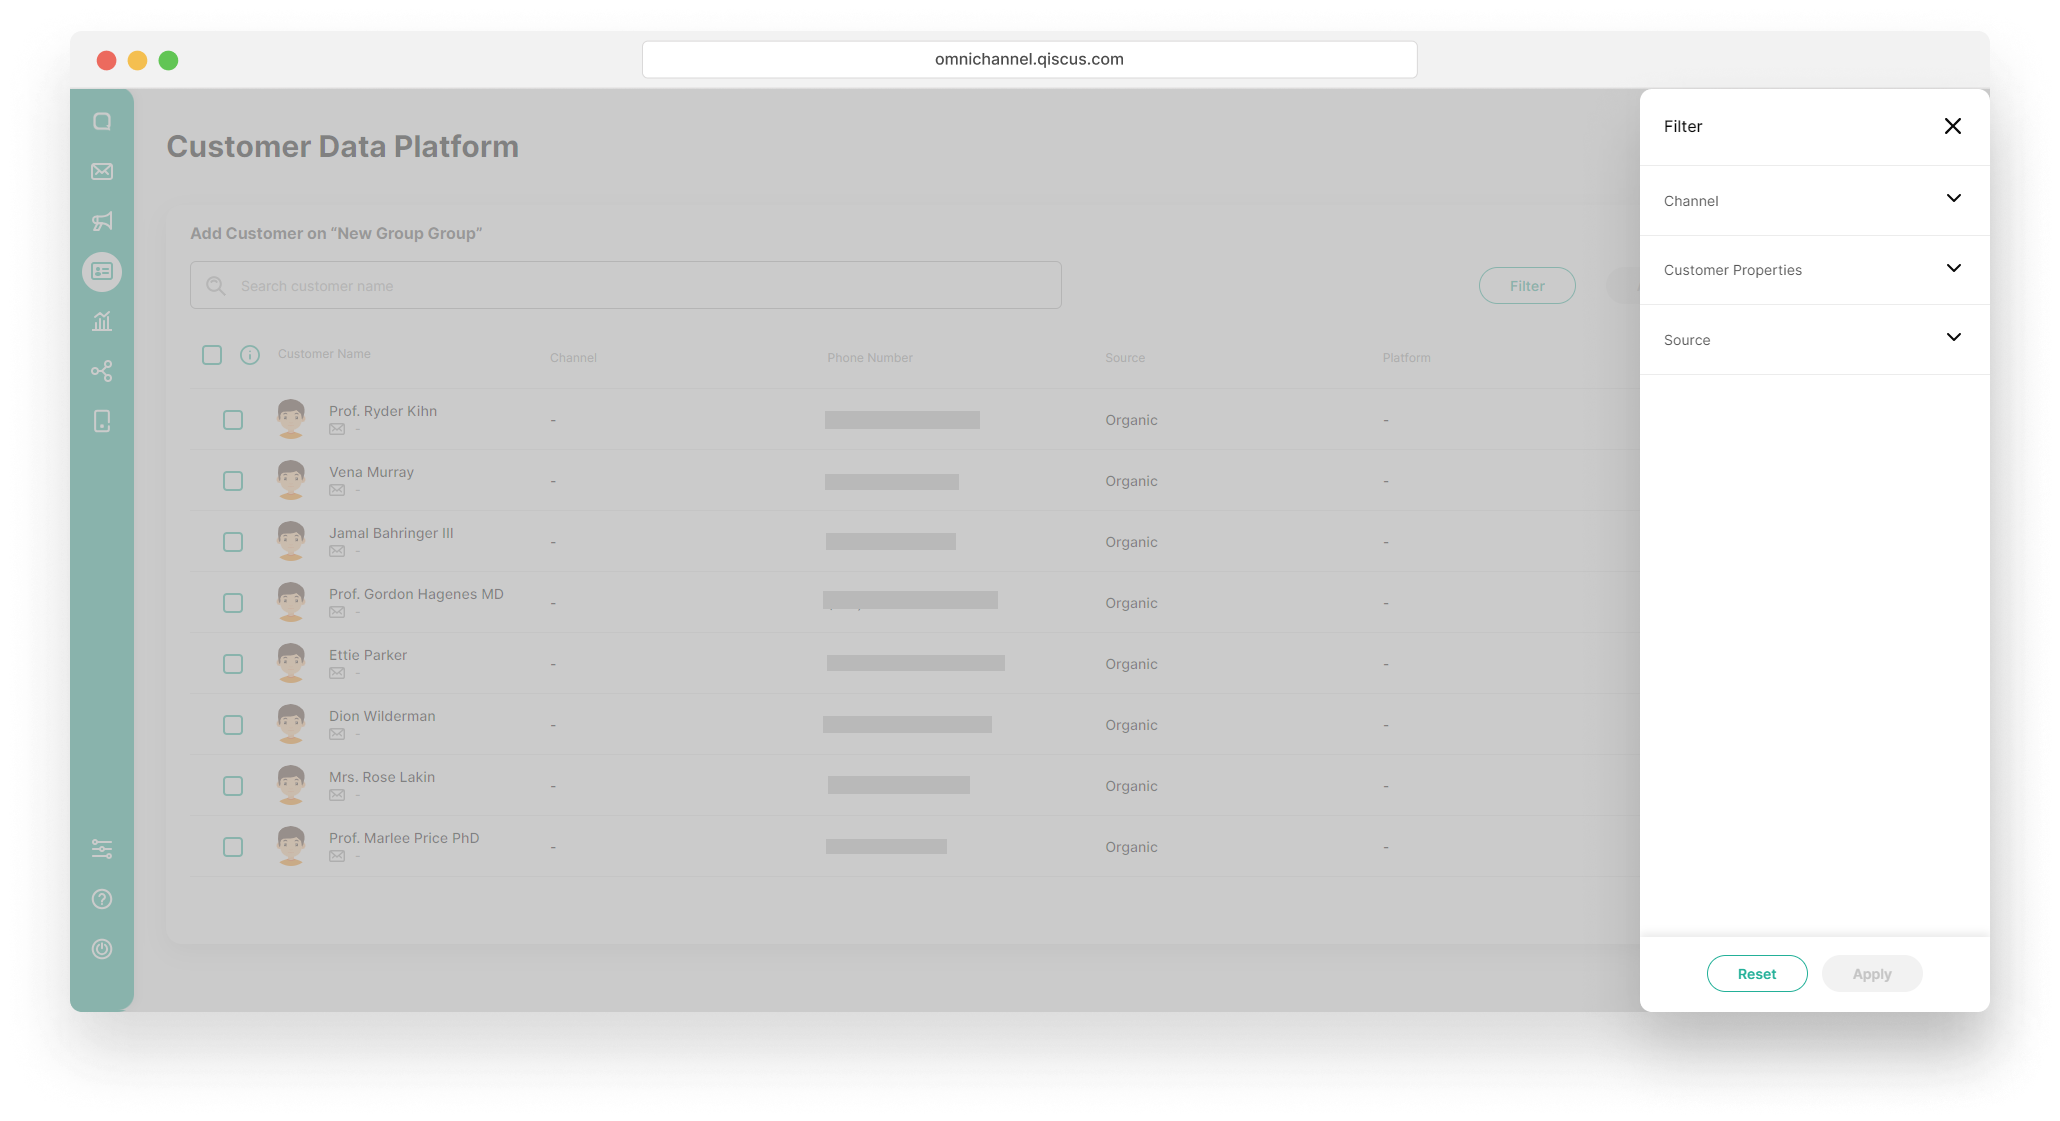
- Using the Filter button
- Click the Filter button,
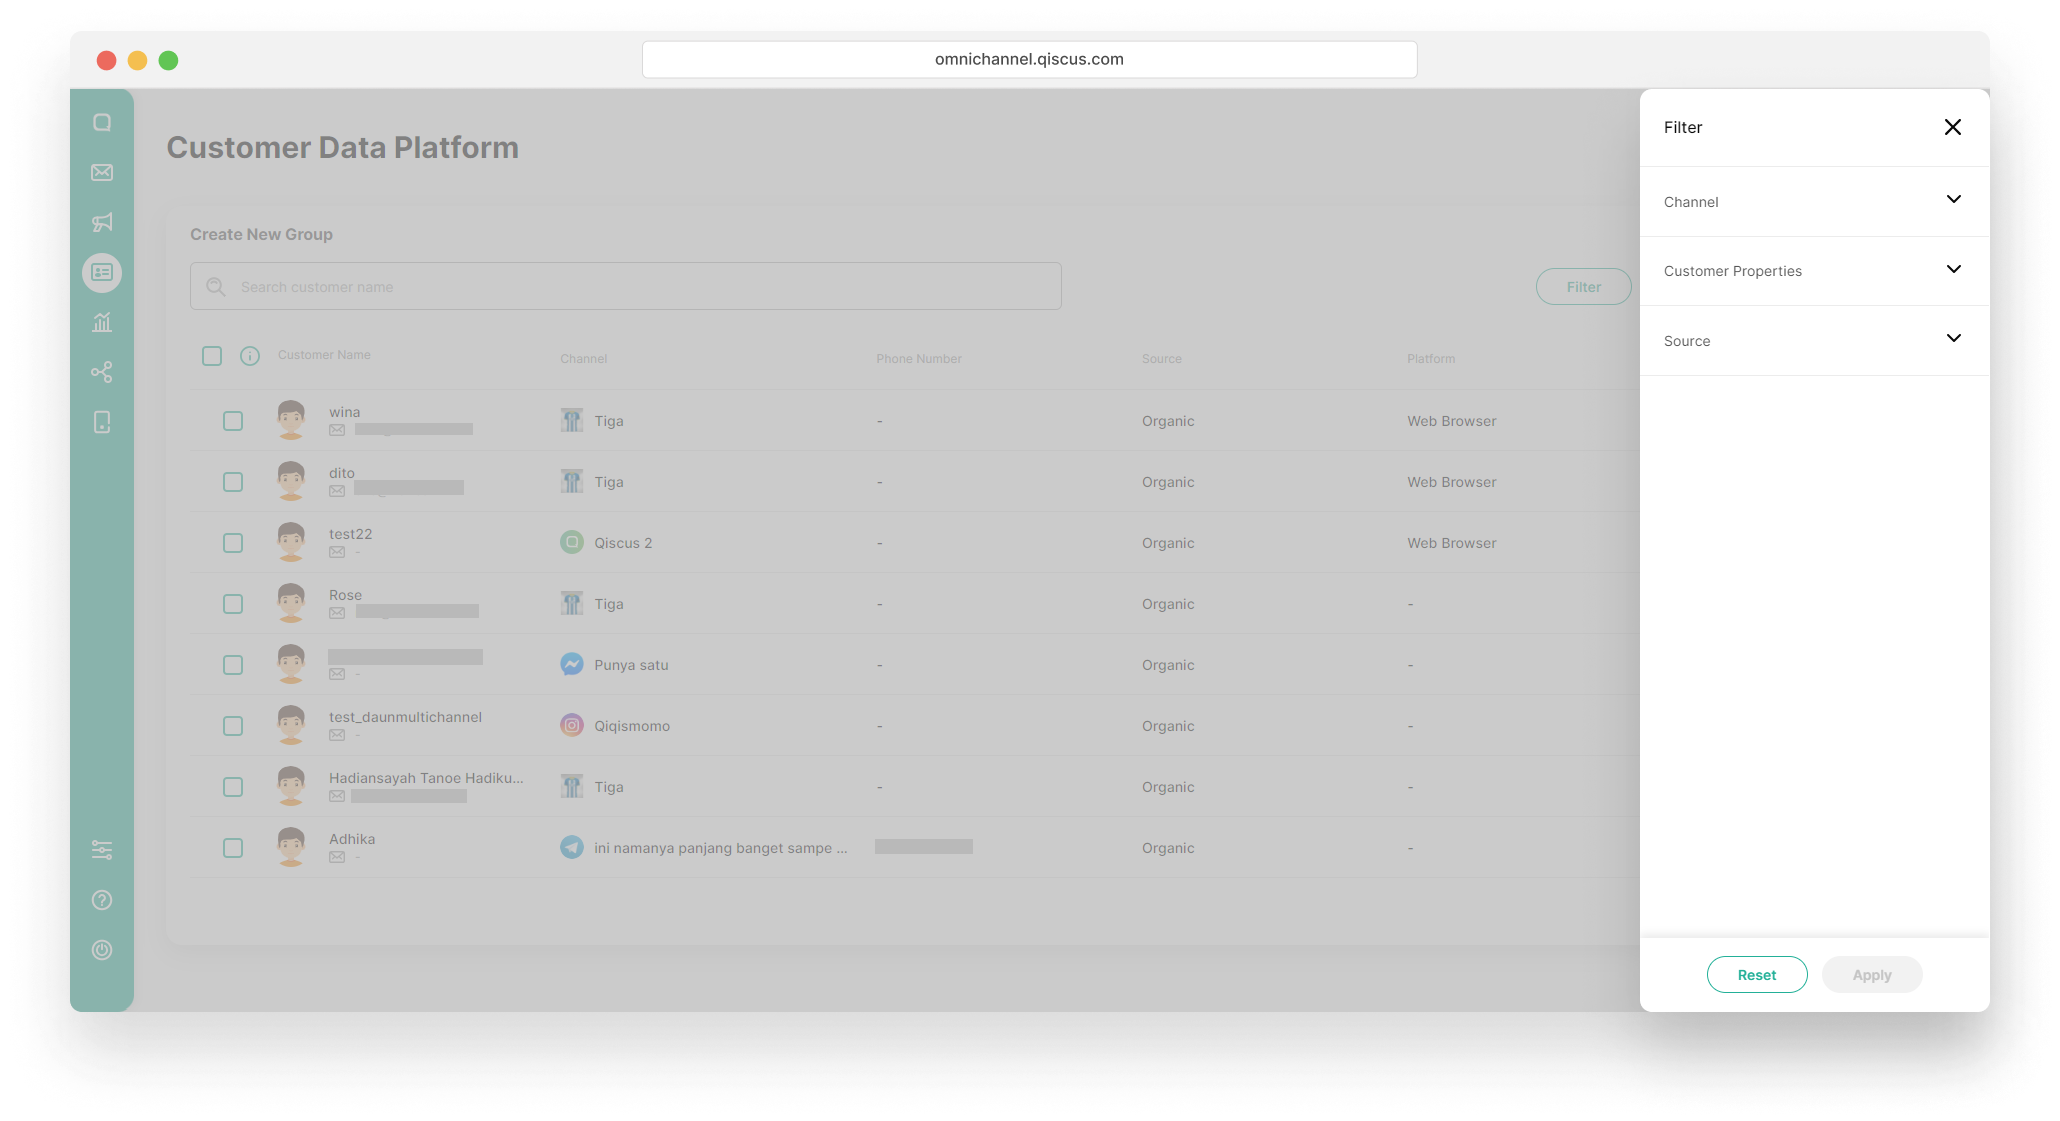
- Select the filter condition. You can set the filter based on channel, customer properties, OR/AND source. Click the Apply button,
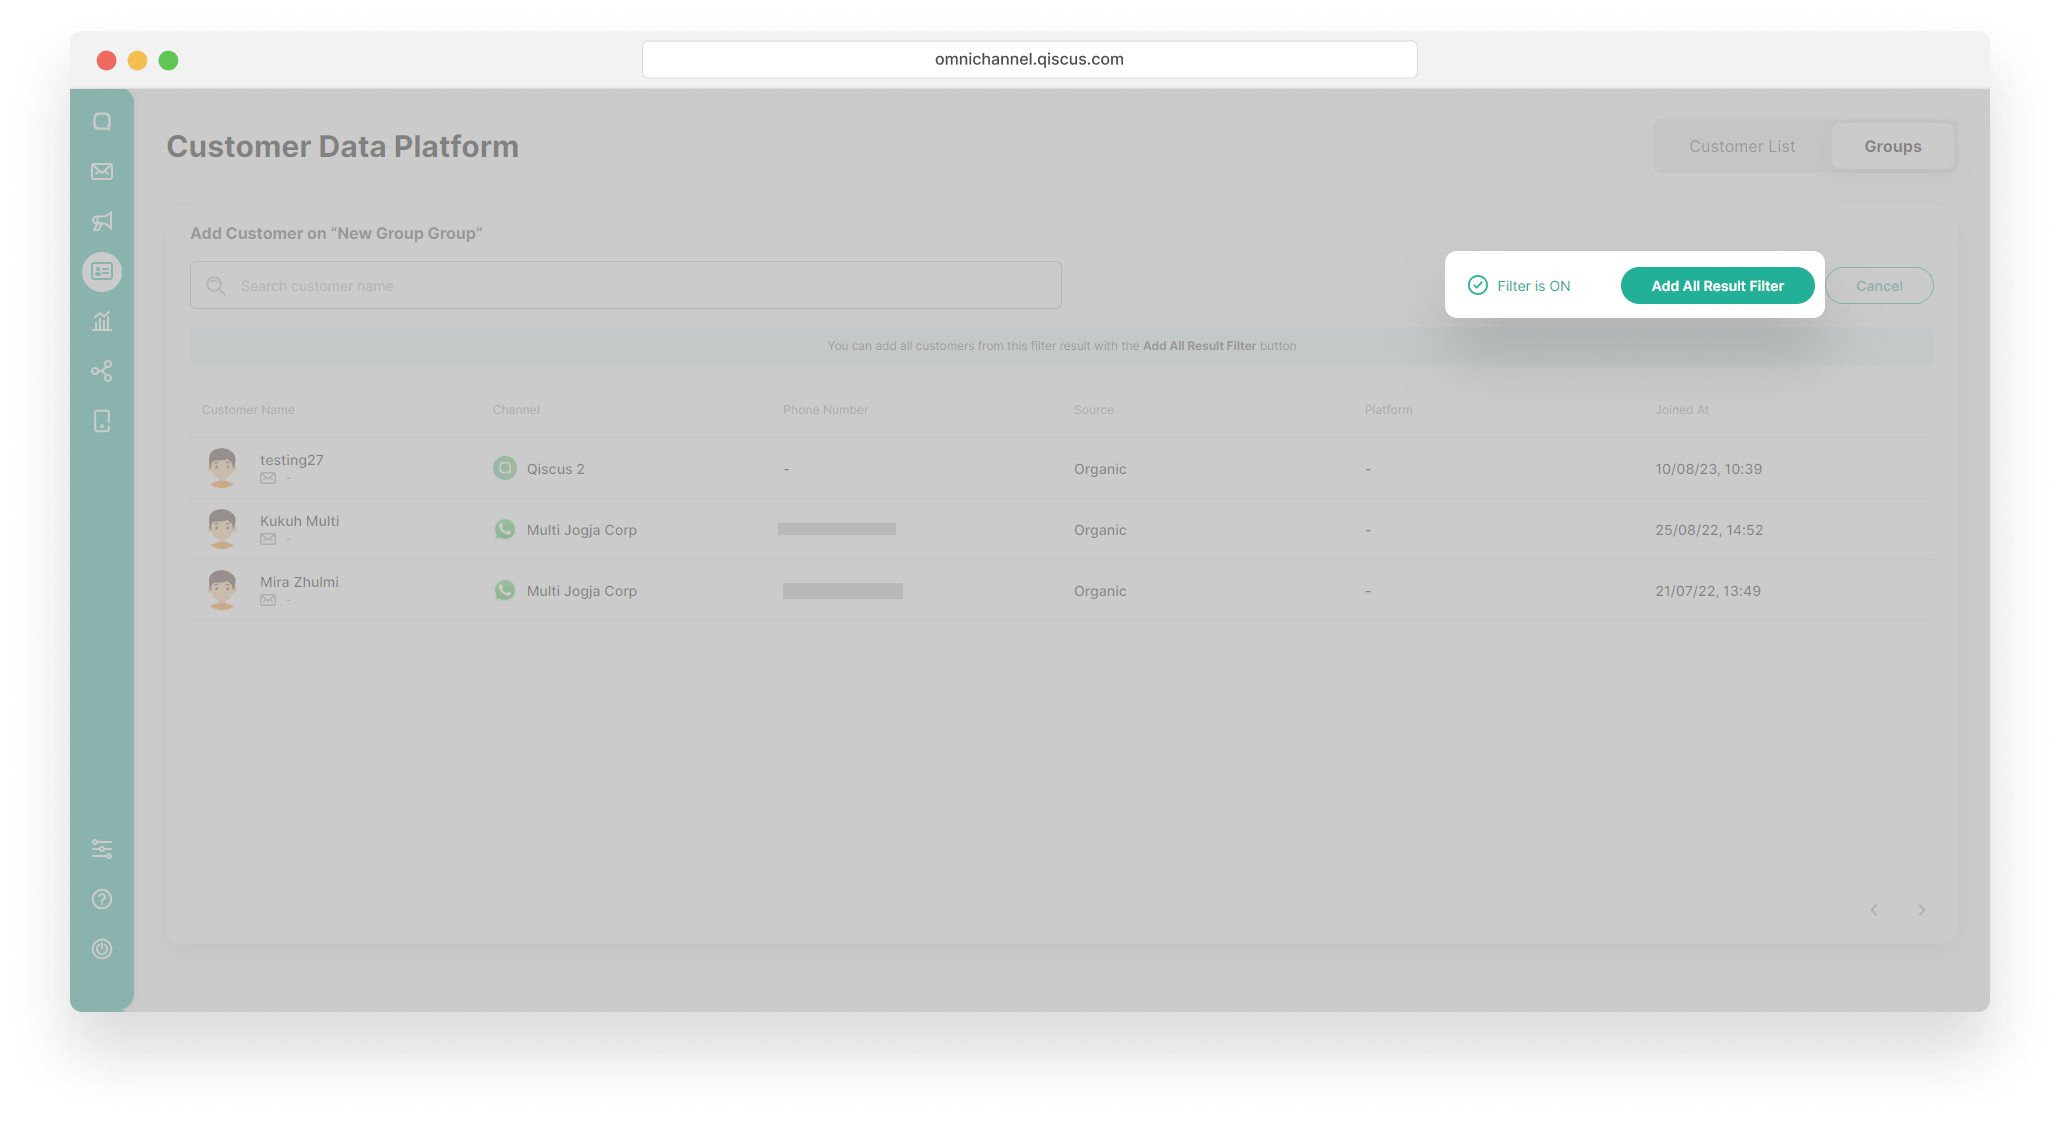
- Click Group All Result Filter button,
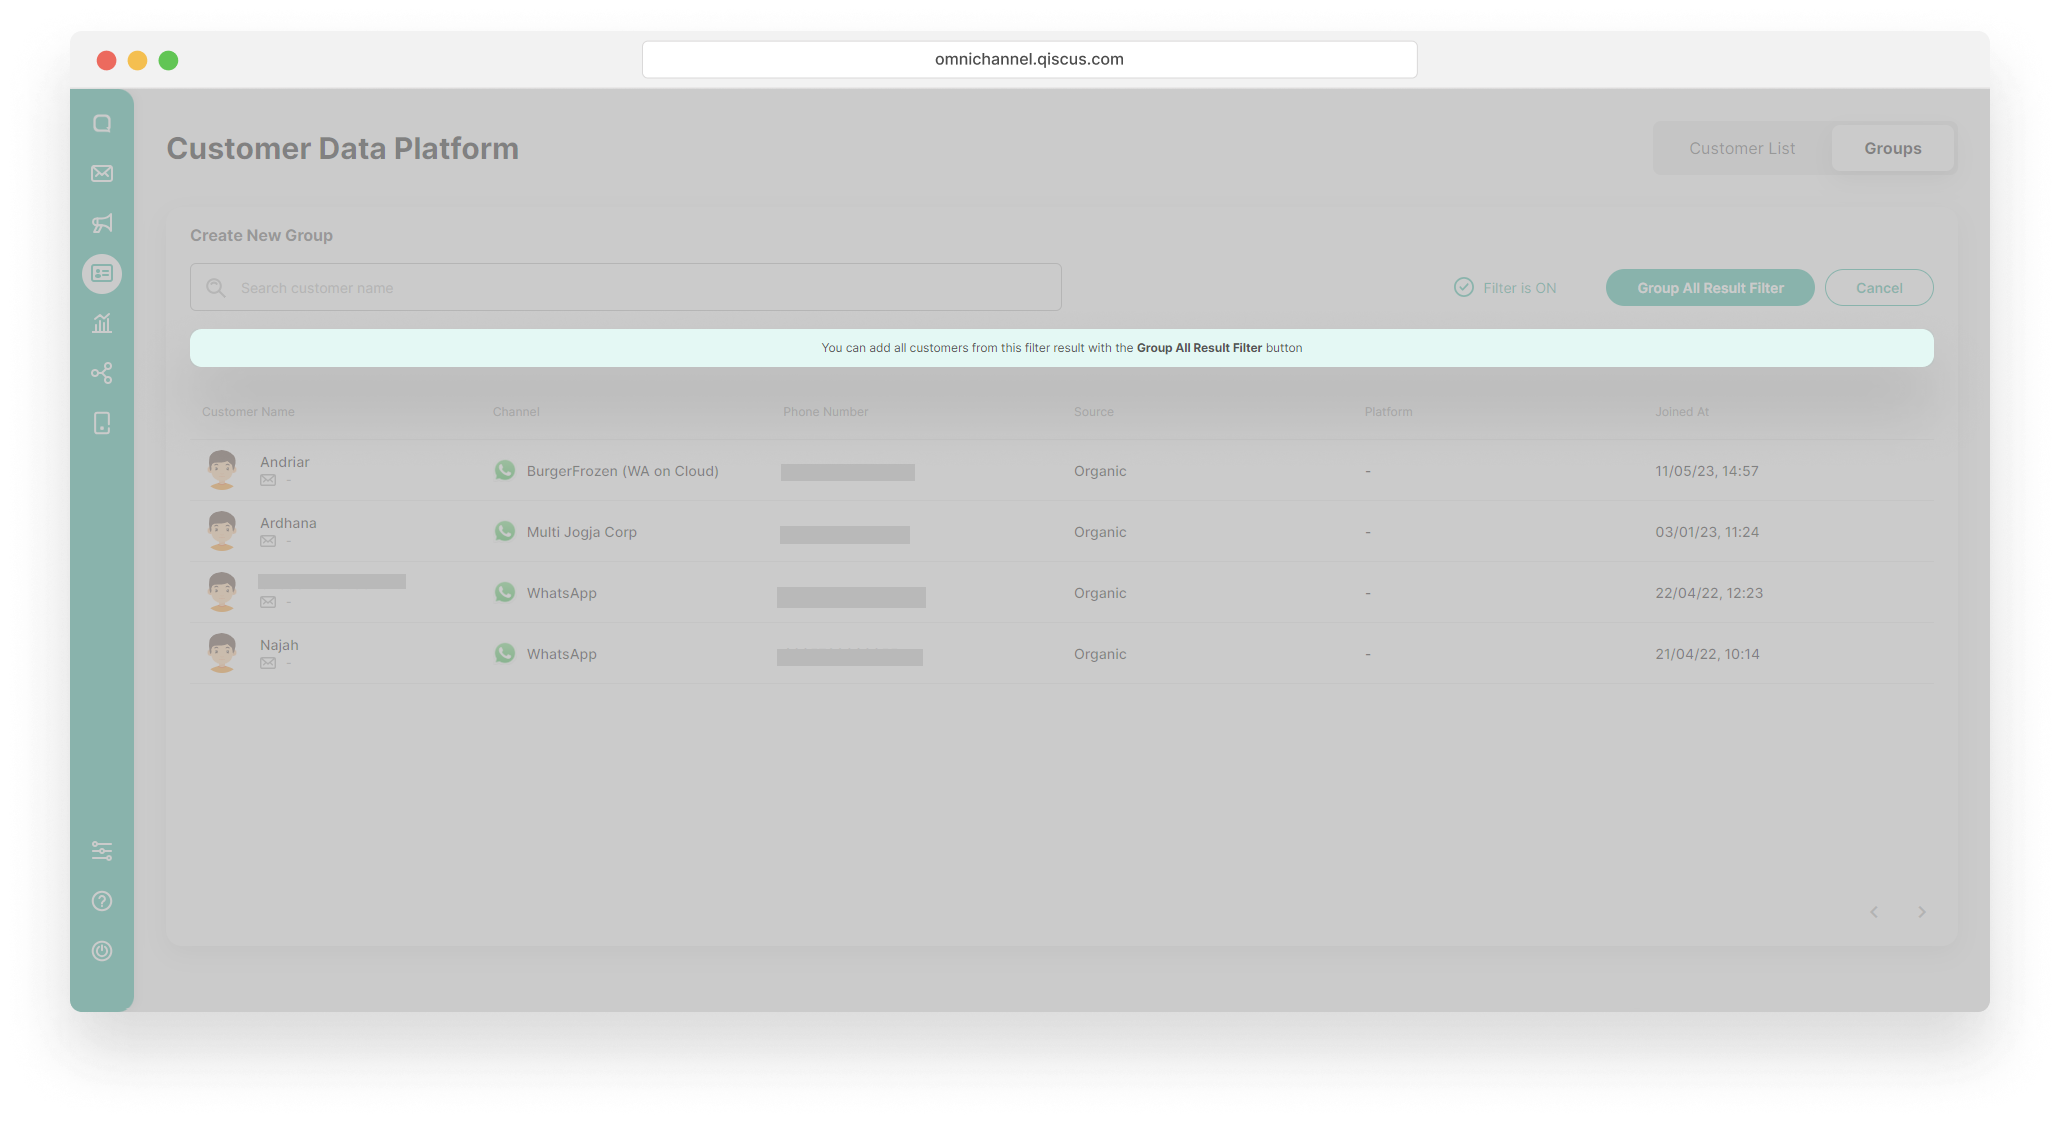
- Fill in the Group Name and the Descriptions, and click the Create button.
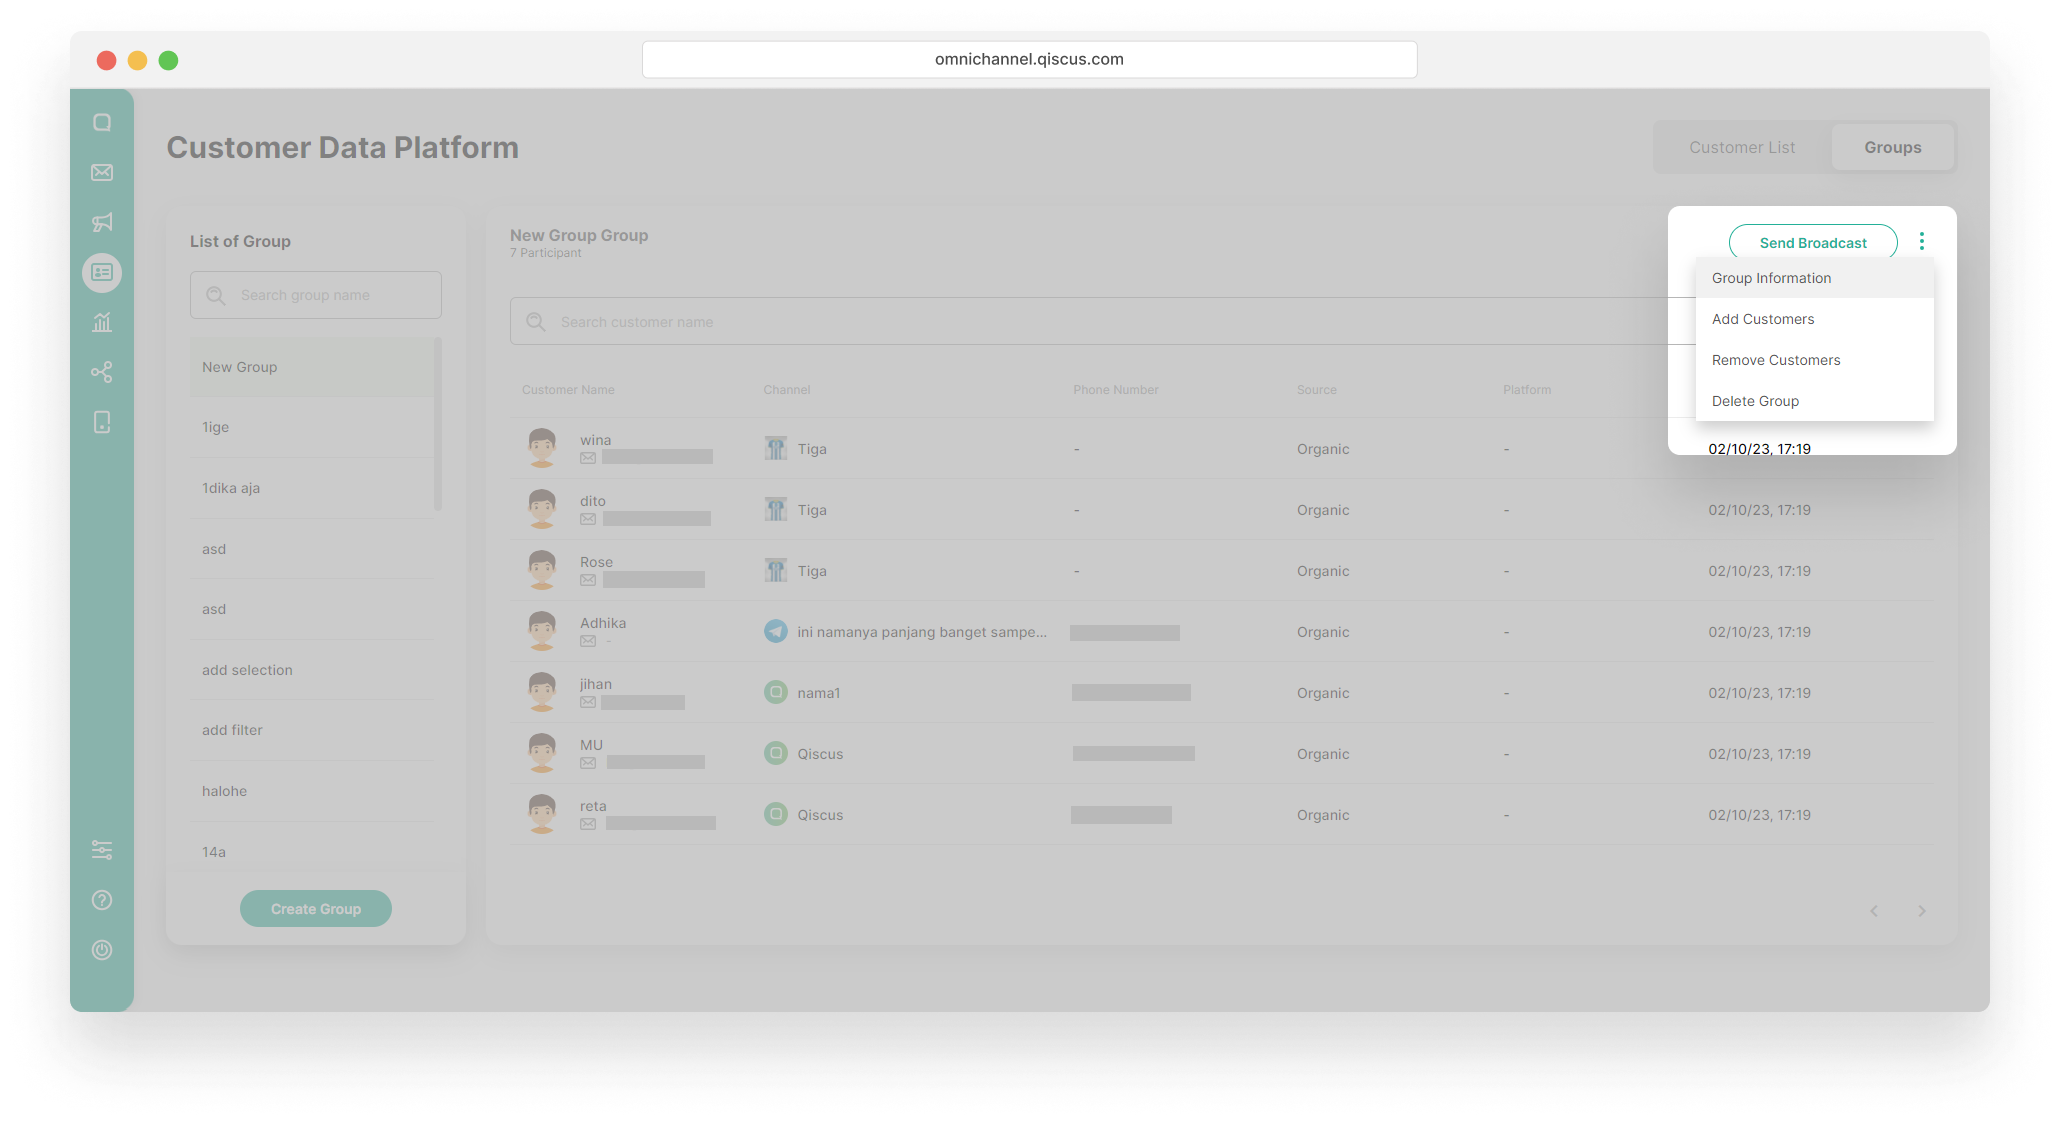
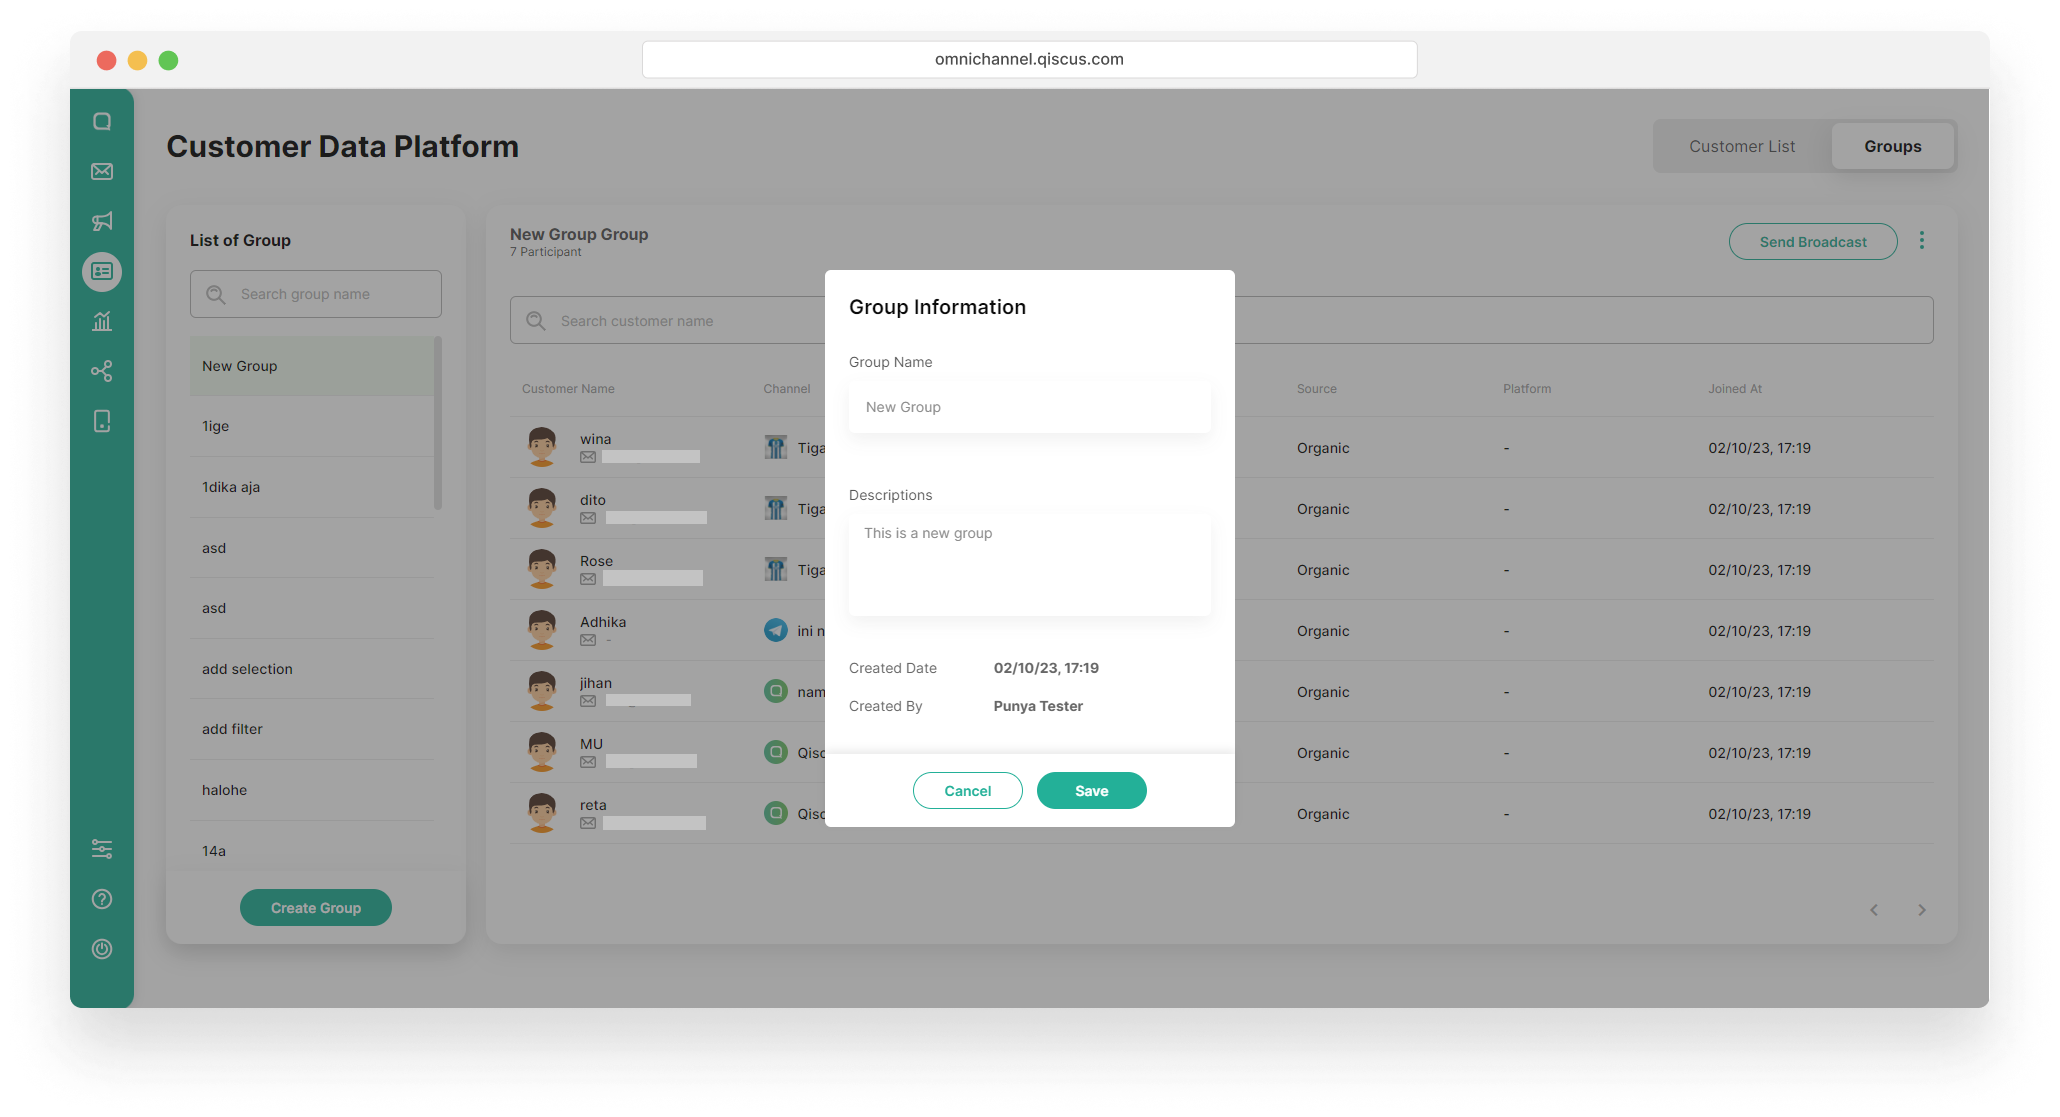
View and Edit Customer Group Information
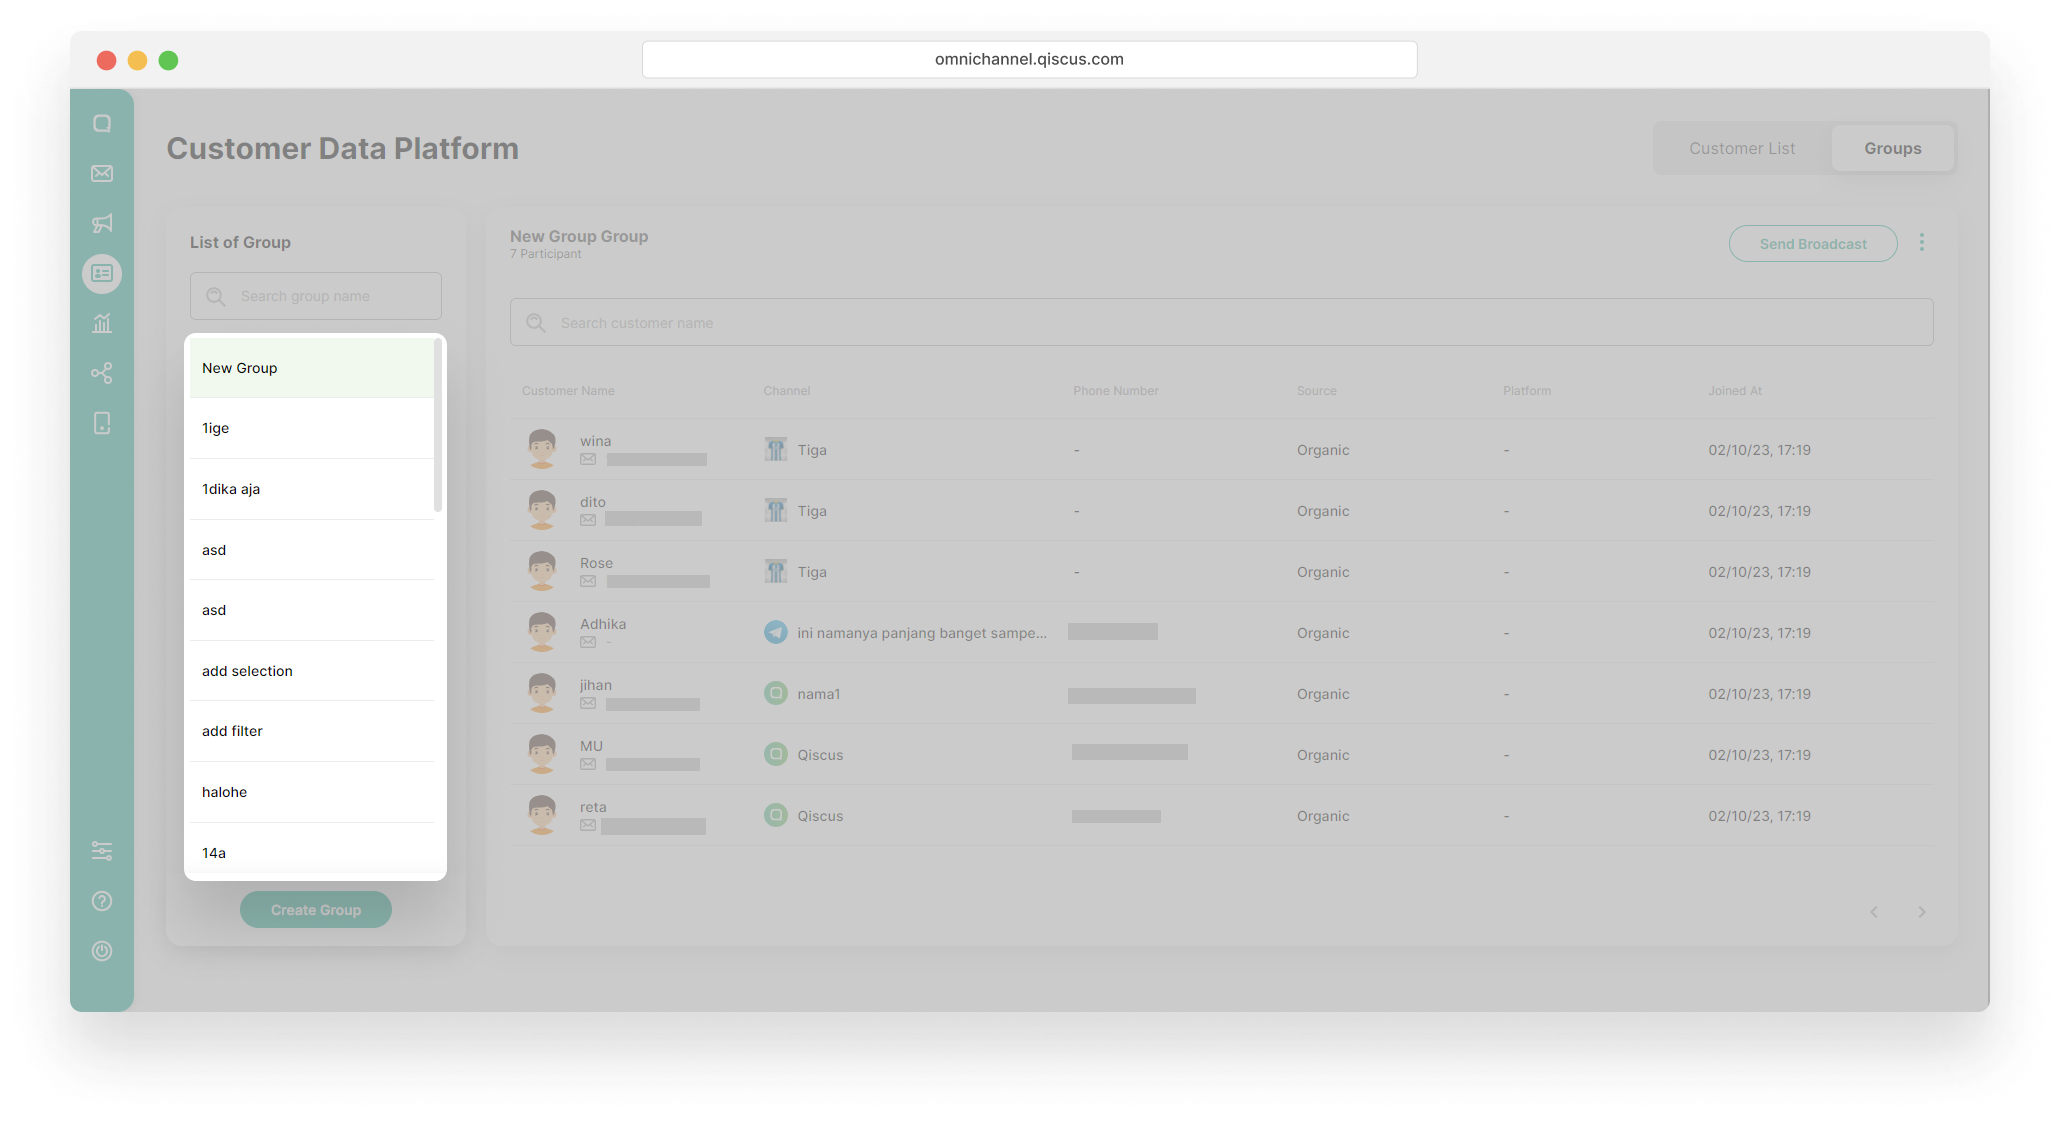
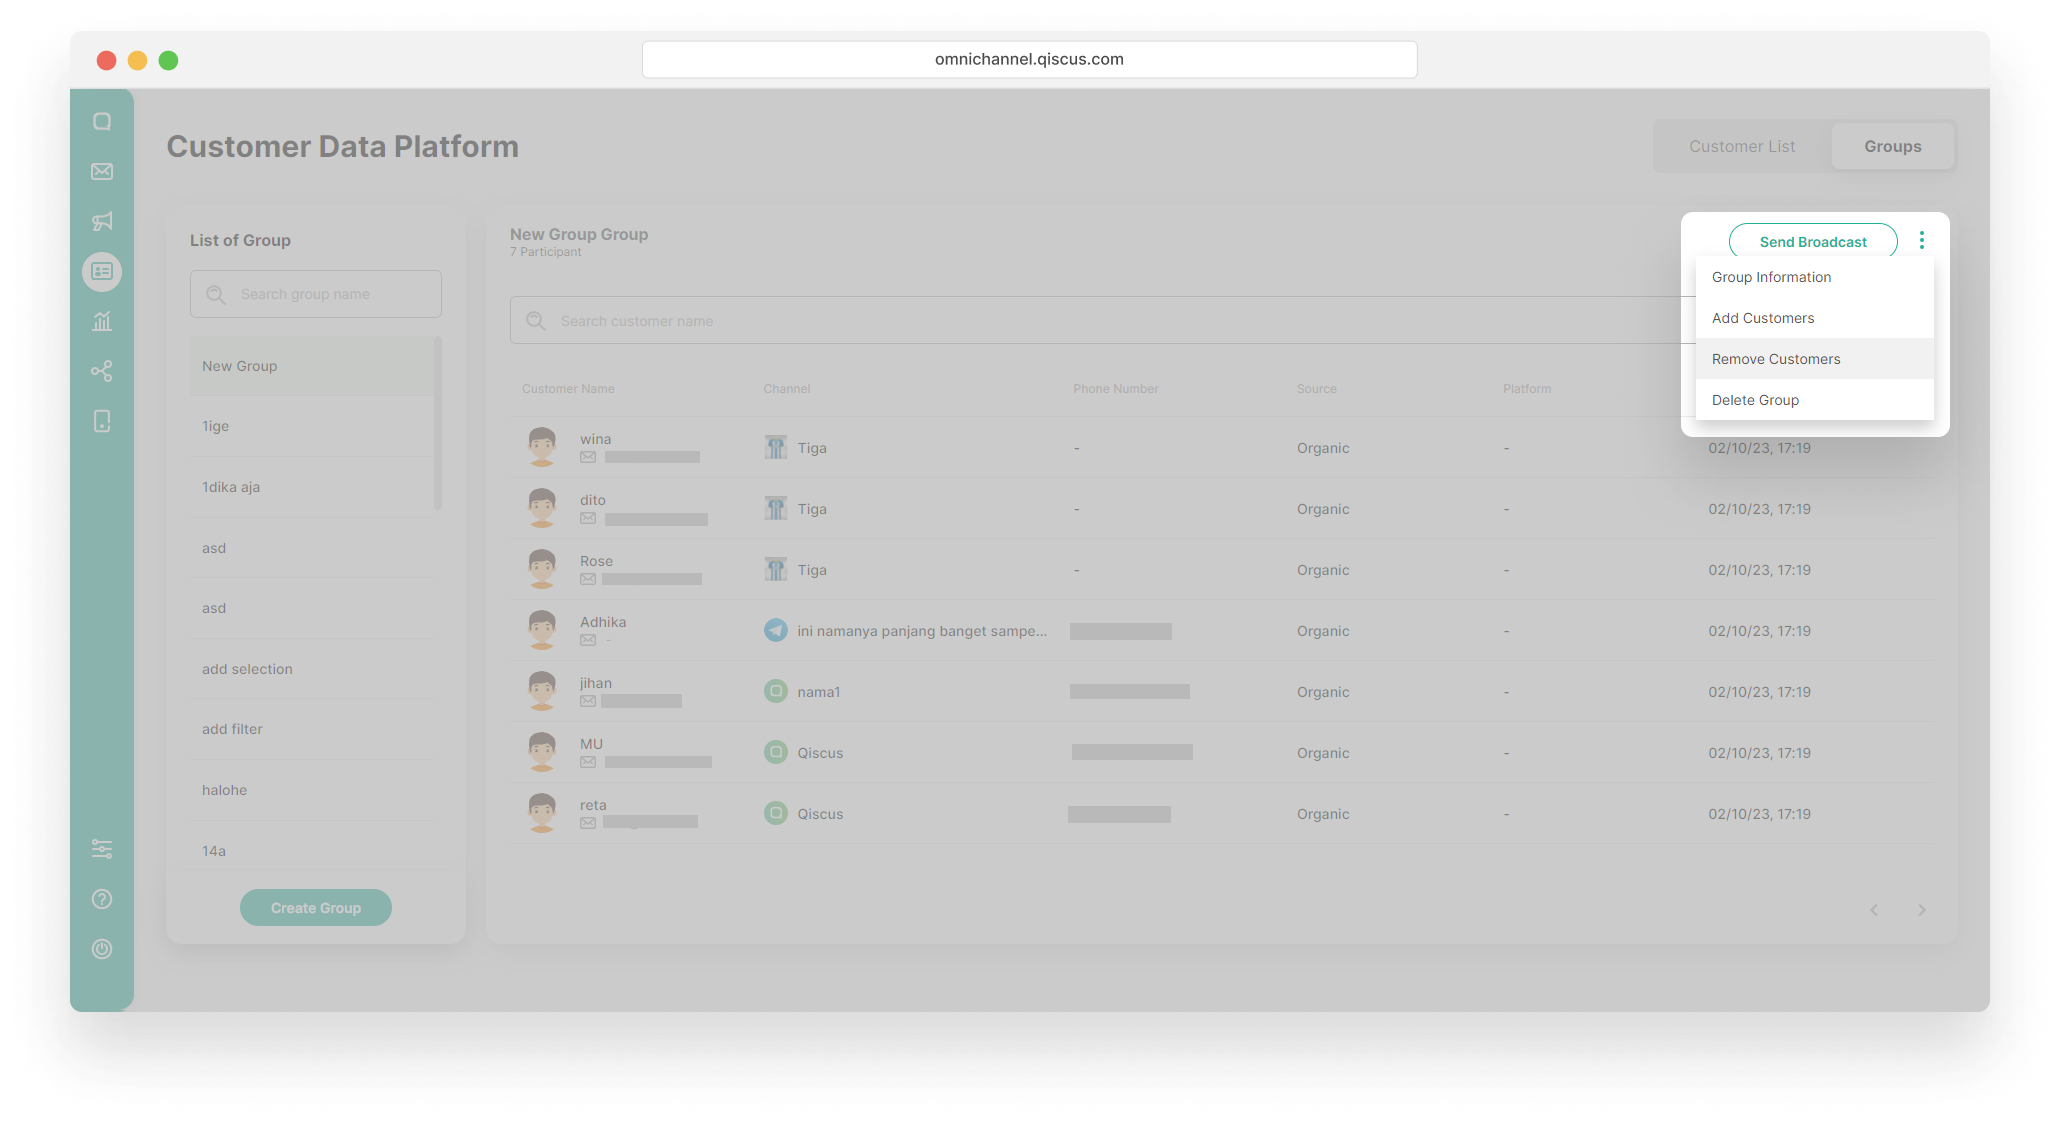
- Select a Customer Group,

- Click the kebab button (three vertical dots), and click the Group Information,
- Edit the Group Information, and click the Save button.
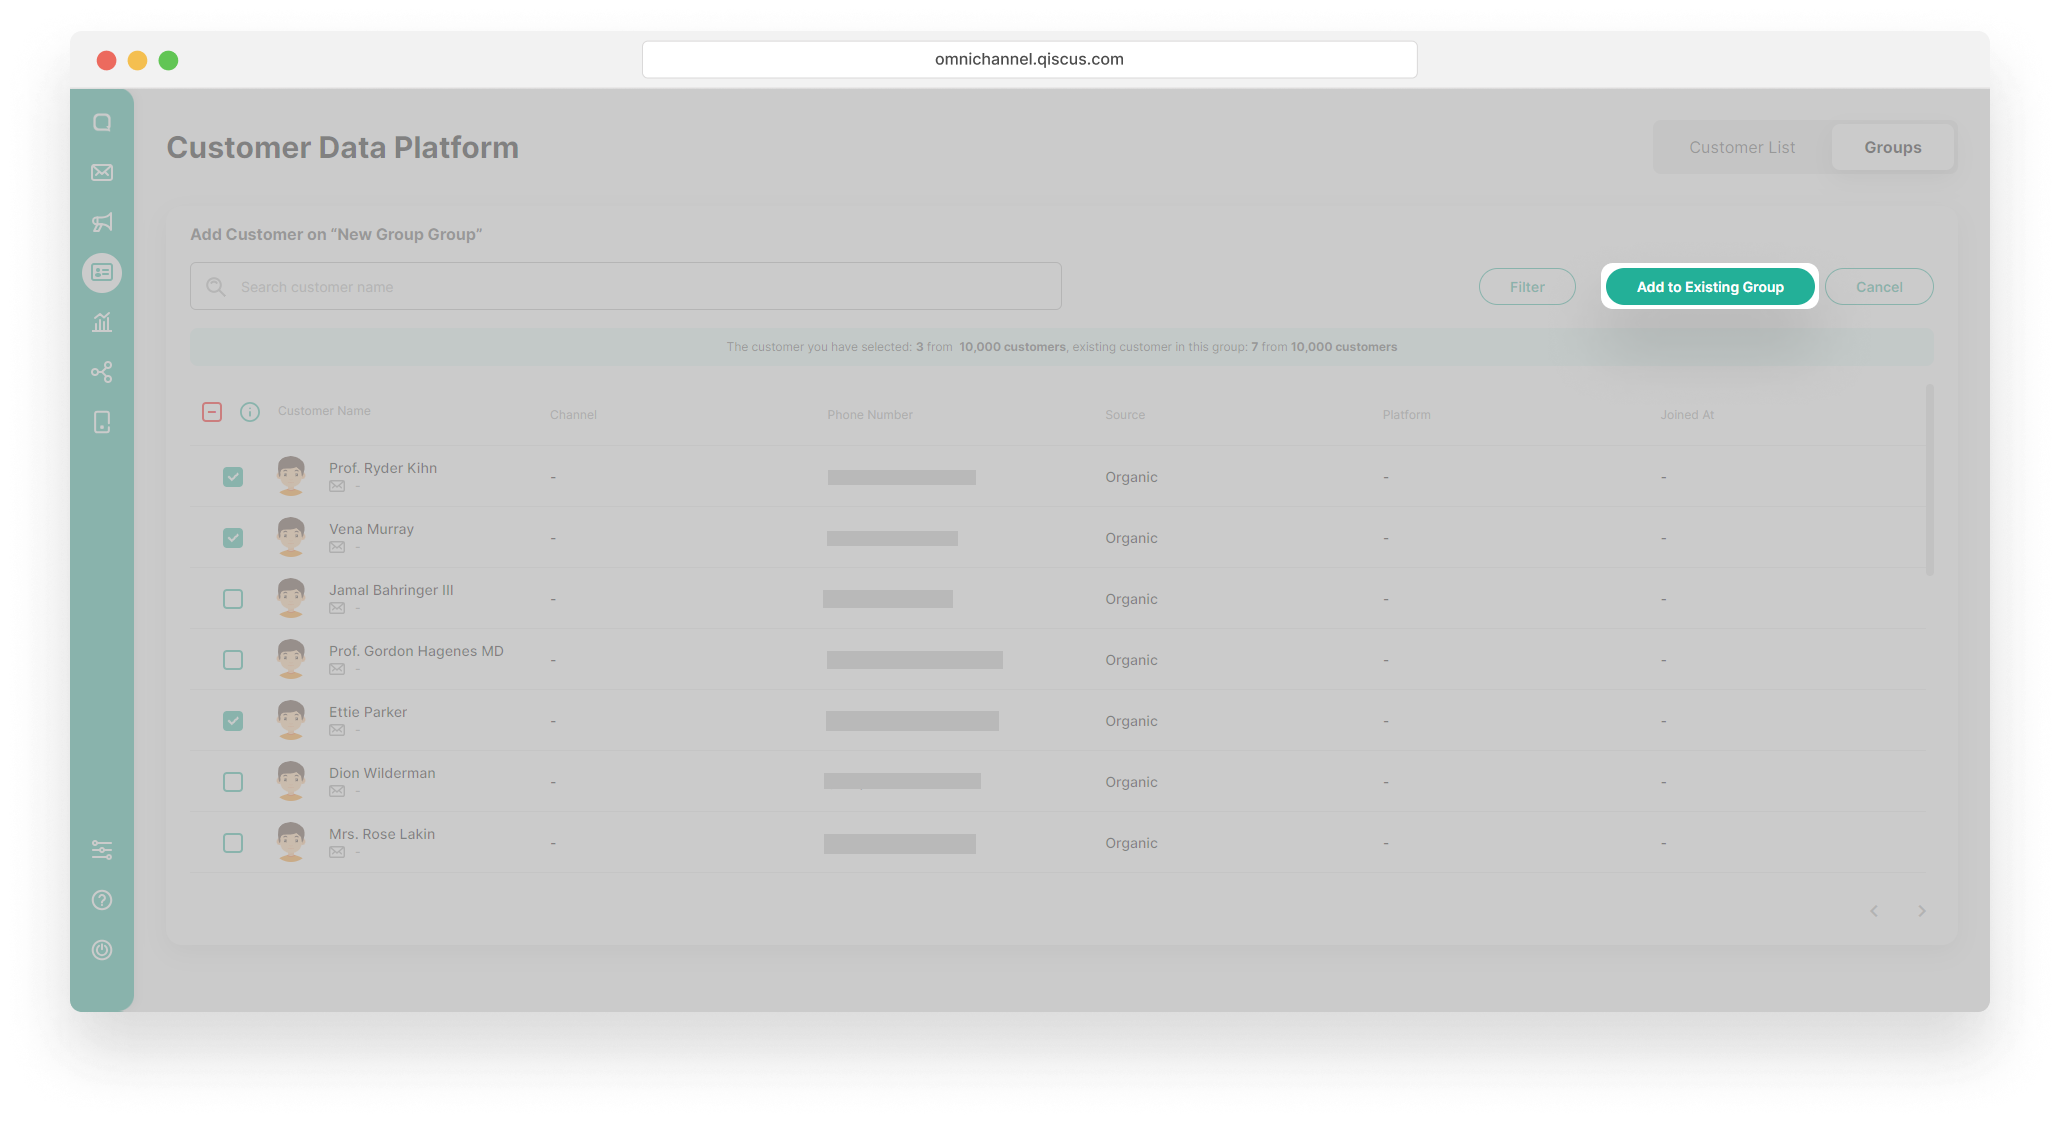
Add Member of Customer Group
- Select a Customer Group,
- Click the kebab button (three vertical dots), and click the Add Customers,

- You can choose one of two methods to add members to an existing group.
- Using the checkbox to the left of the customer list
- Select the customers you want to add to a group,
- Using the checkbox to the left of the customer list
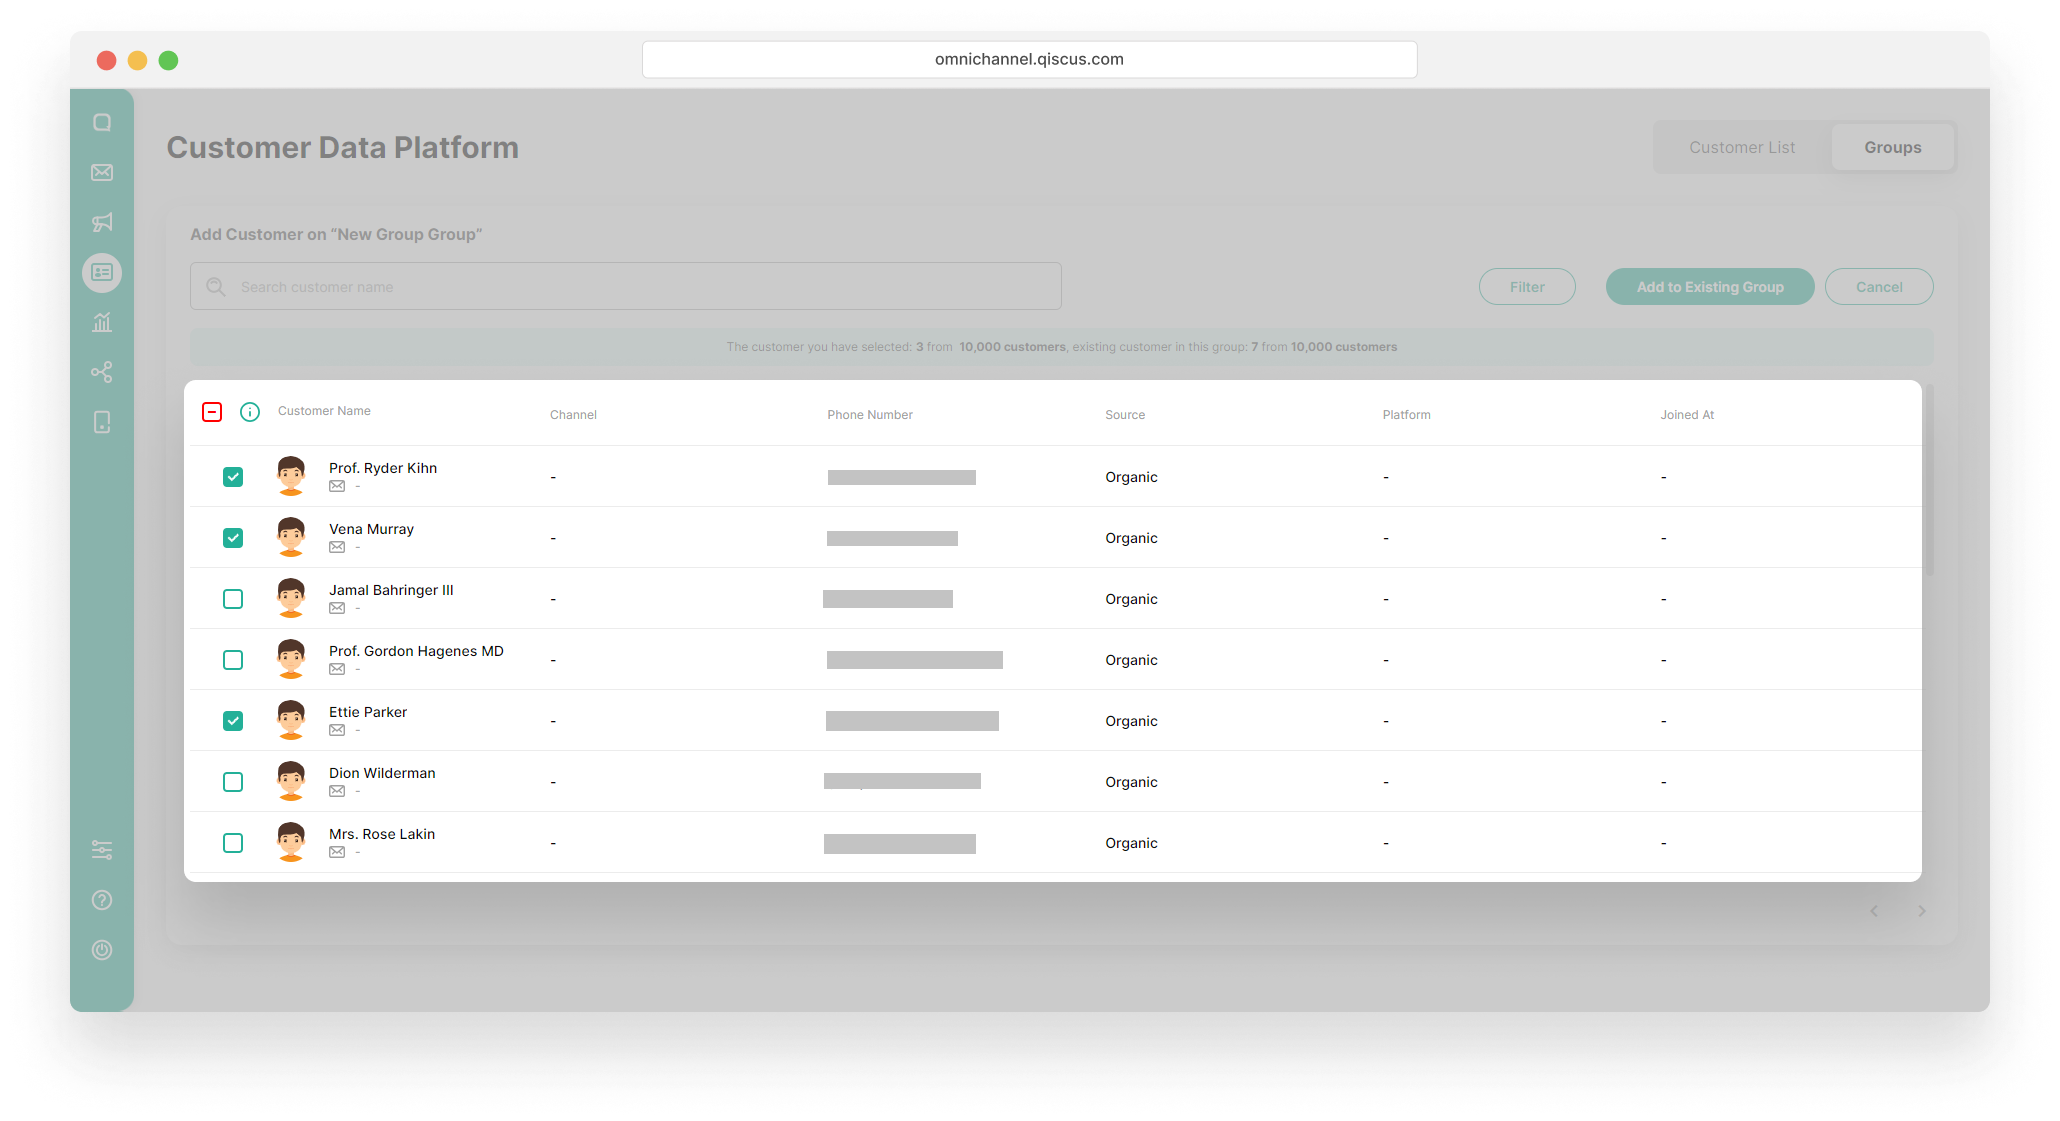
- You will get a notification about the number of customers in the group and how many customers have been selected,
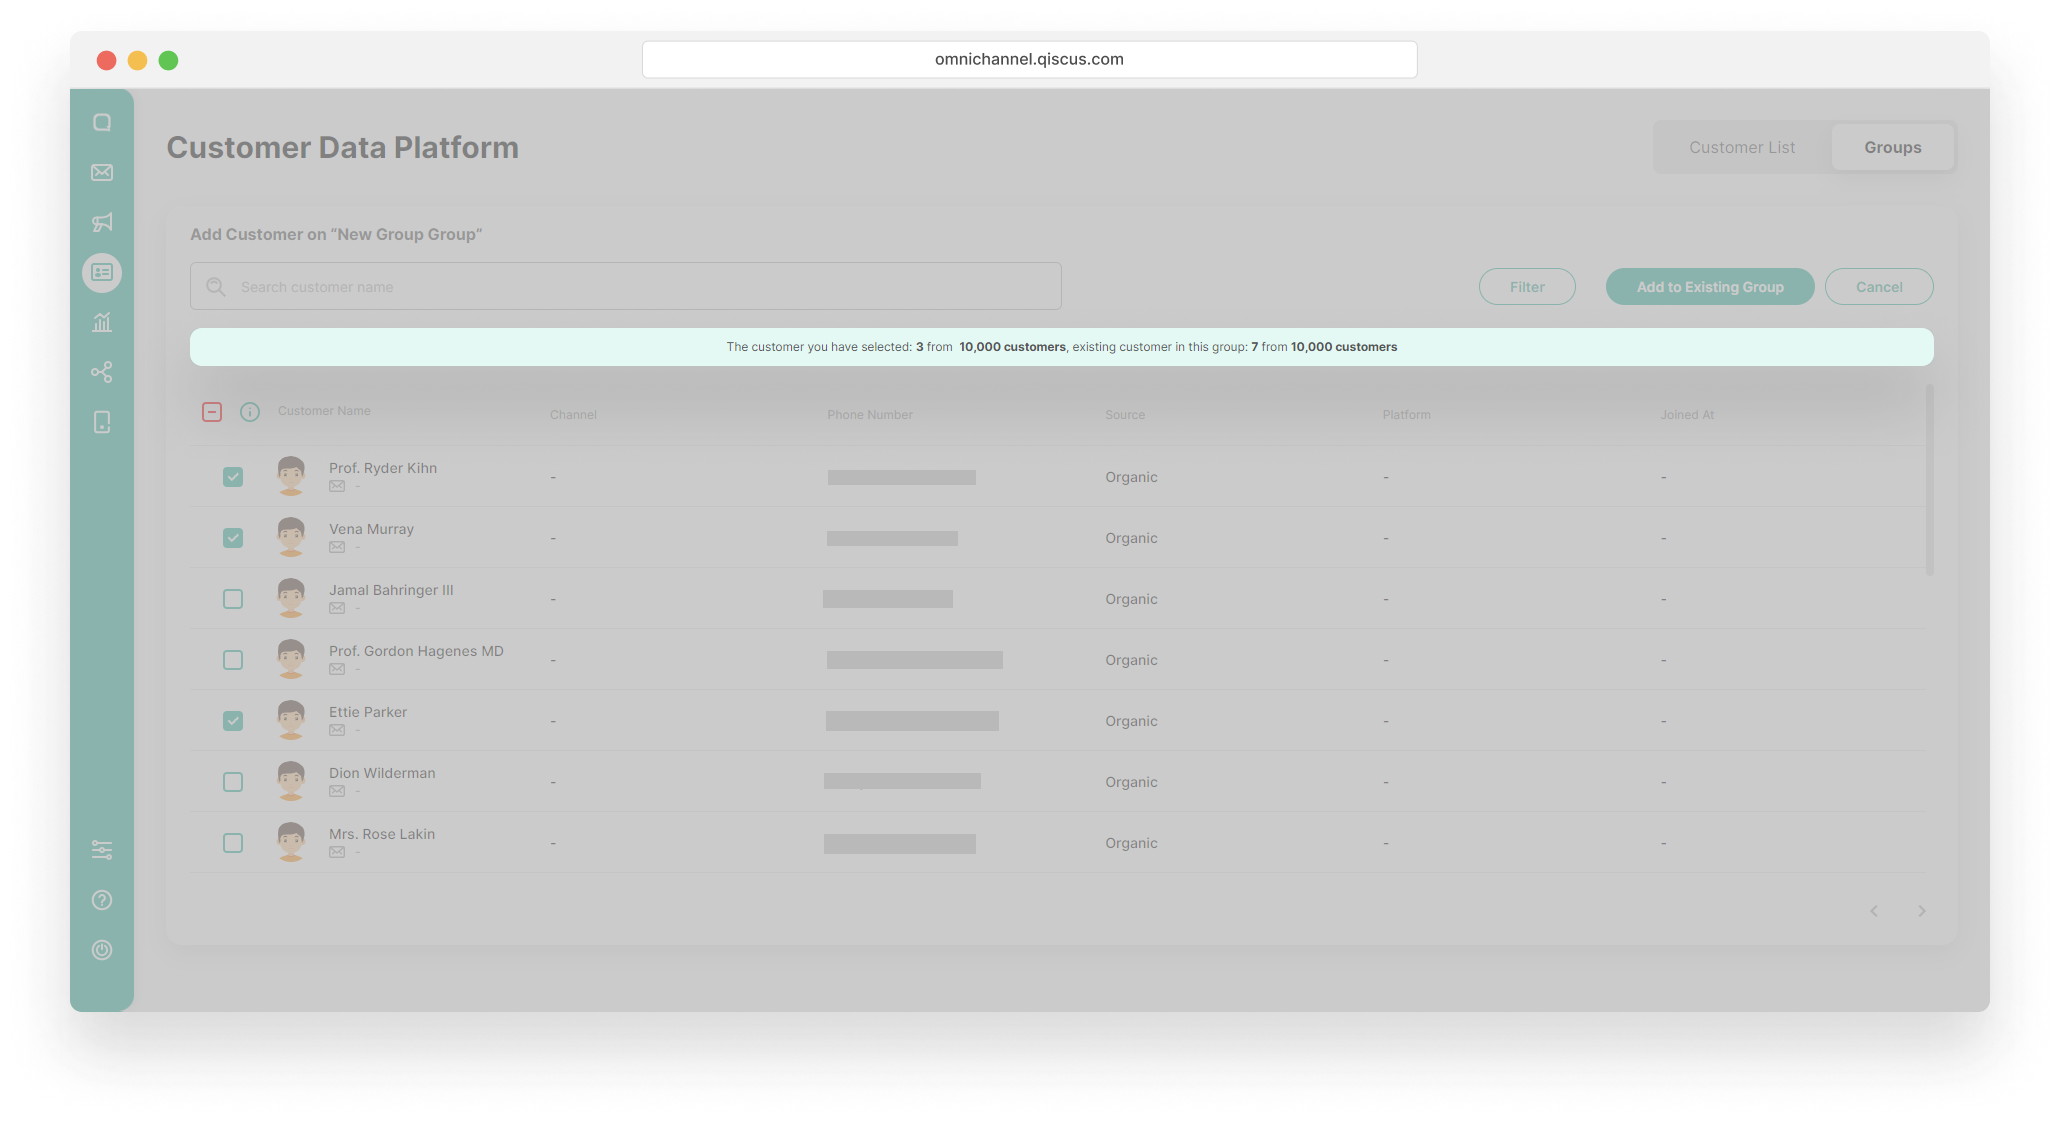
- Click Add to Add to Existing Group button.
You can click the checkbox at the top to select all the customers on a given page.
- Using the Filter button
- Click the Filter button,
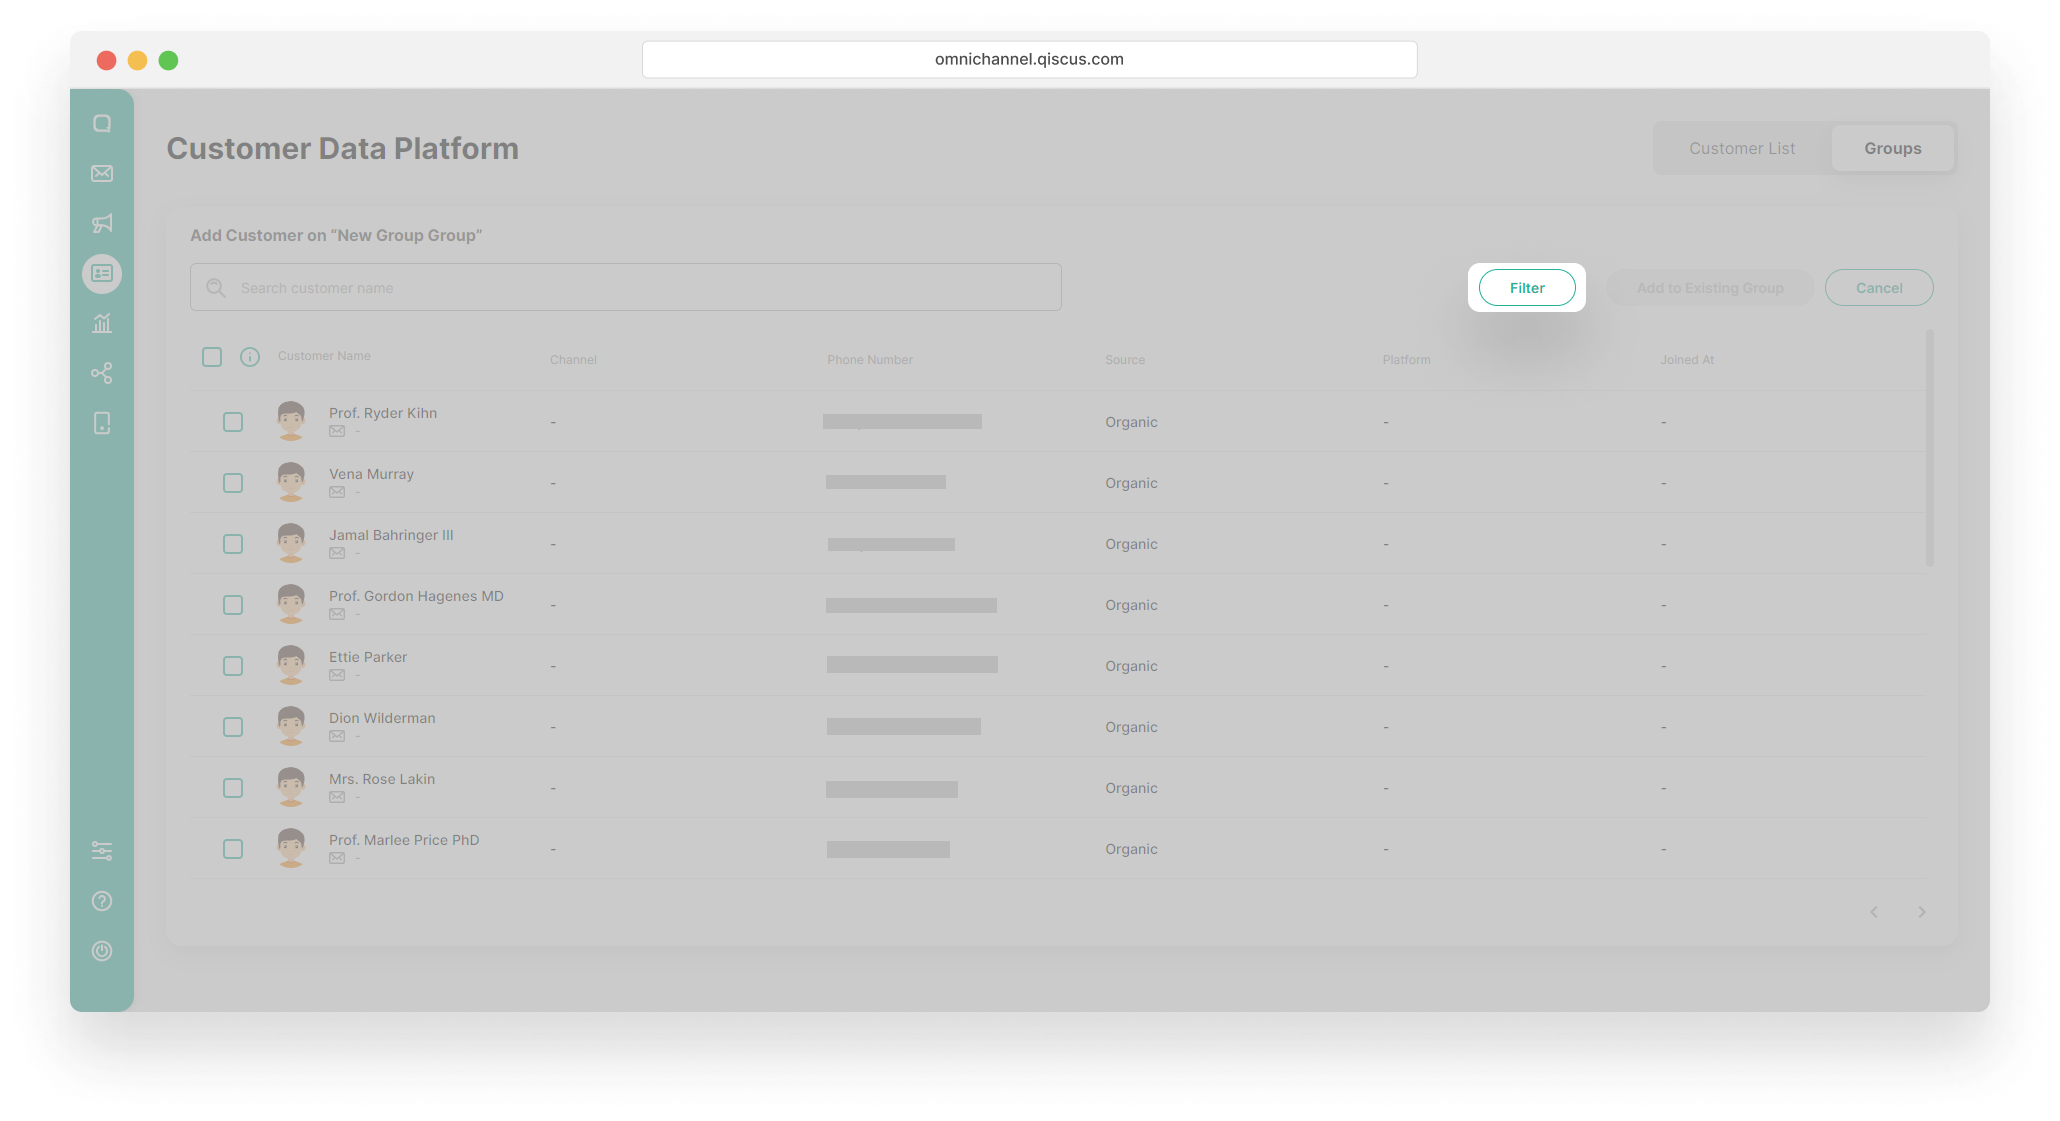
- Select the filter condition. You can set the filter based on channel, customer properties, OR/AND source. Click the Apply button,
- Click Add All Result Filter button.

Remove Member of Customer Group
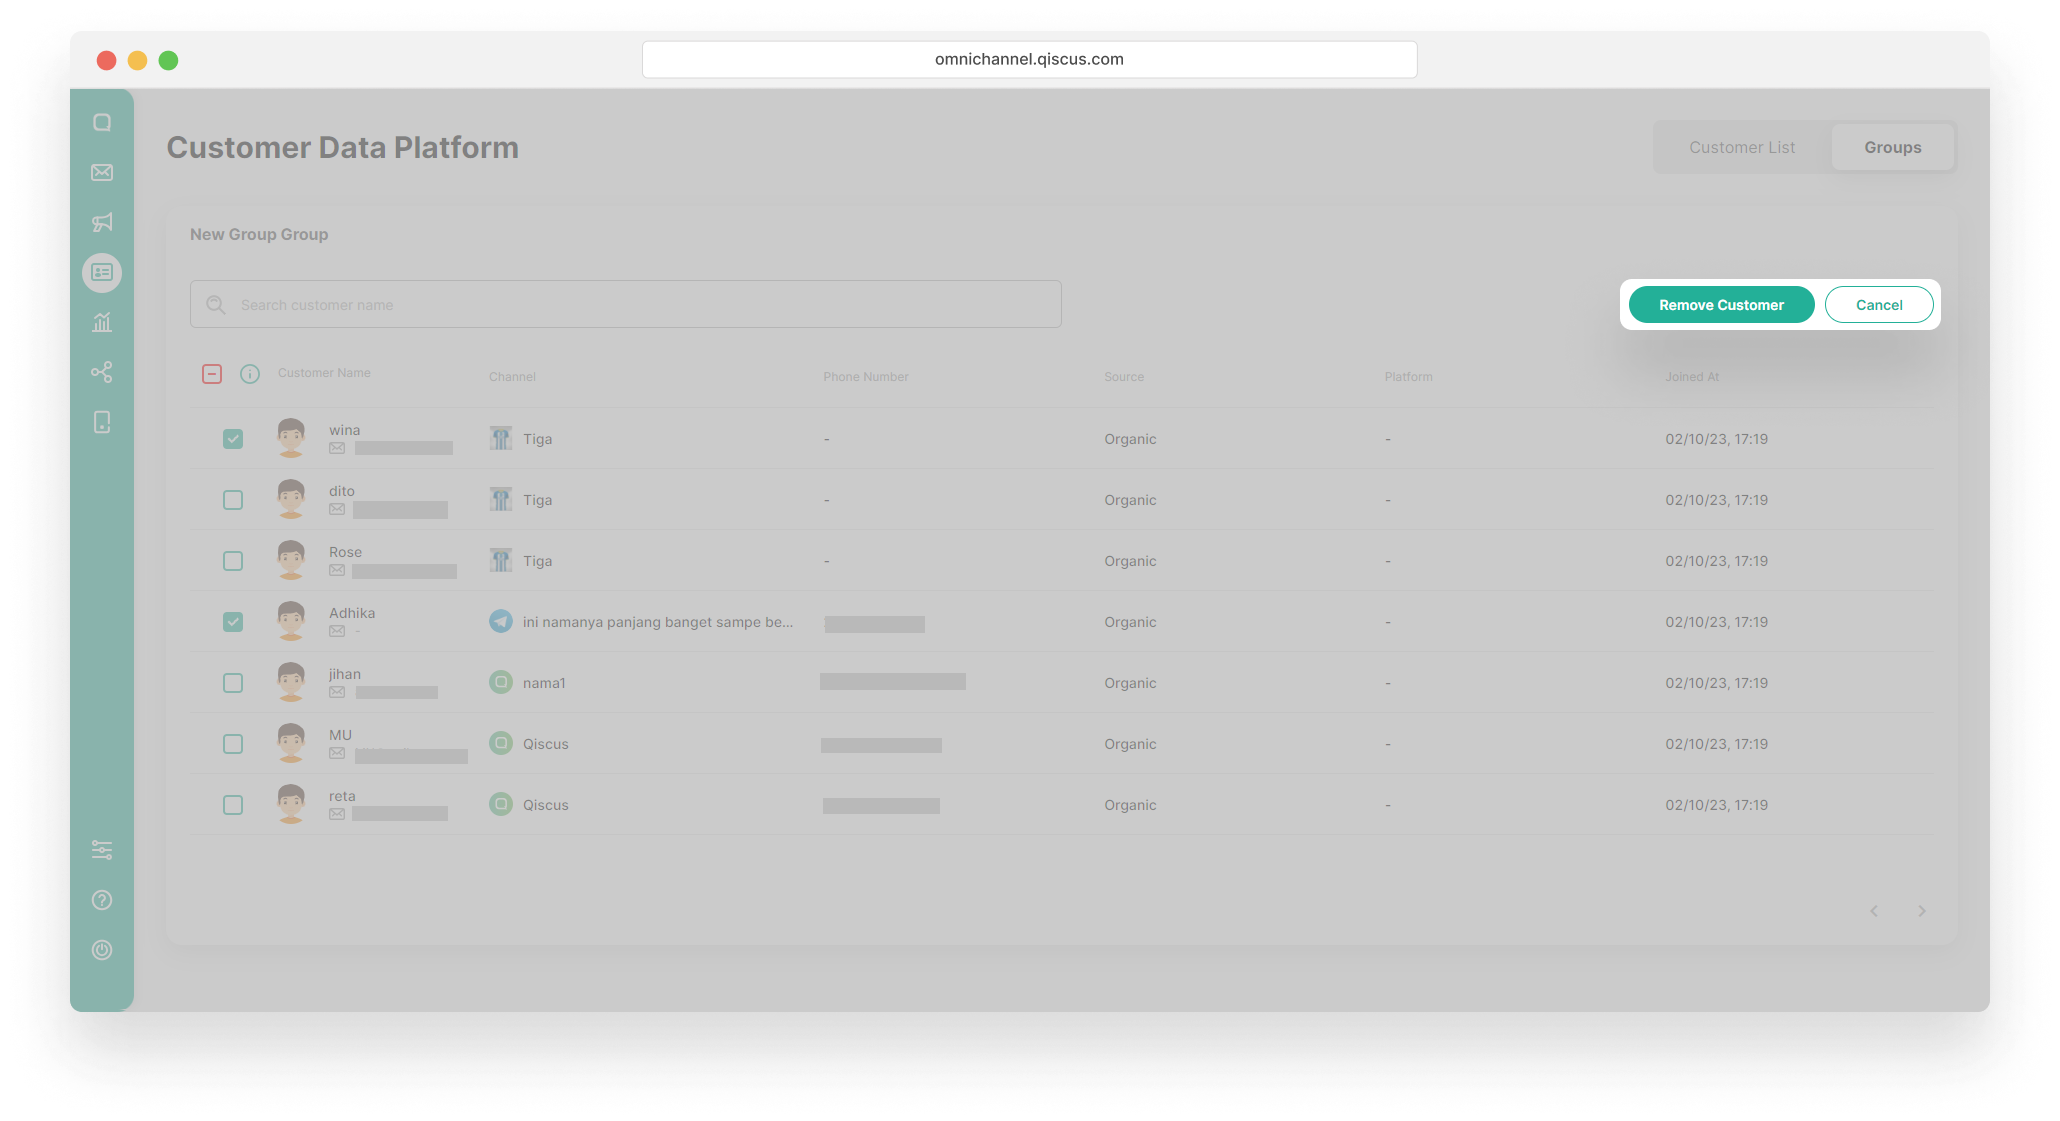
- Select a Customer Group,
- Click the kebab button (three vertical dots), and click the Remove Customer button,
- Select the customers, and click the Remove Customer button.
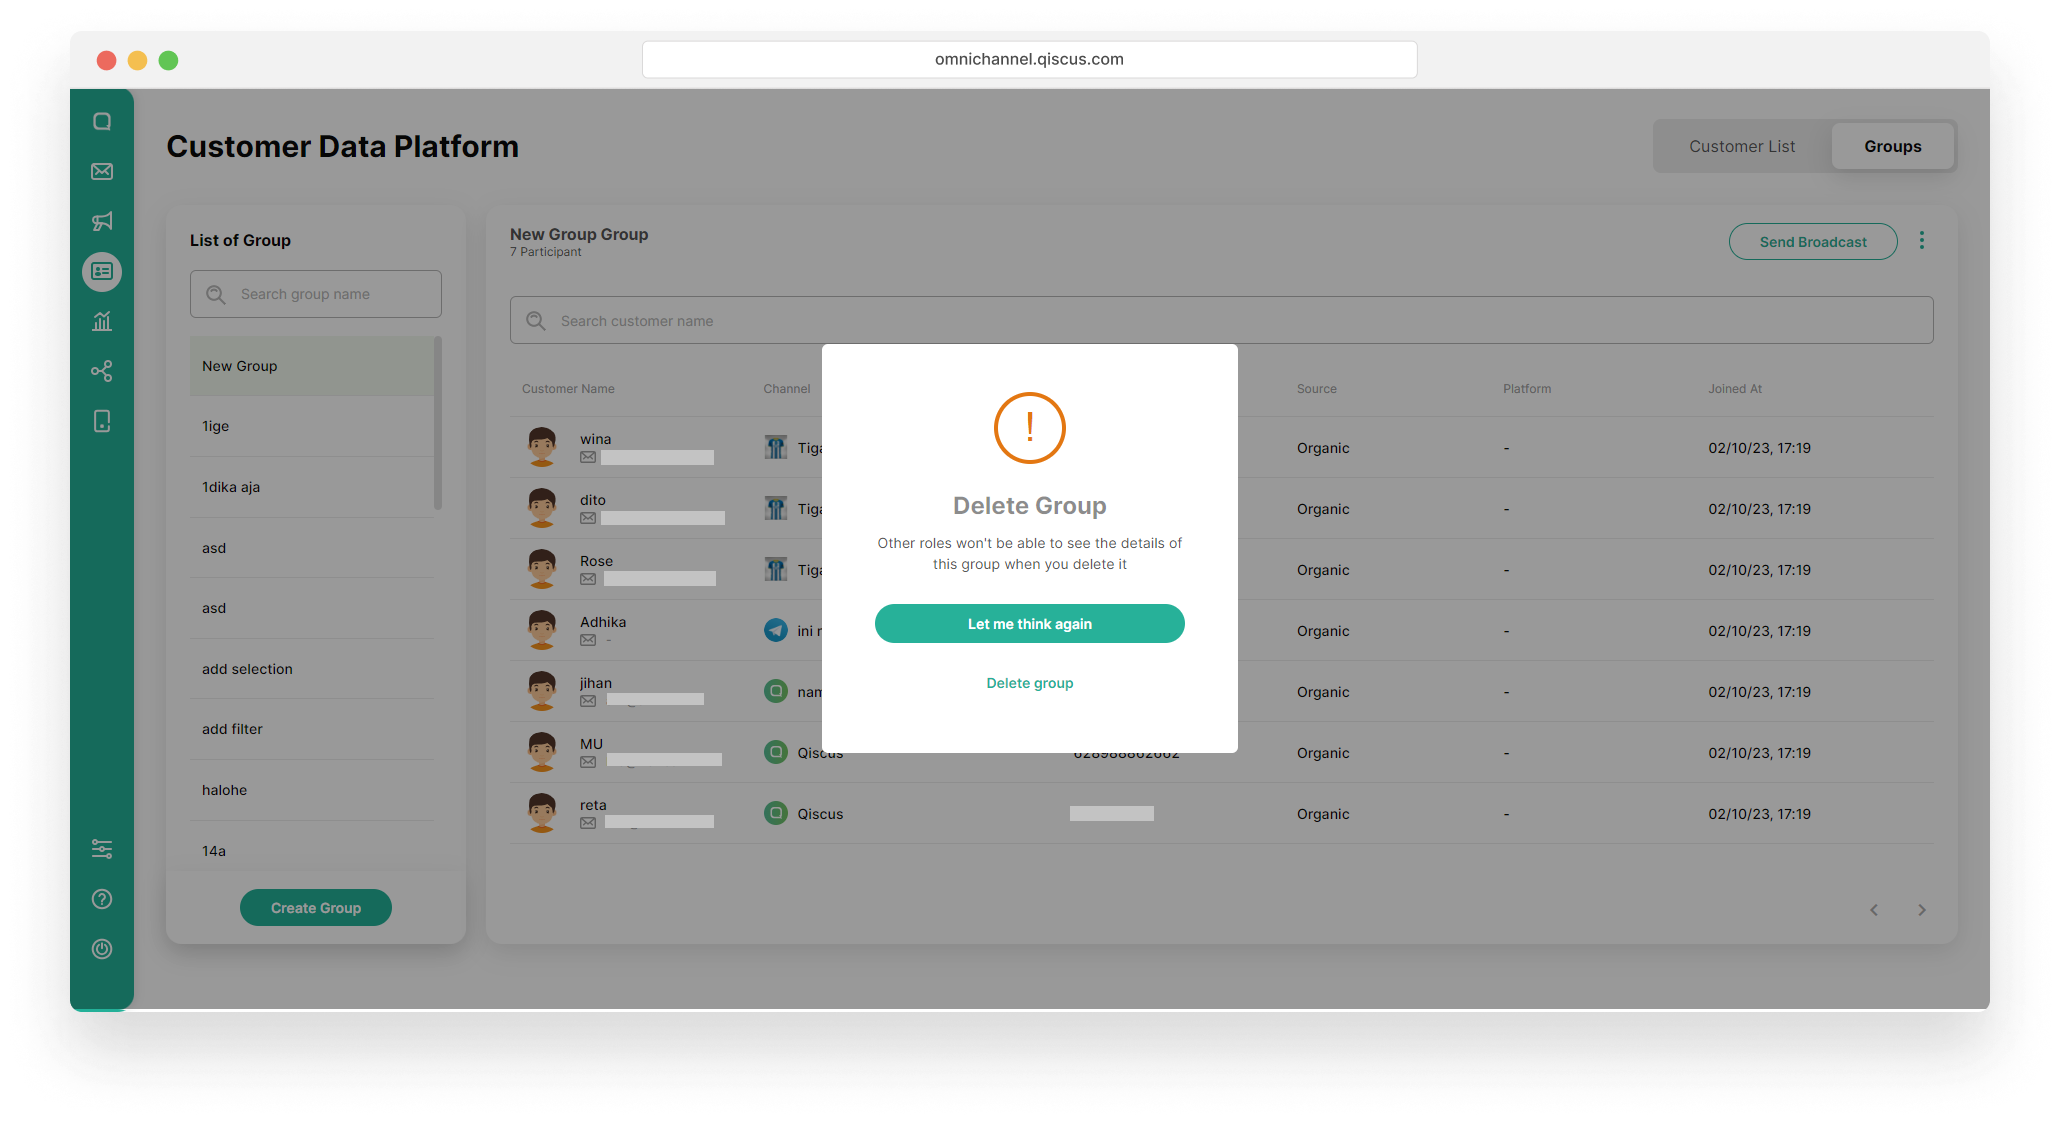
Delete Customer Group
- Select a Customer Group,

- Click the kebab button (three vertical dots), and click the Delete Group button,
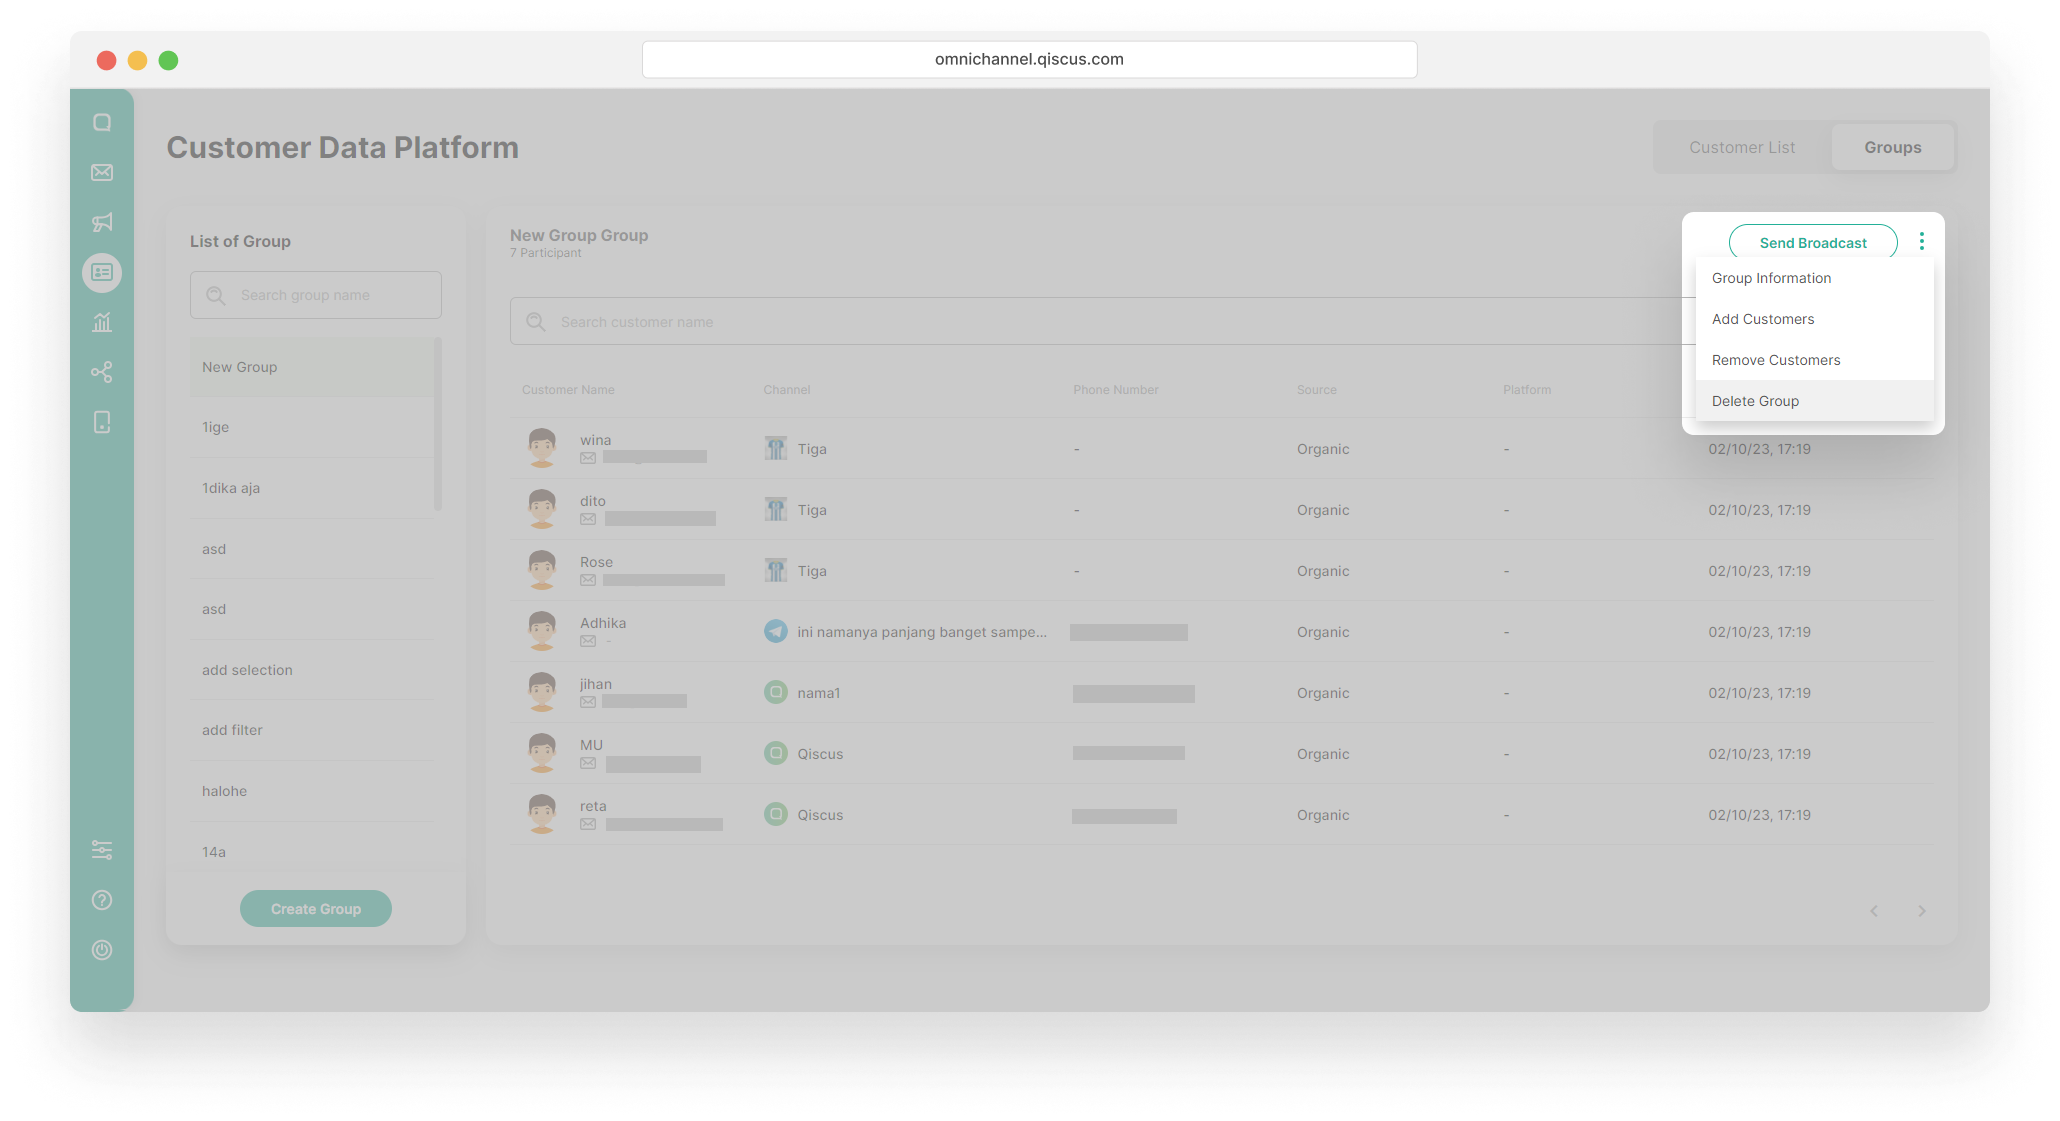
- Click the Delete Group button in the Delete Group Confirmation pop up.
Send Broadcast Message to A Group
- Select a Customer Group,

- Click Send Broadcast button,
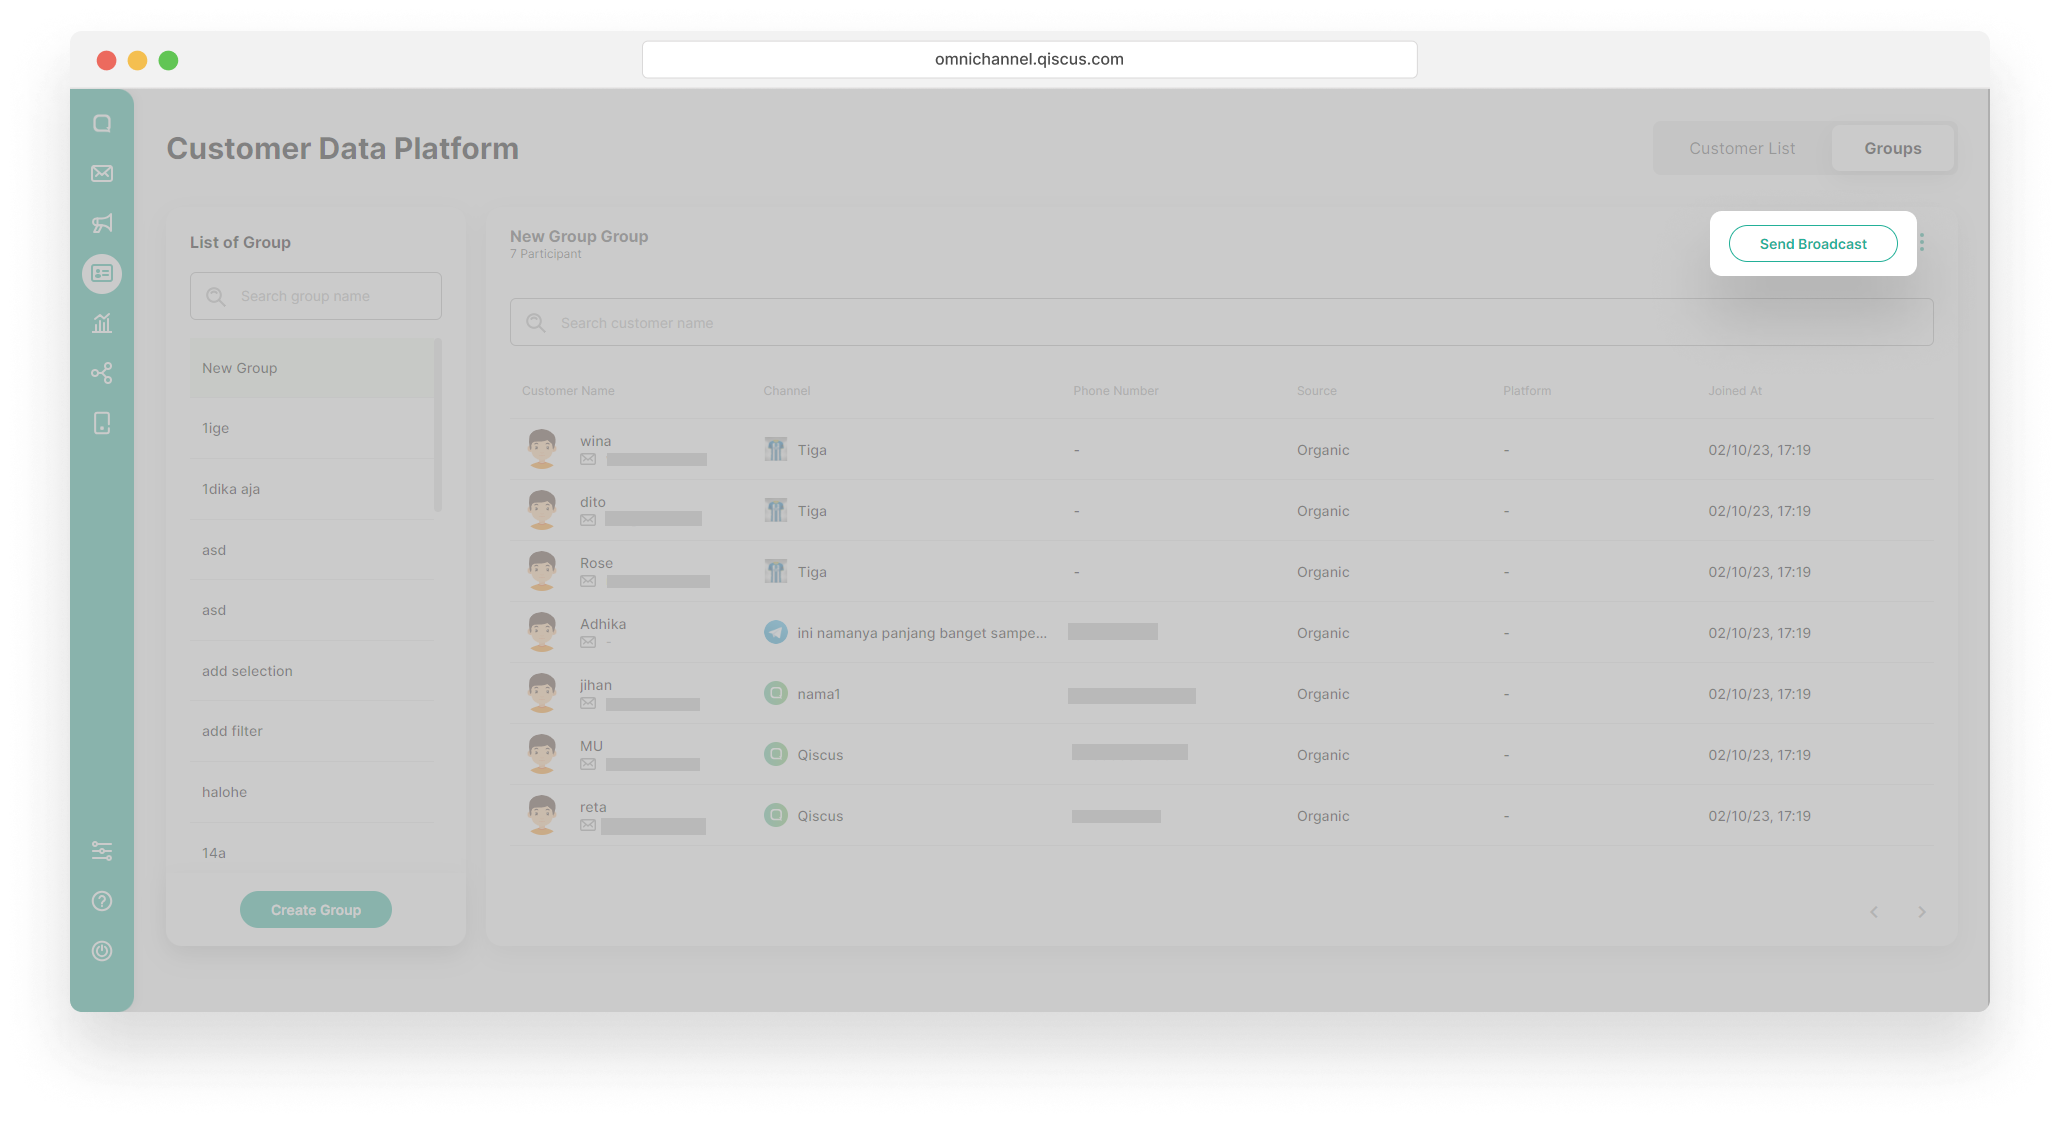
- You will be redirected to Outbound Message page,
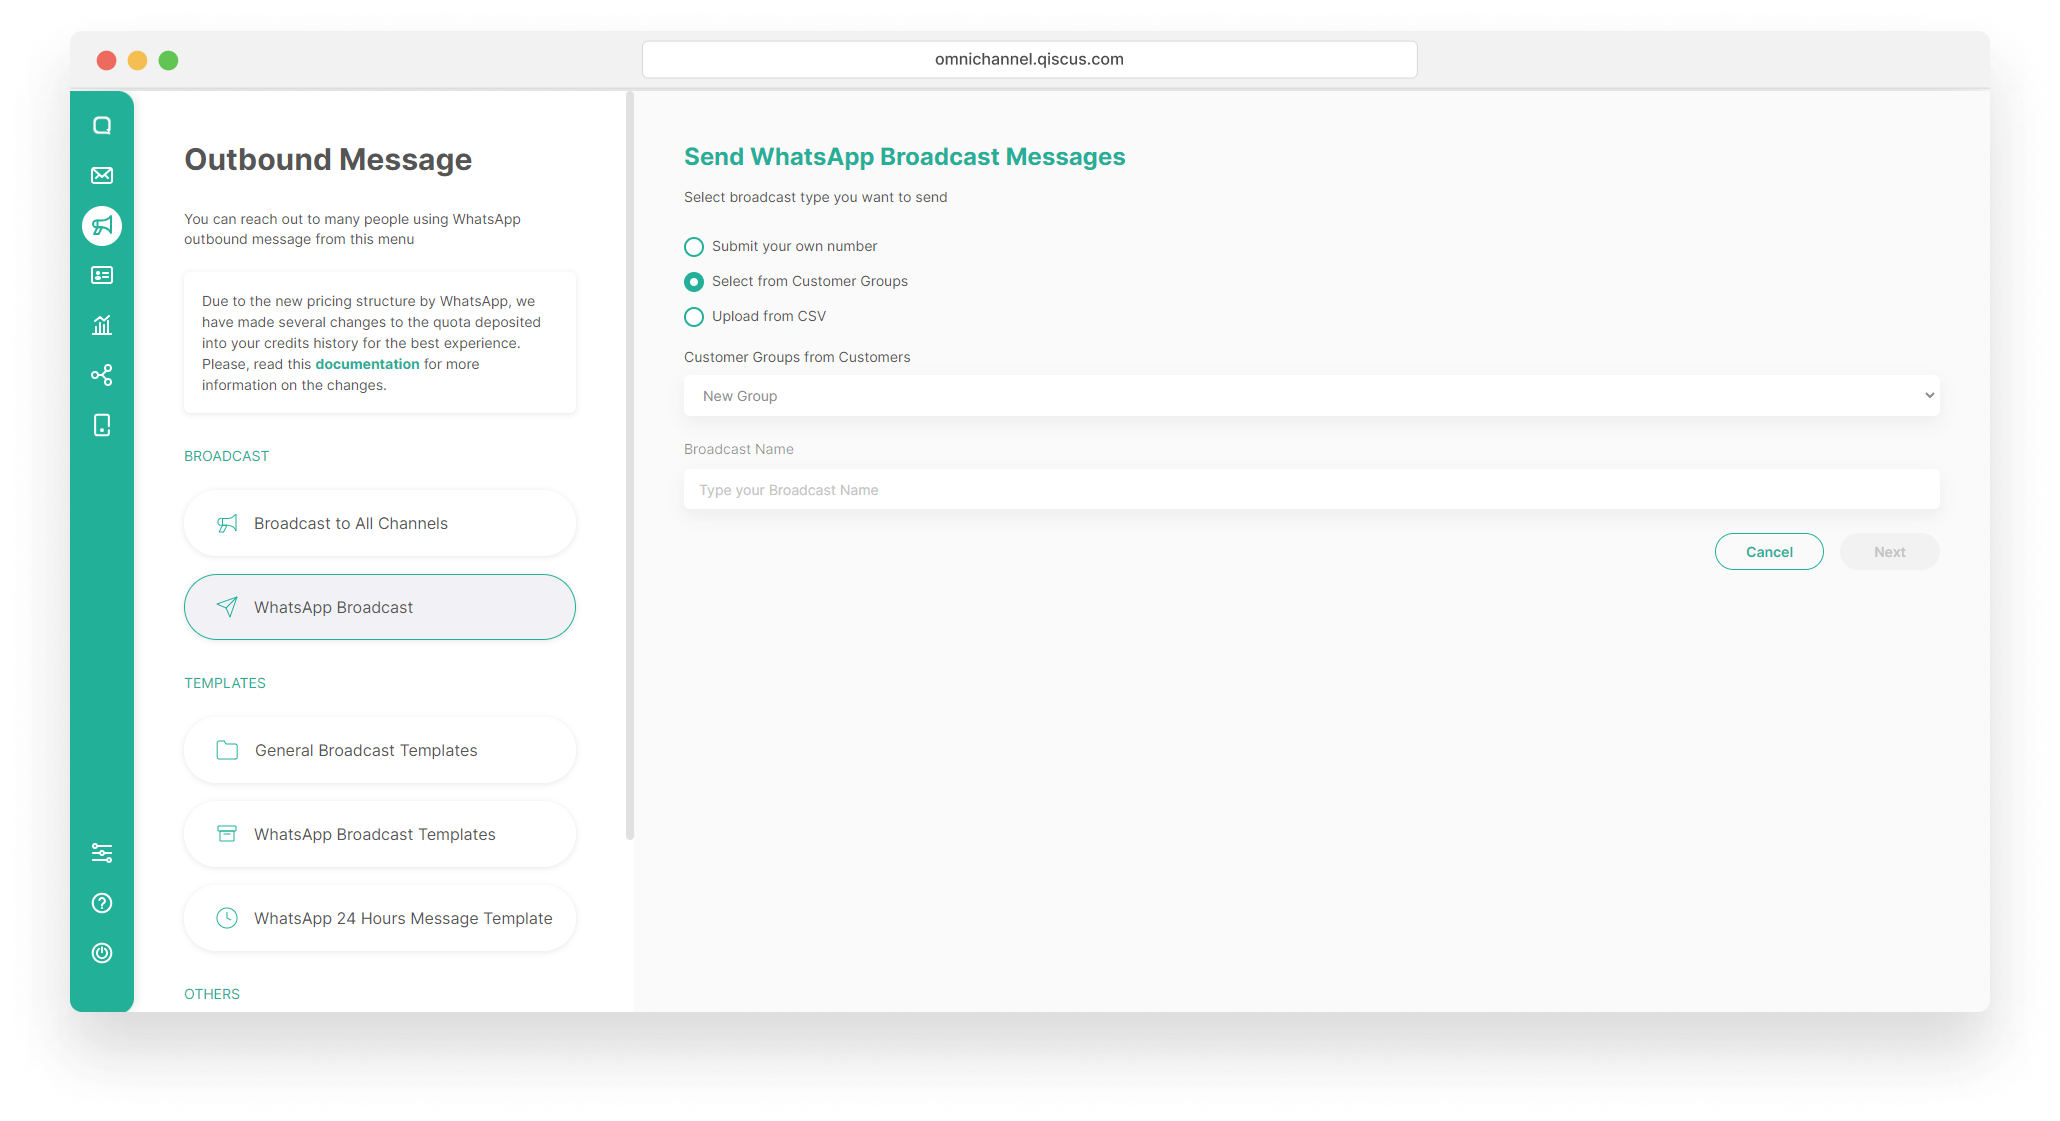
- Follow these steps in Broadcast Template Message with Customer Group.
Broadcast Template Message with customer groups is currently only available for Enterprise
Leave a Reply