You may need to learn how to use and set up WhatsApp Catalog for your WhatsApp Business API, please read this documentation.
Add WABA Catalog Integration
WABA Catalog Integration is a feature that allows for product synchronization triggered by Meta to retrieve data from Qiscus Shop. You can add more than 1 WhatsApp Business API (channel) to integrate with the WhatsApp Catalog. The prerequisite is that the WhatsApp Business API (channel) to be added must be installed in Omnichannel – Channel Integration with an Enabled status.
If you haven’t installed WhatsApp on Omnichannel Integration, please follow the documentation for WhatsApp Cloud API Channel Integration.
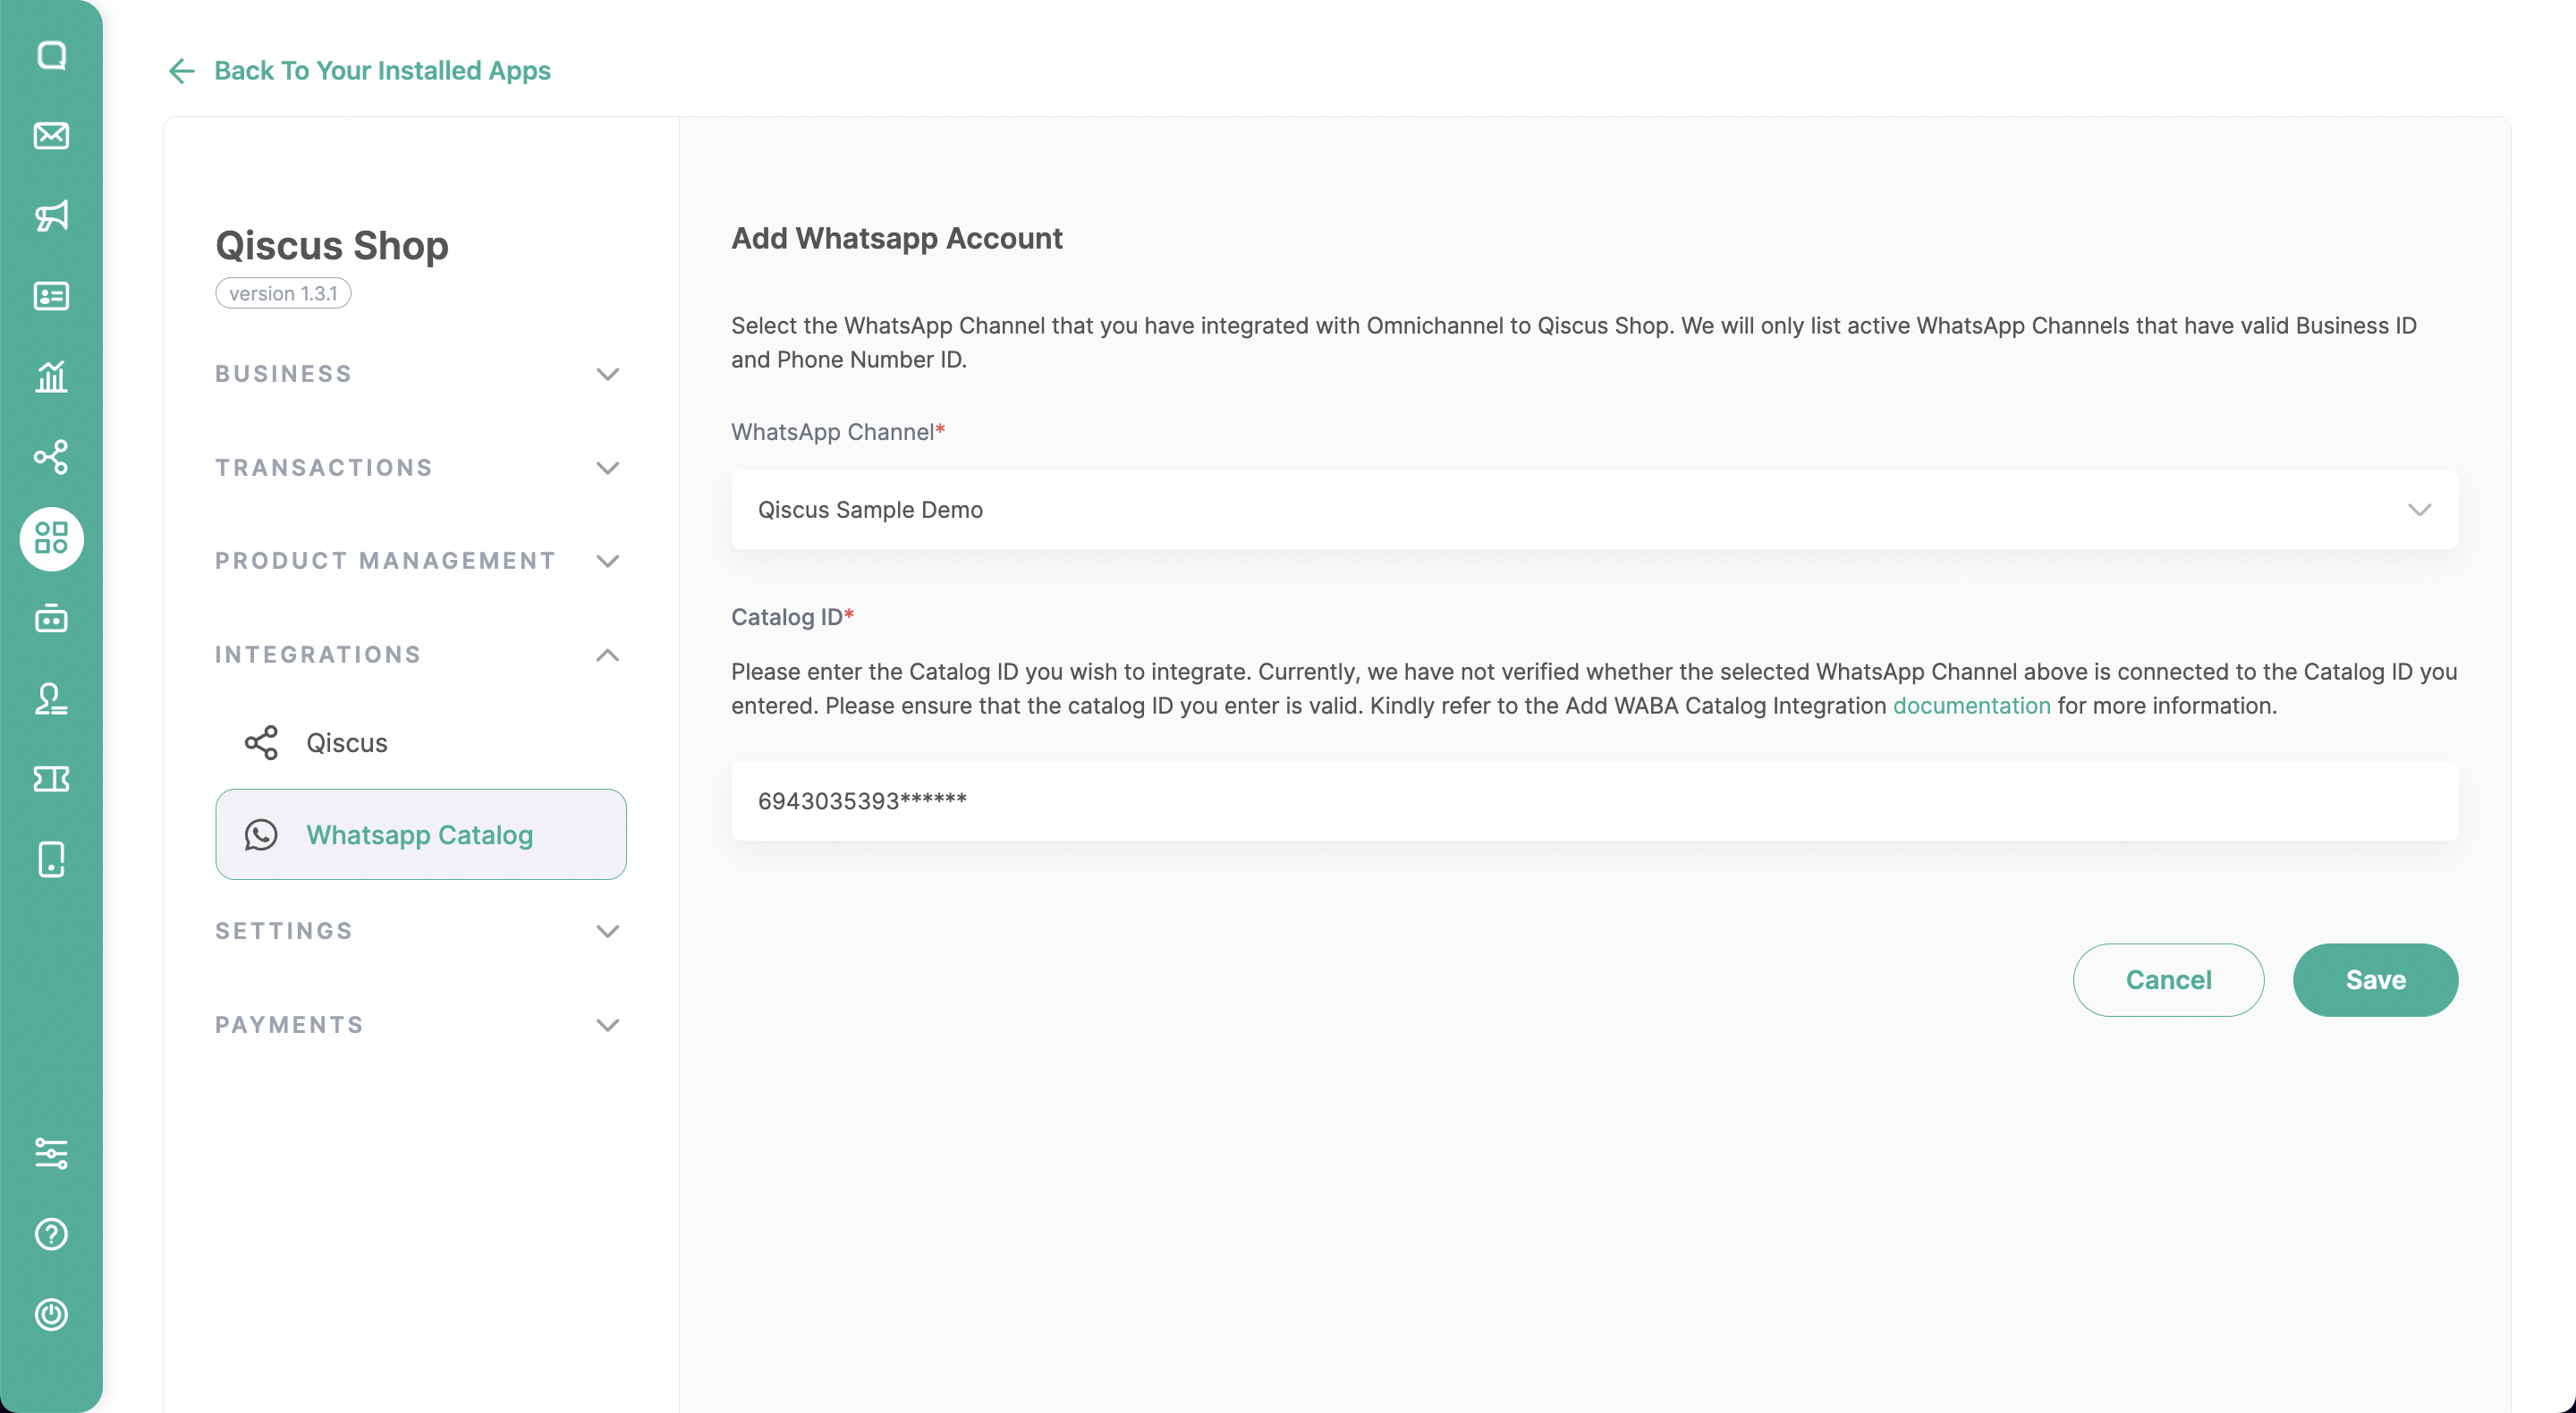
First, please click on the “WhatsApp Catalog” menu.
Click on “Add WhatsApp Account” to integrate it with the WABA channel that has been integrated in Omnichannel Integration.
Get the Catalog ID
- If you have created a Catalogue, please follow How to Sync Meta Catalog.
- if you have not, please follow How to Create a Catalog on Facebook Commerce Catalog.
Make sure the inputted Catalog ID is valid, as we are currently unable to validate it.
If you feel everything is in order, please click Save to proceed with Sync Data to the Meta Catalog.
How to Create Facebook Commerce Catalog
In order to create Facebook Commerce Catalog, you’ll need to go to your Facebook business manager first and navigate to the Facebook Commerce menu like this steps:
- Access the business account manager https://business.facebook.com/
- Login to your Facebook Business Account.
- Enter the 6-digit code from the authentication app that you set up, if required.
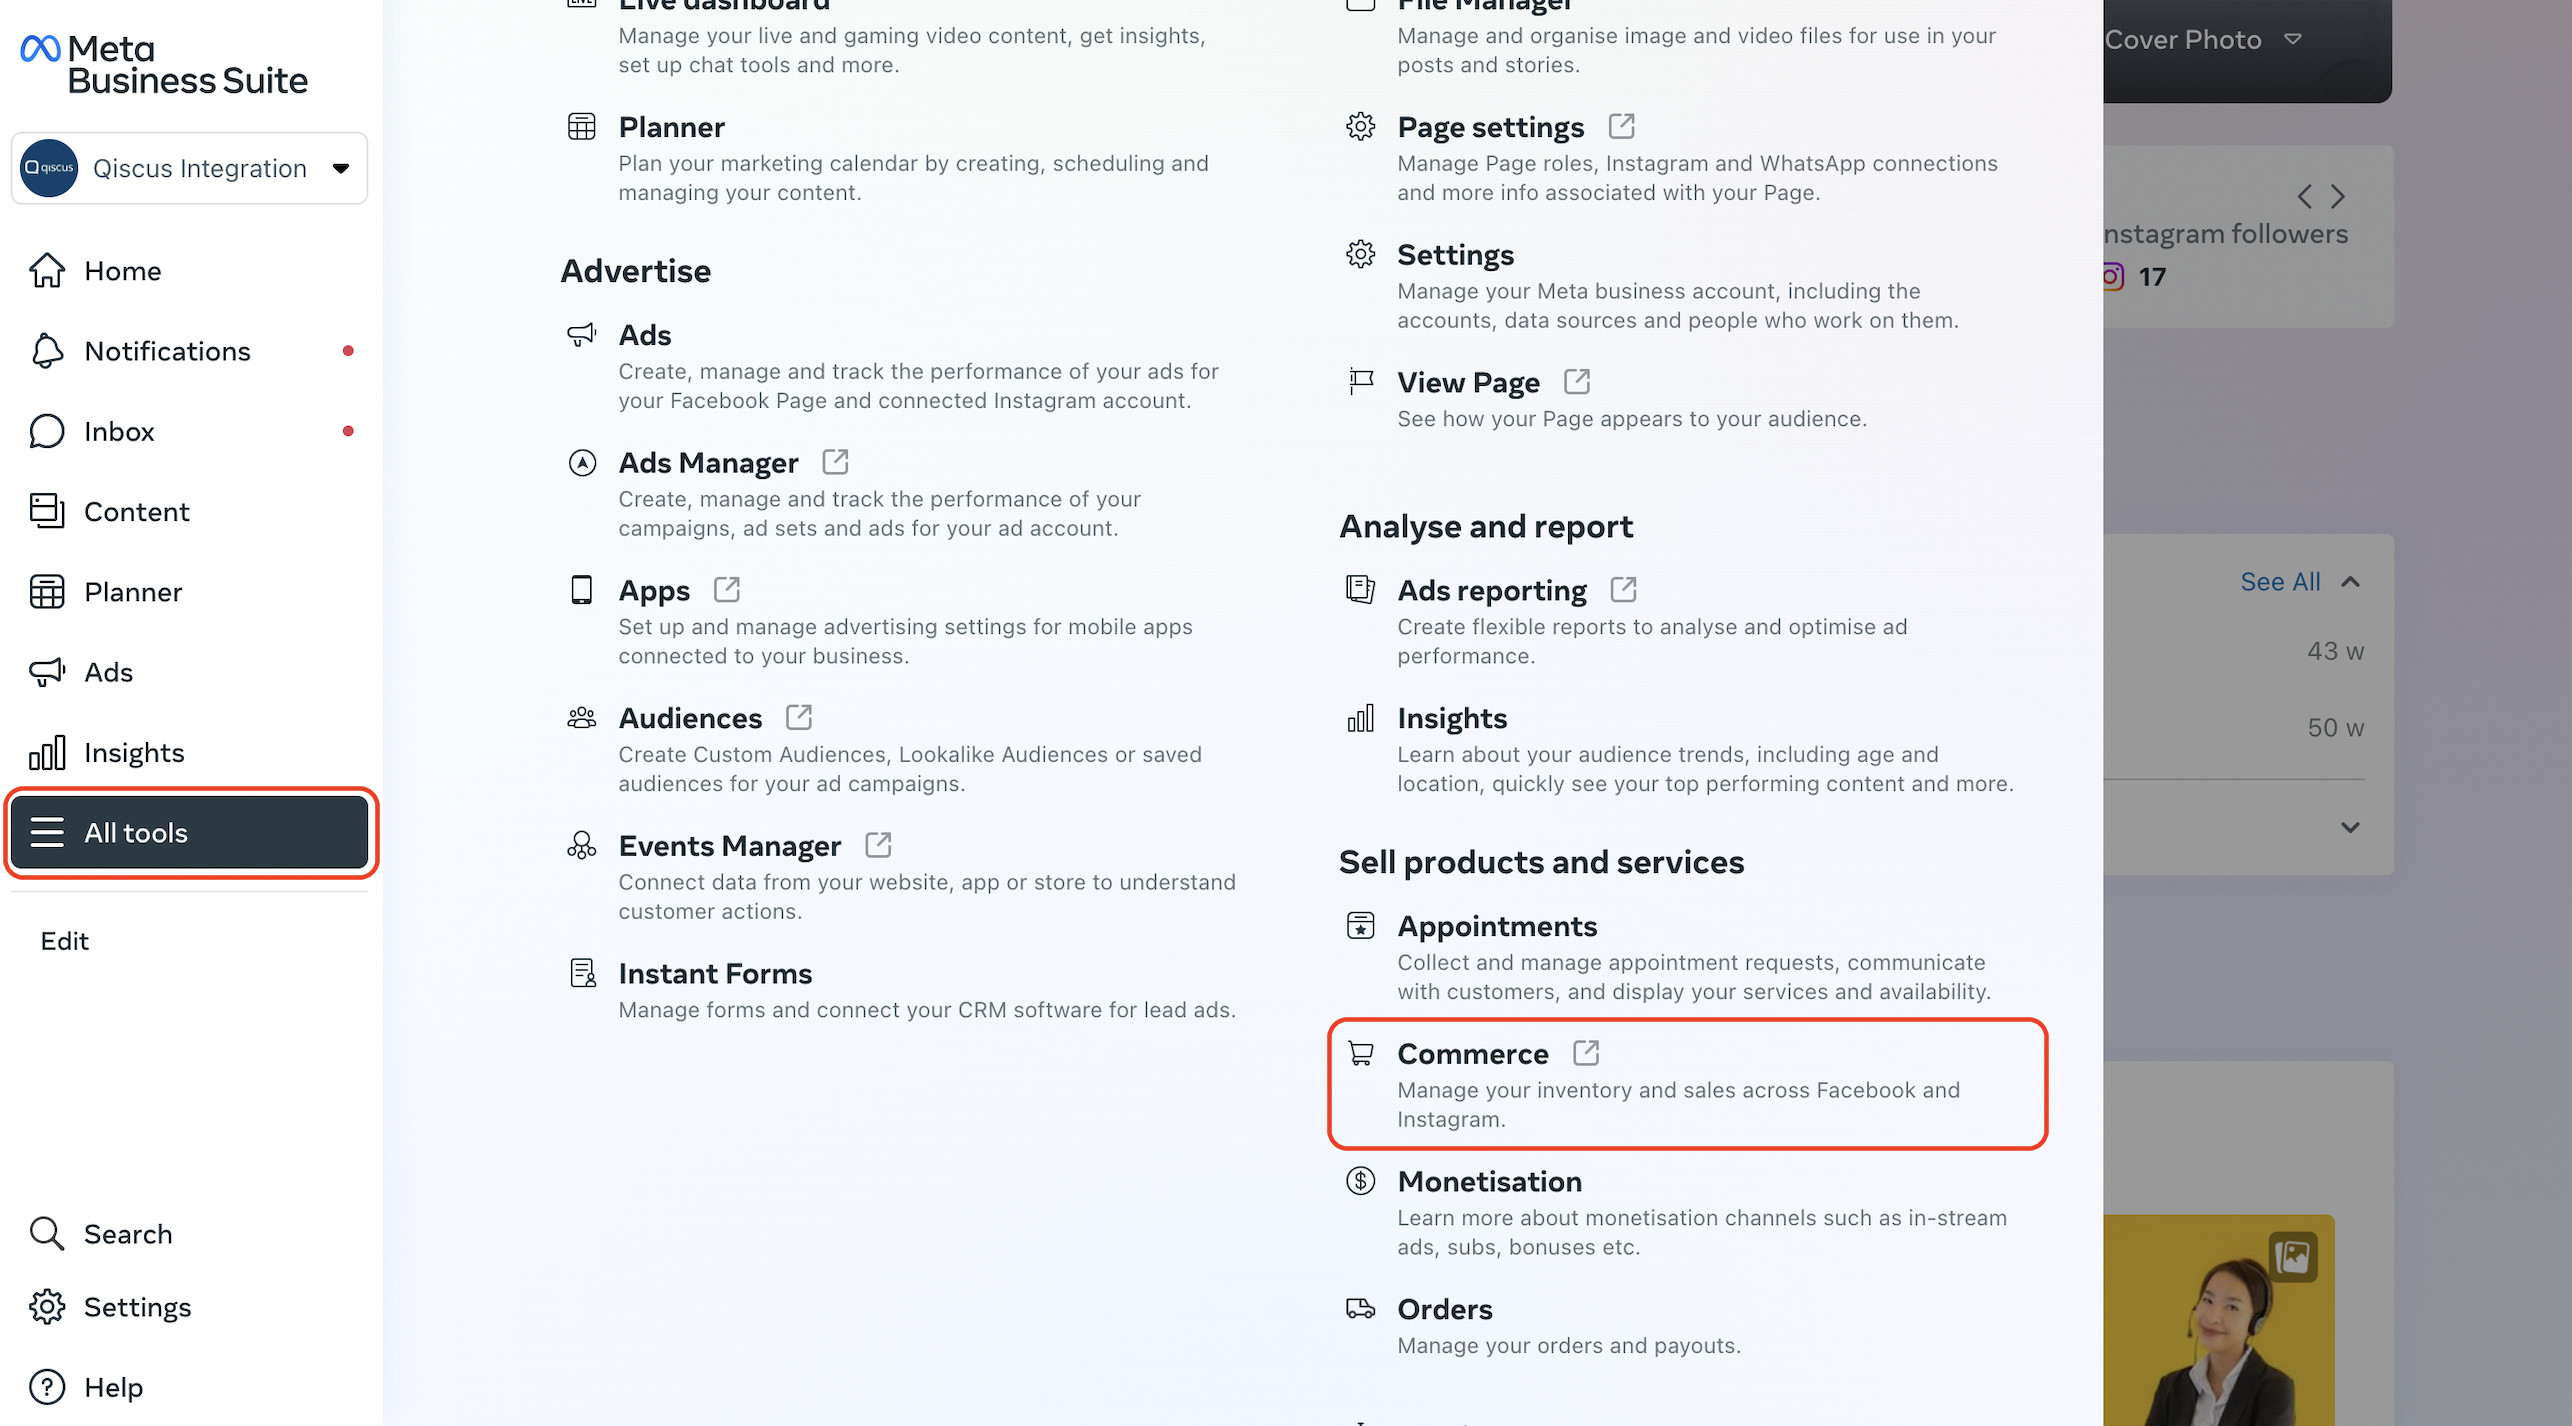
- After successfully logging in, you need to find “Commerce” from the “All tools” menu or as simple as visiting https://business.facebook.com/commerce/.
Follow this video bellow to create new E-commerce catalog or follow the instruction steps bellow the video.
- If you haven’t created a Catalog, then you need to create one by clicking the “Add Catalog” button
- Select Type, choose one of E-commerce, Travel, Property, Auto. (eg: E-commerce -> online Products)
- Configure Settings, select Upload product info, select catalog owner & enter the Catalog name.
- Then click “Create” to complete the catalog creation.
- Then click “View Catalog” to get the details of the catalog that has been made, then you will automatically be at https://business.facebook.com/commerce/catalogs/
- Next click “Settings”
- Click “Catalgue”
- Then you will find Catalog ID in the Catalog Name Section
How to Sync product to Meta Catalog
- Access the business account manager https://business.facebook.com/
- Login to your Facebook Business Account.
- Enter the 6-digit code from the authentication app that you set up, if required.
- After successfully logging in, you need to find “Commerce” from the “All tools” menu or as simple as visiting https://business.facebook.com/commerce/.
- Then, you need to make sure that the Business Account used to manage the Catalog is correct. If it’s not, you can select the appropriate account.

- If you have selected the Business account, you will see the created Catalogs with details including Catalogue Name and Catalogue ID. Please select one to proceed.
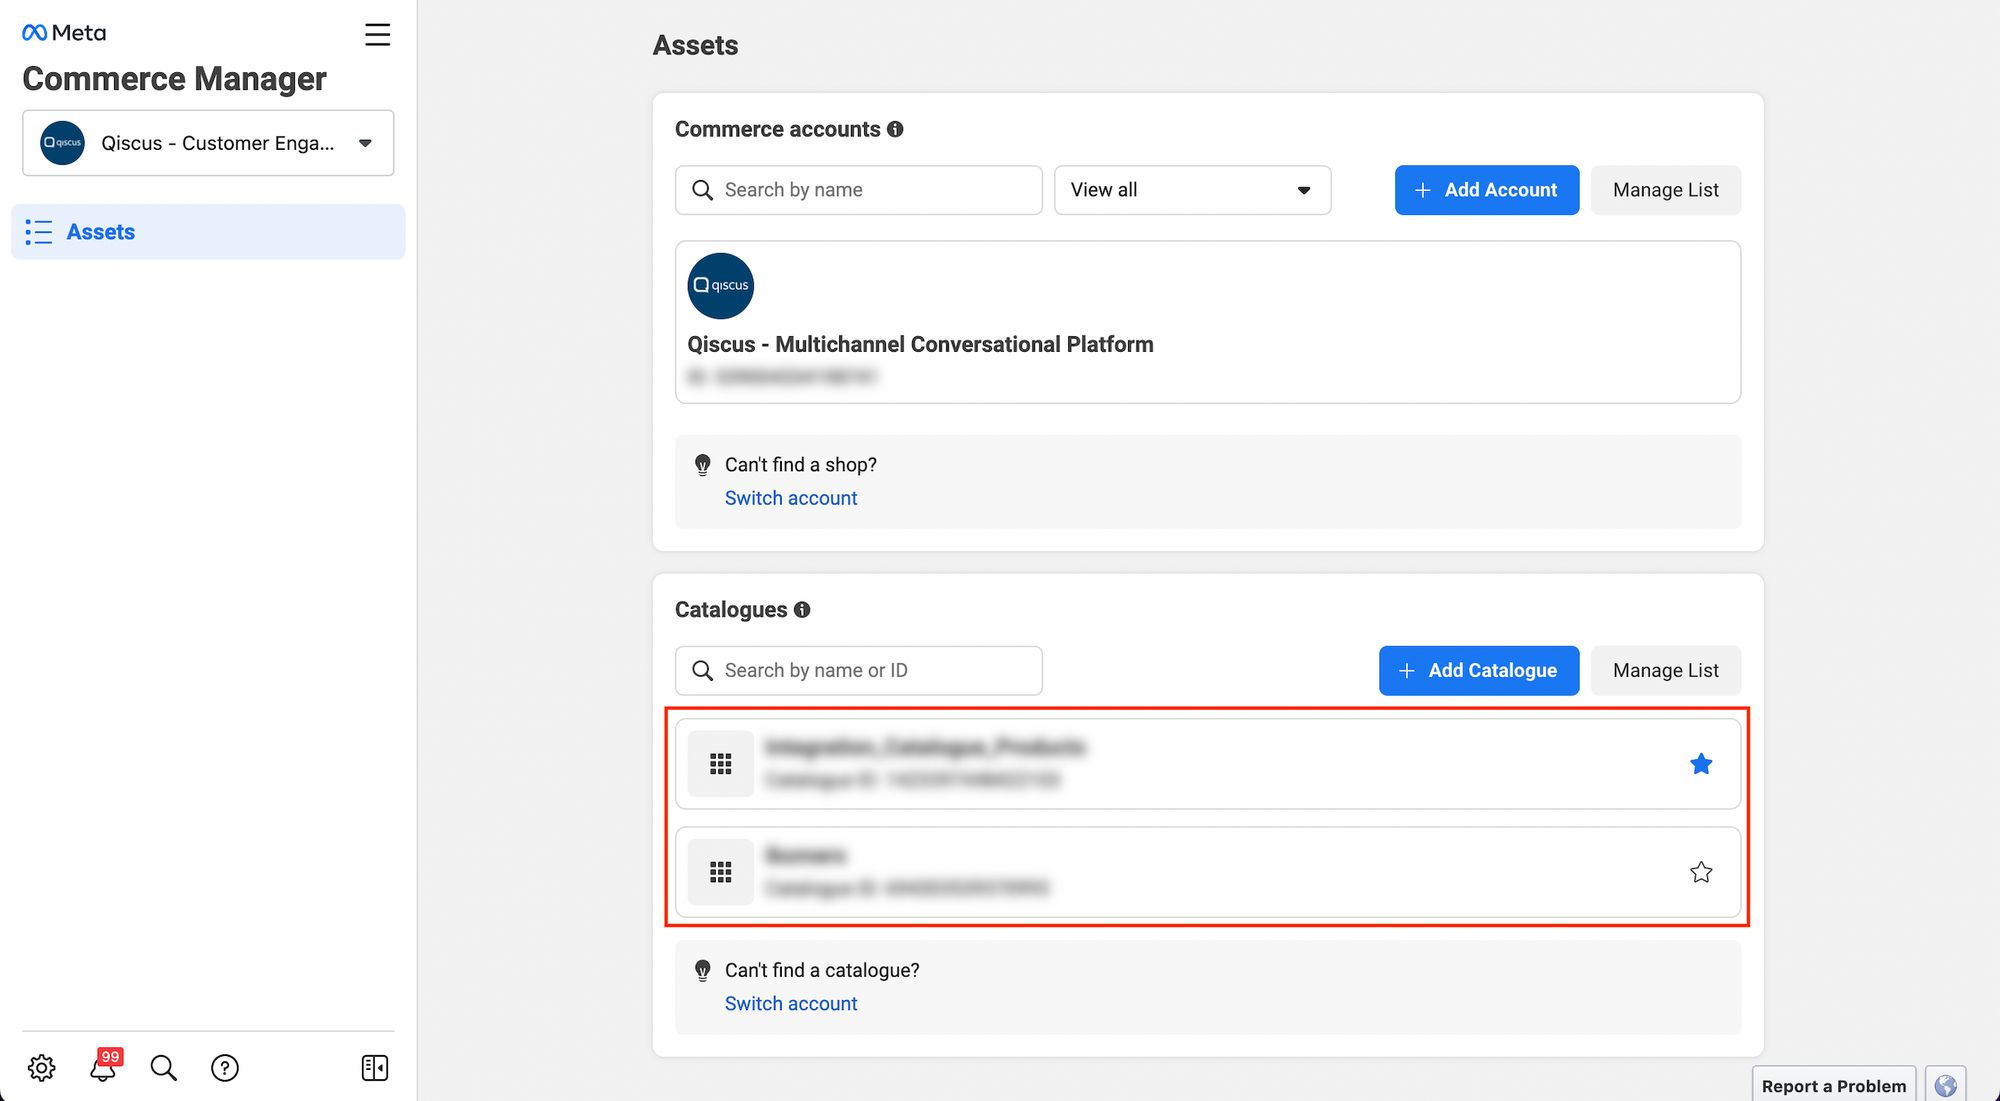
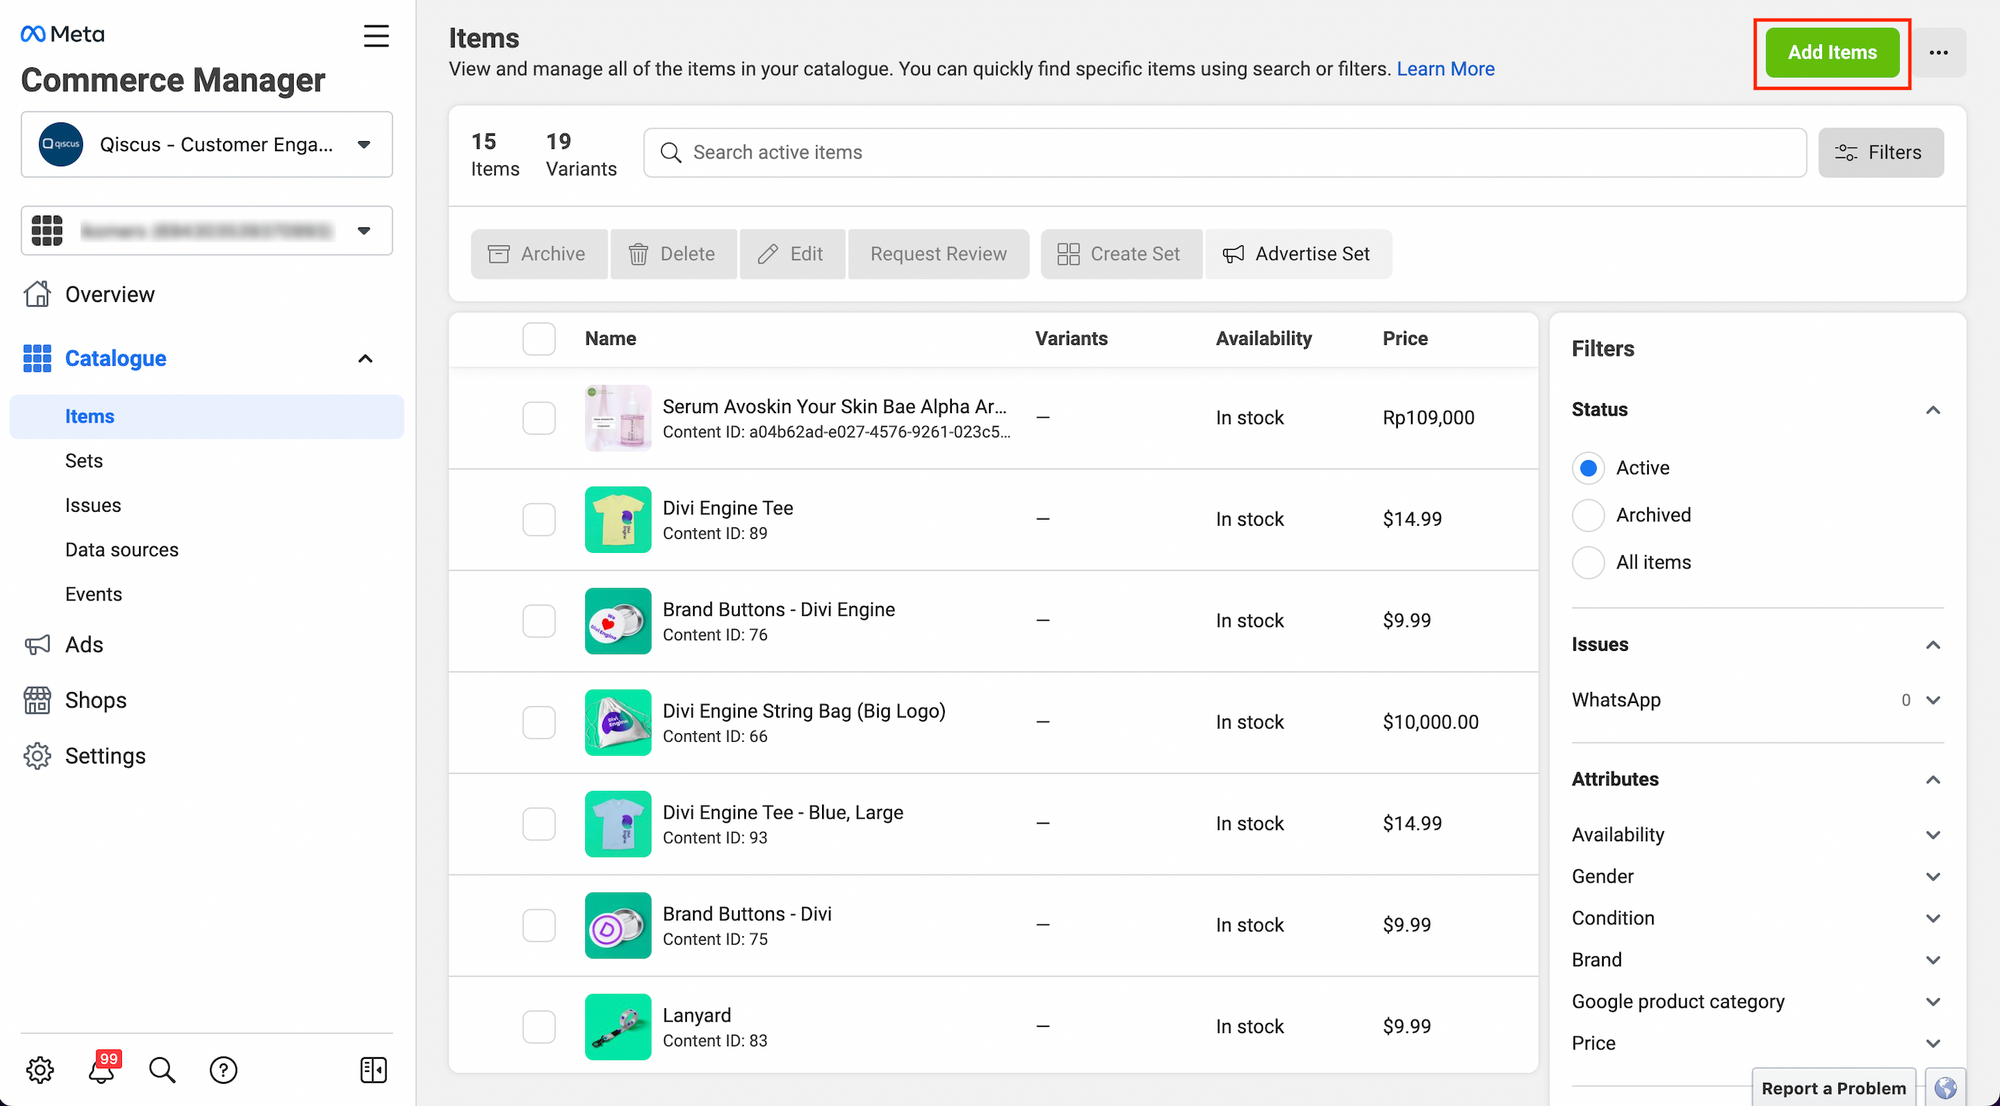
- After selecting a catalog, you need to click on “Add Items”.
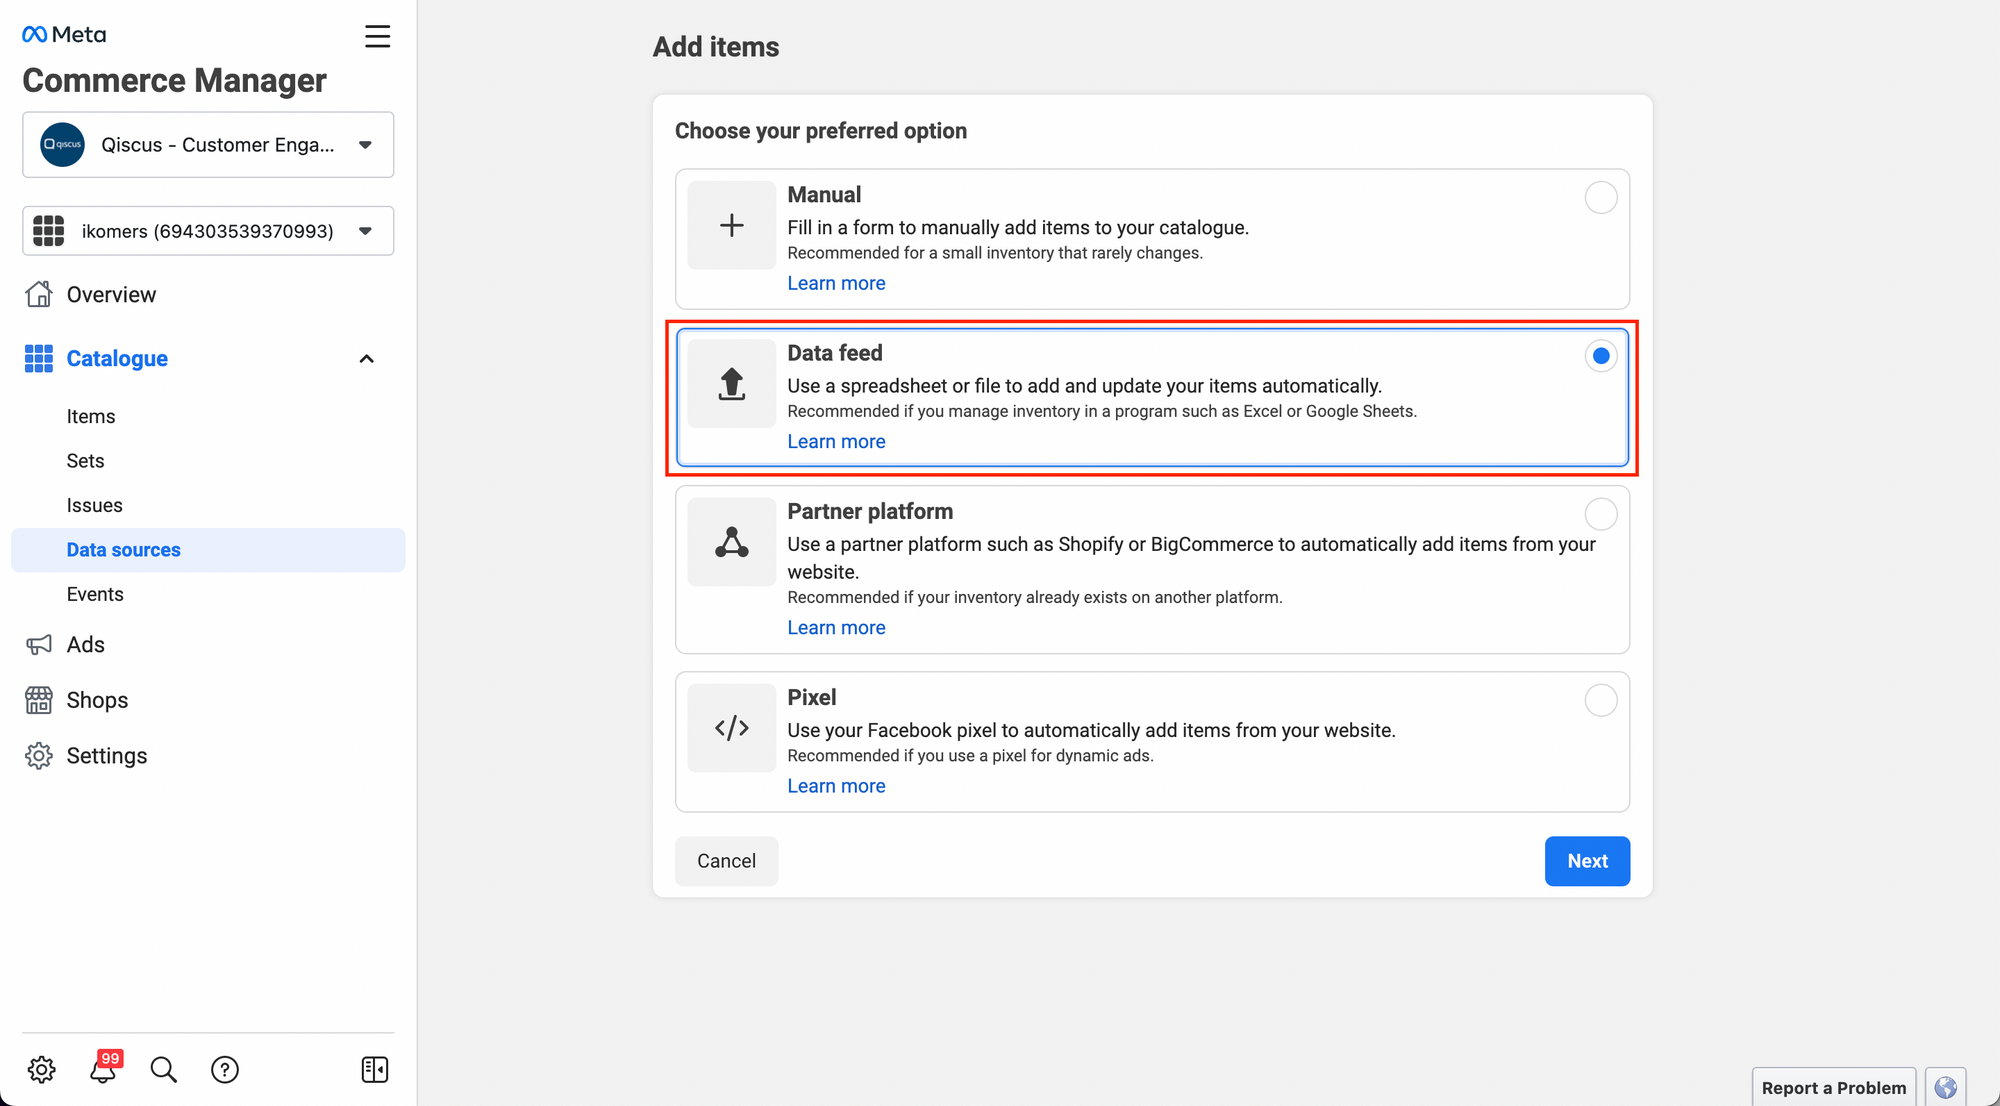
- Choose the method for adding items. Here, you need to select “Data Feed” and then click “Next”.
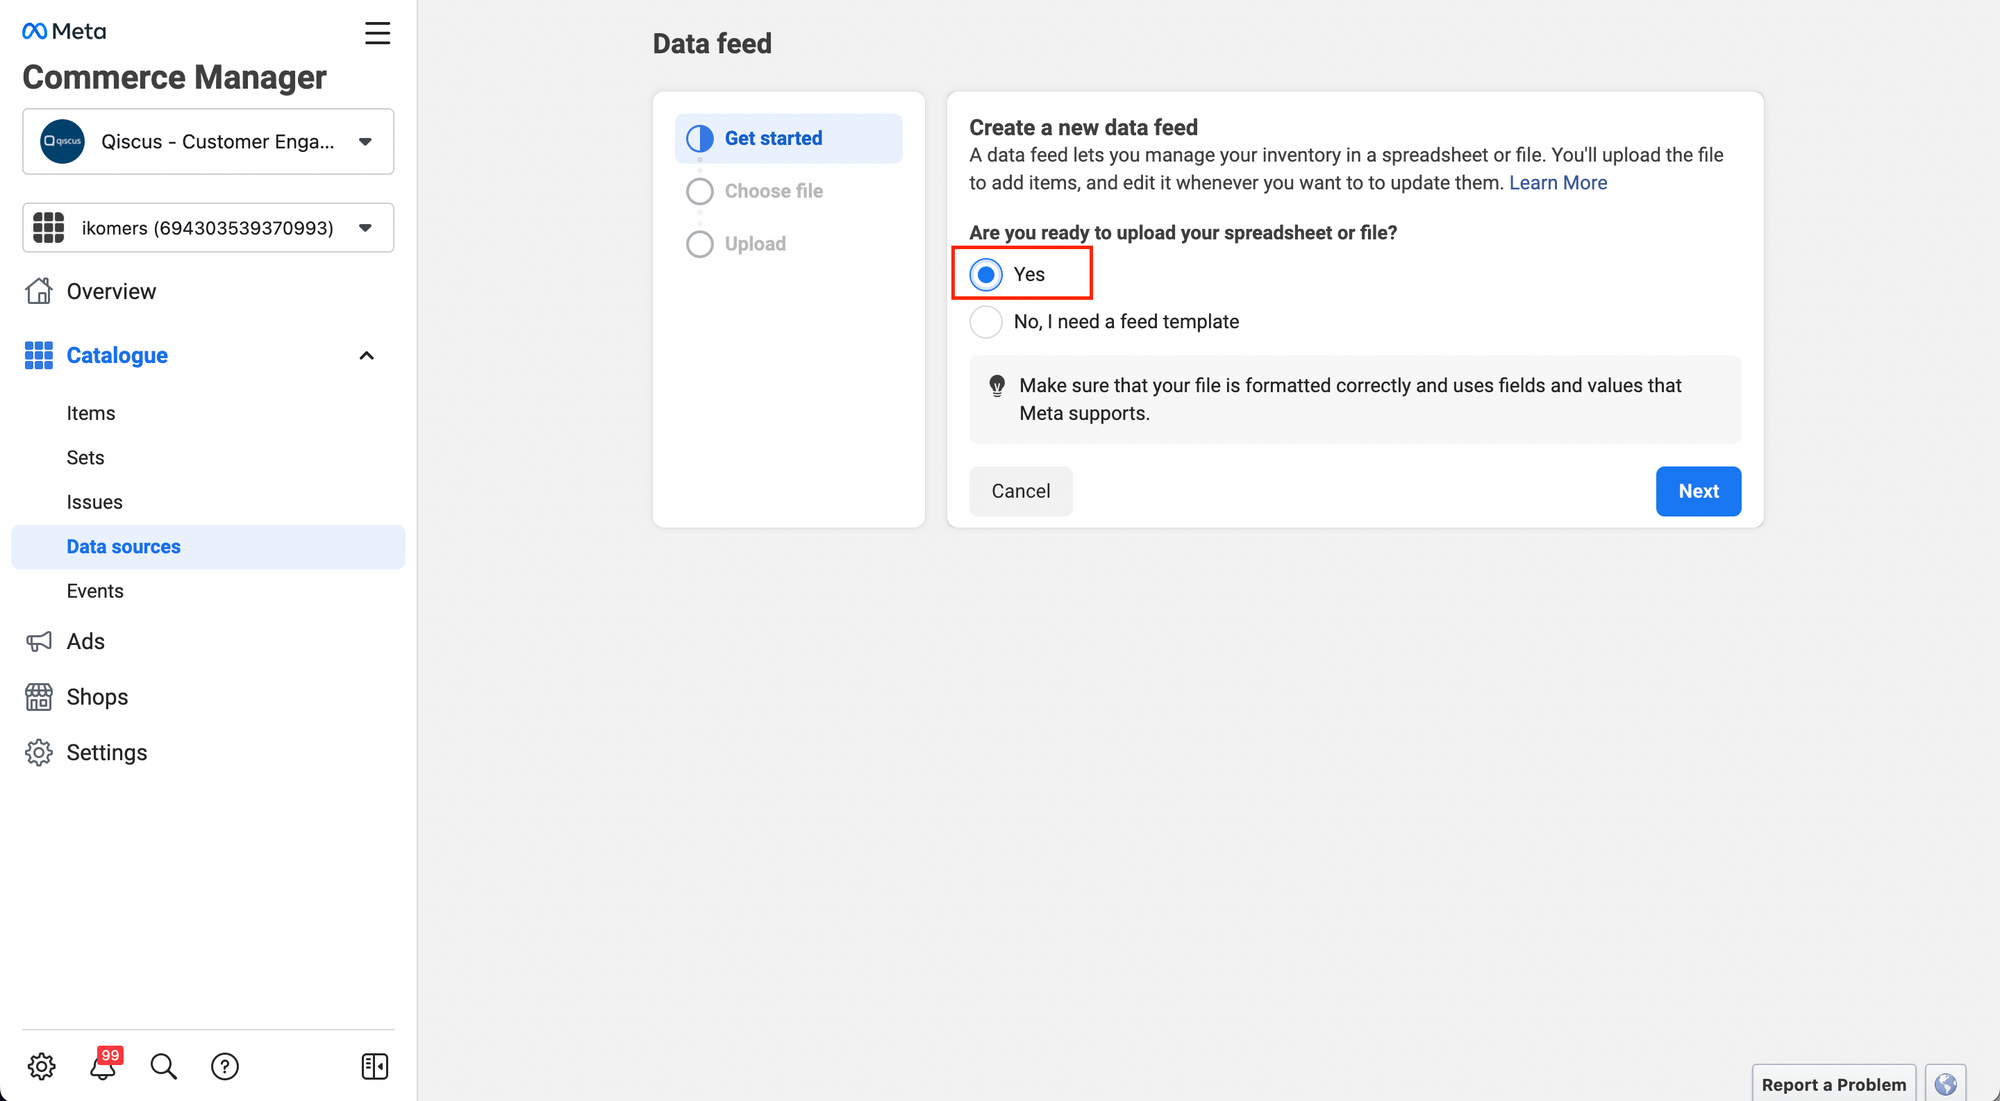
- Select “Yes” because the integration will be done using a Data Feed URL, which does not require a feed template.
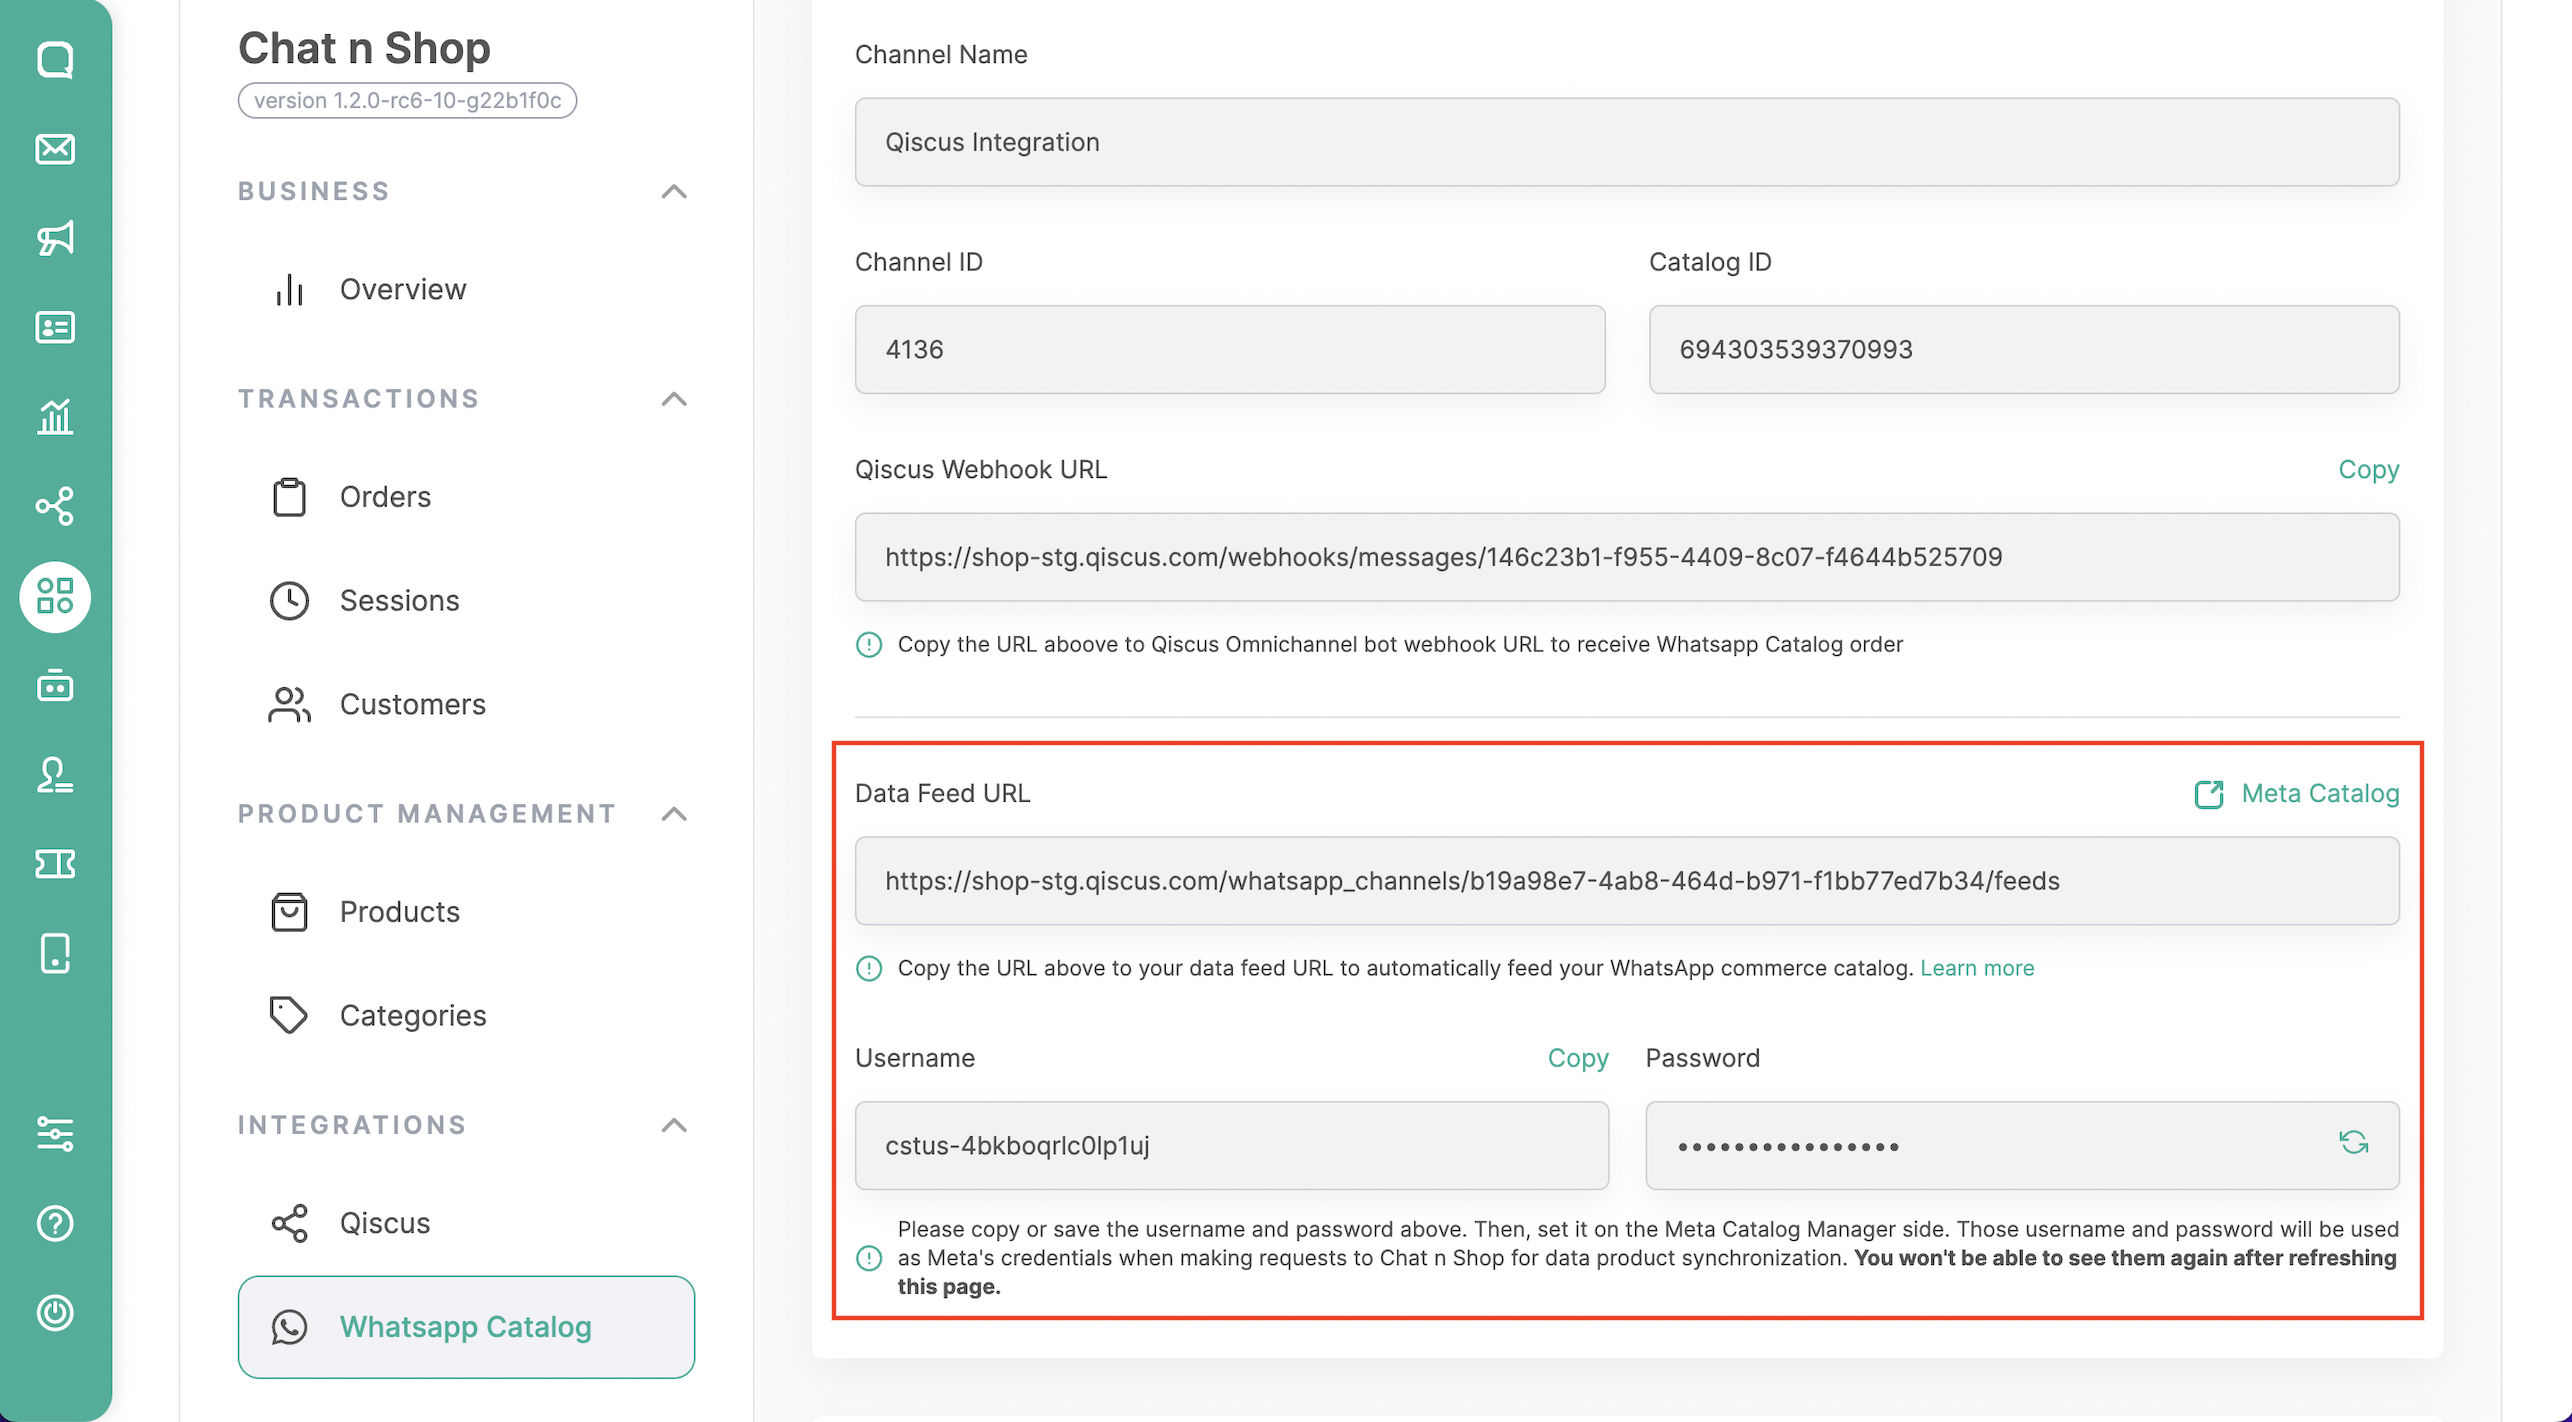
- Select the method “Use a URL” and then fill in the required data that you can obtain from Qiscus Shop, such as the Data Feed URL, Username, and Password.
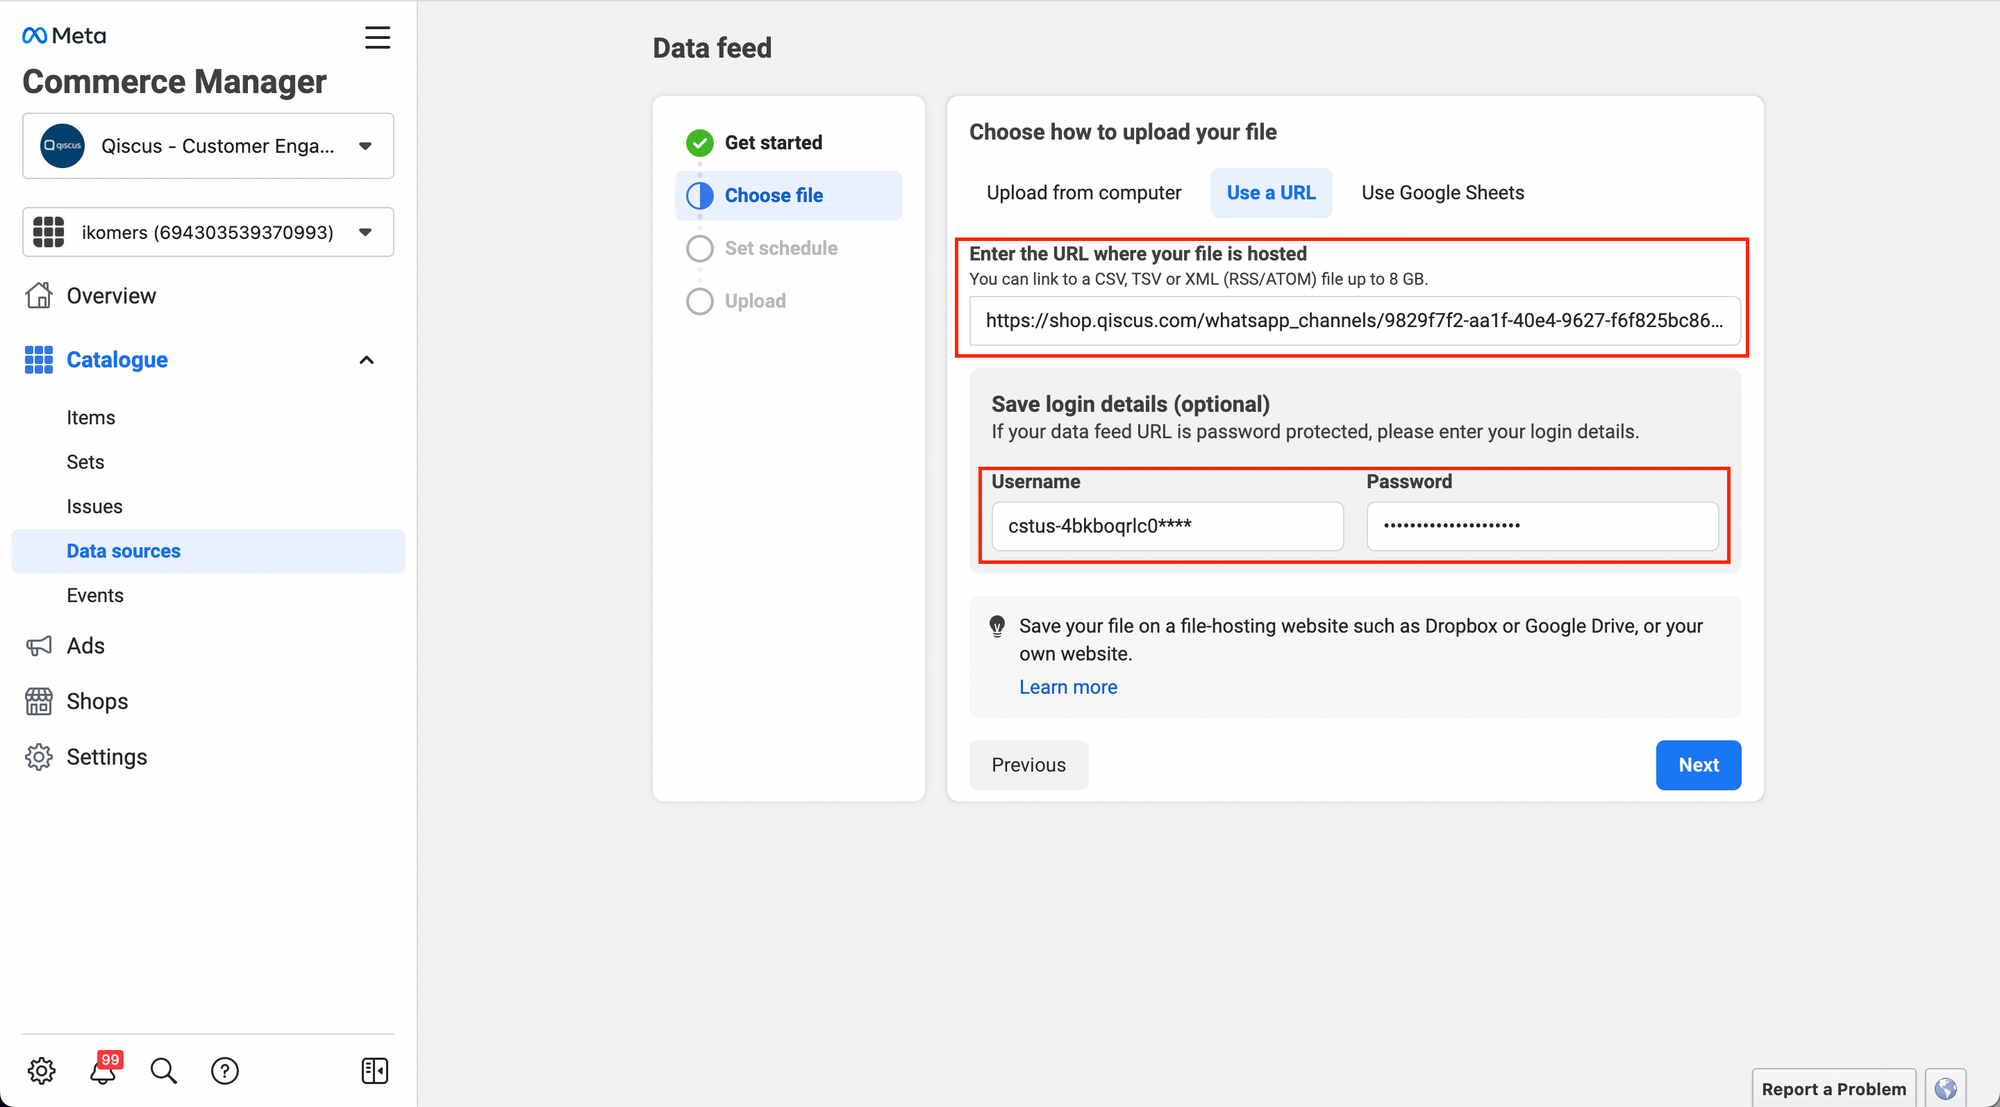
- If you encounter an error when clicking “Next” on the “Choose File” page, please ensure that the data you entered is correct and that you have selected the desired Categories in Qiscus Shop that will be synced to the Meta catalog.
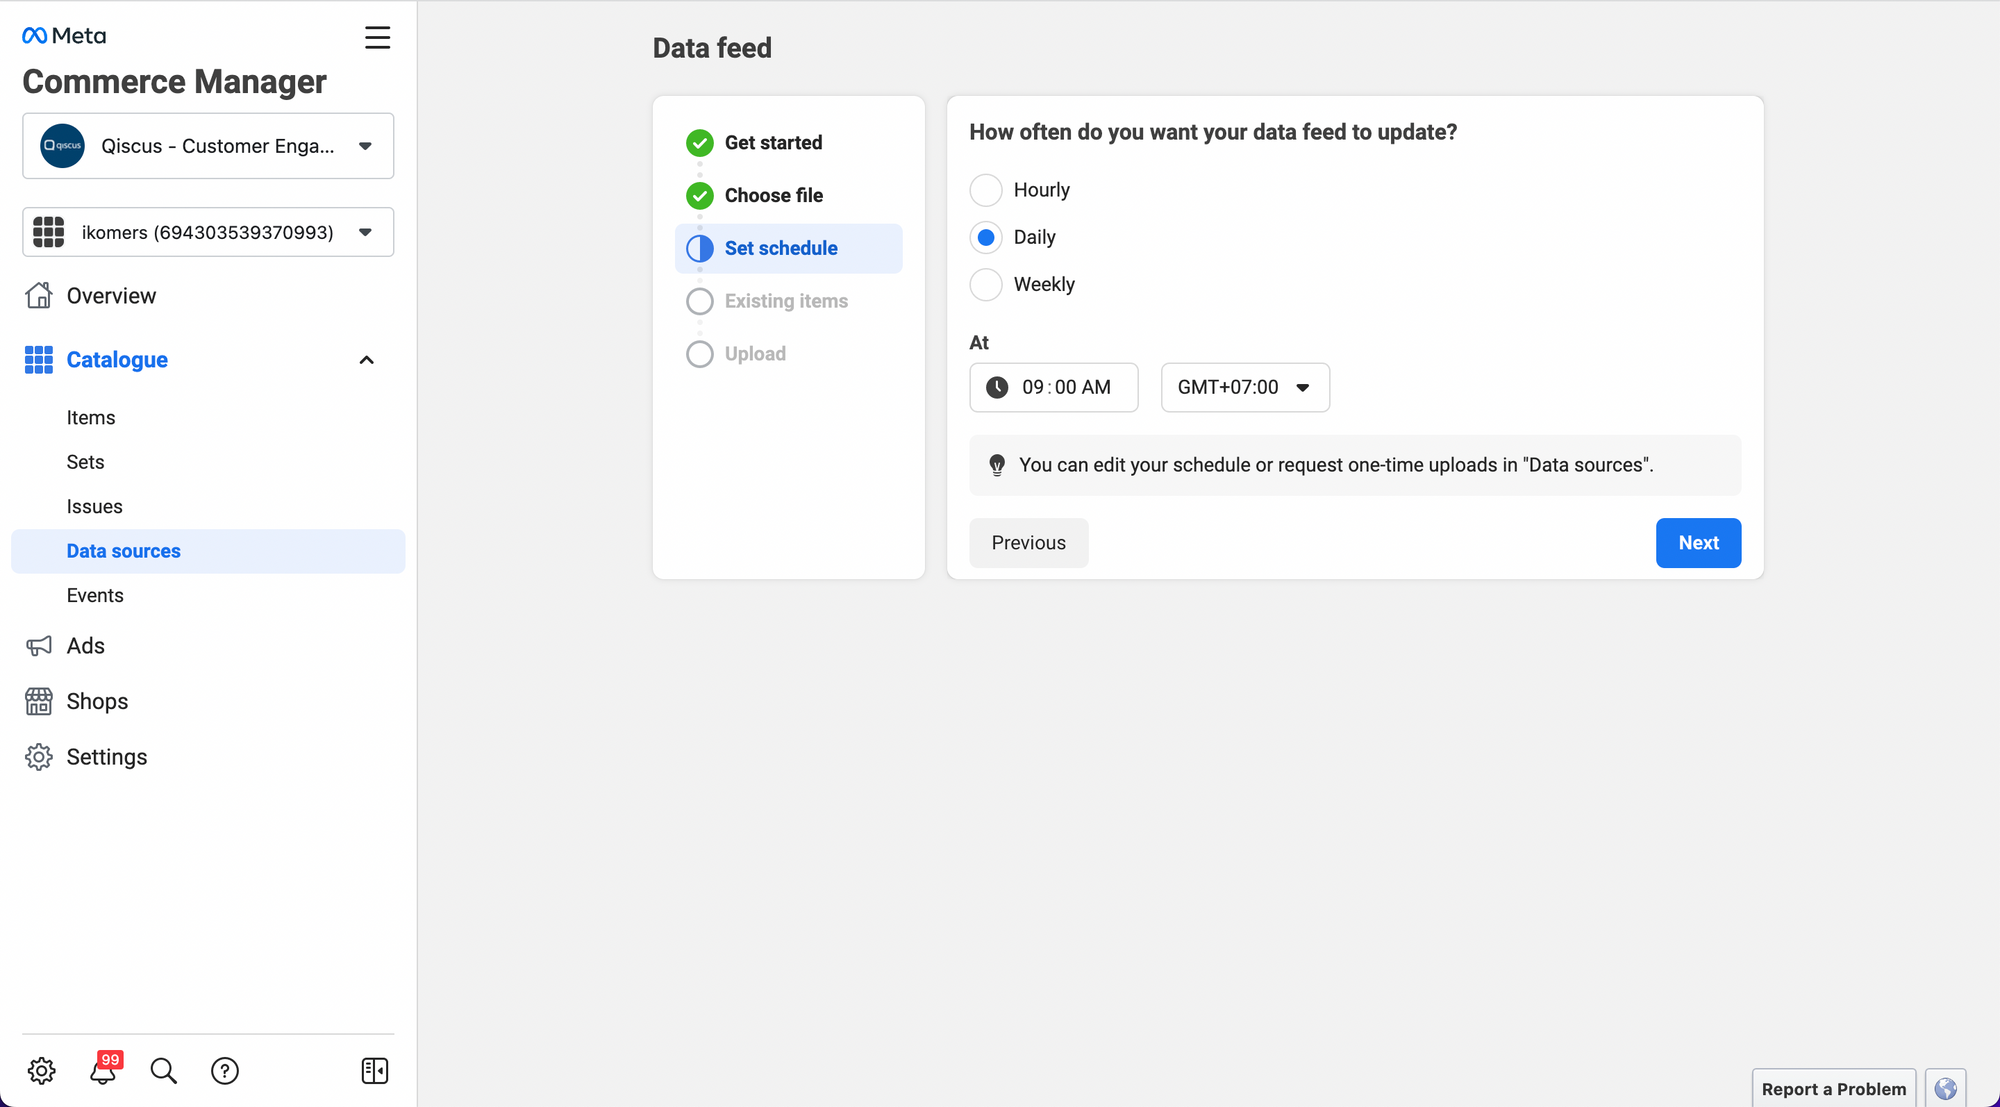
- If there are no issues with the Data Feed, the next step is to determine how often Meta will update the Data Feed. You can choose between Hourly, Daily, or Weekly updates and specify the desired time and time-zone for the updates.
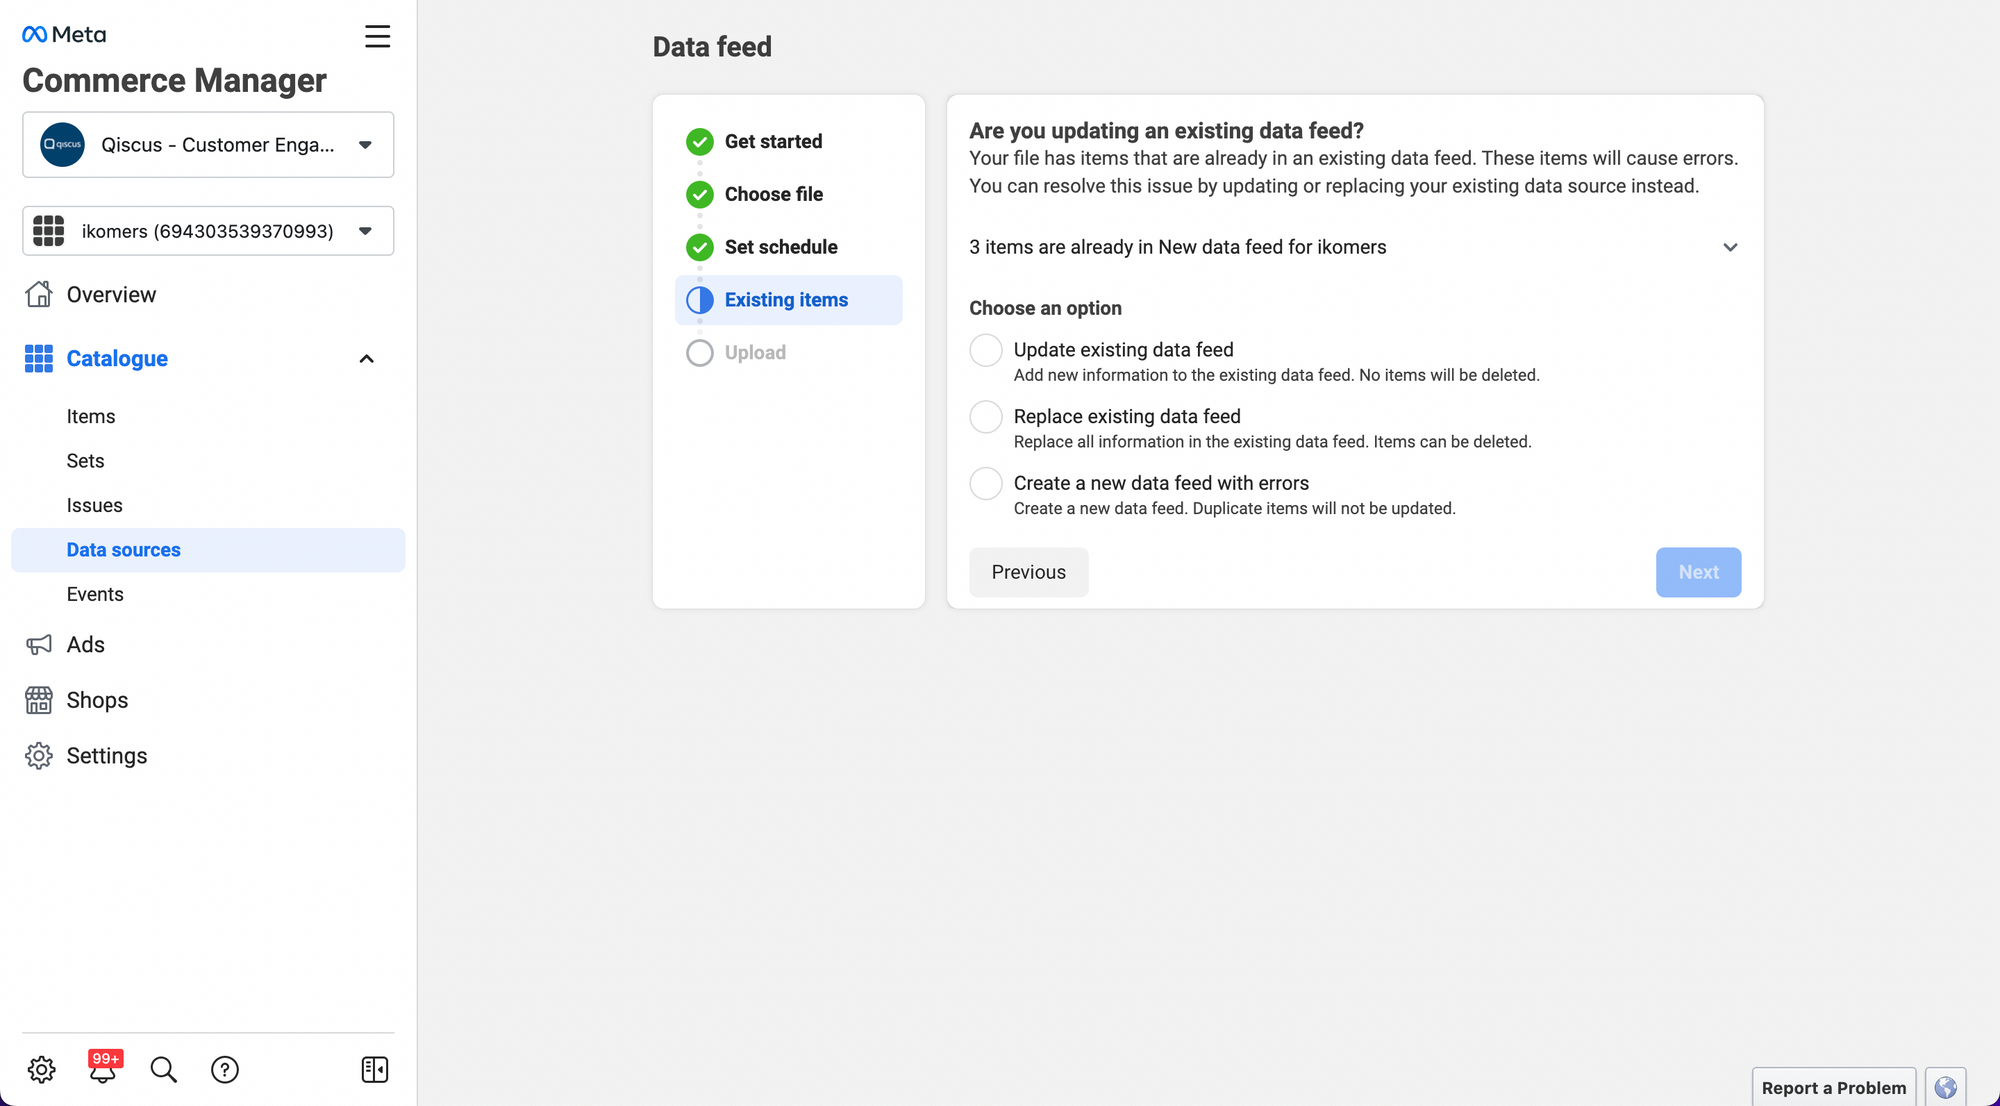
- Determining the action for existing items can be done by choosing whether to update, replace, or create new data for those items that already exist. You can specify the desired action based on your preference, taking into account the potential errors that may occur during the process.
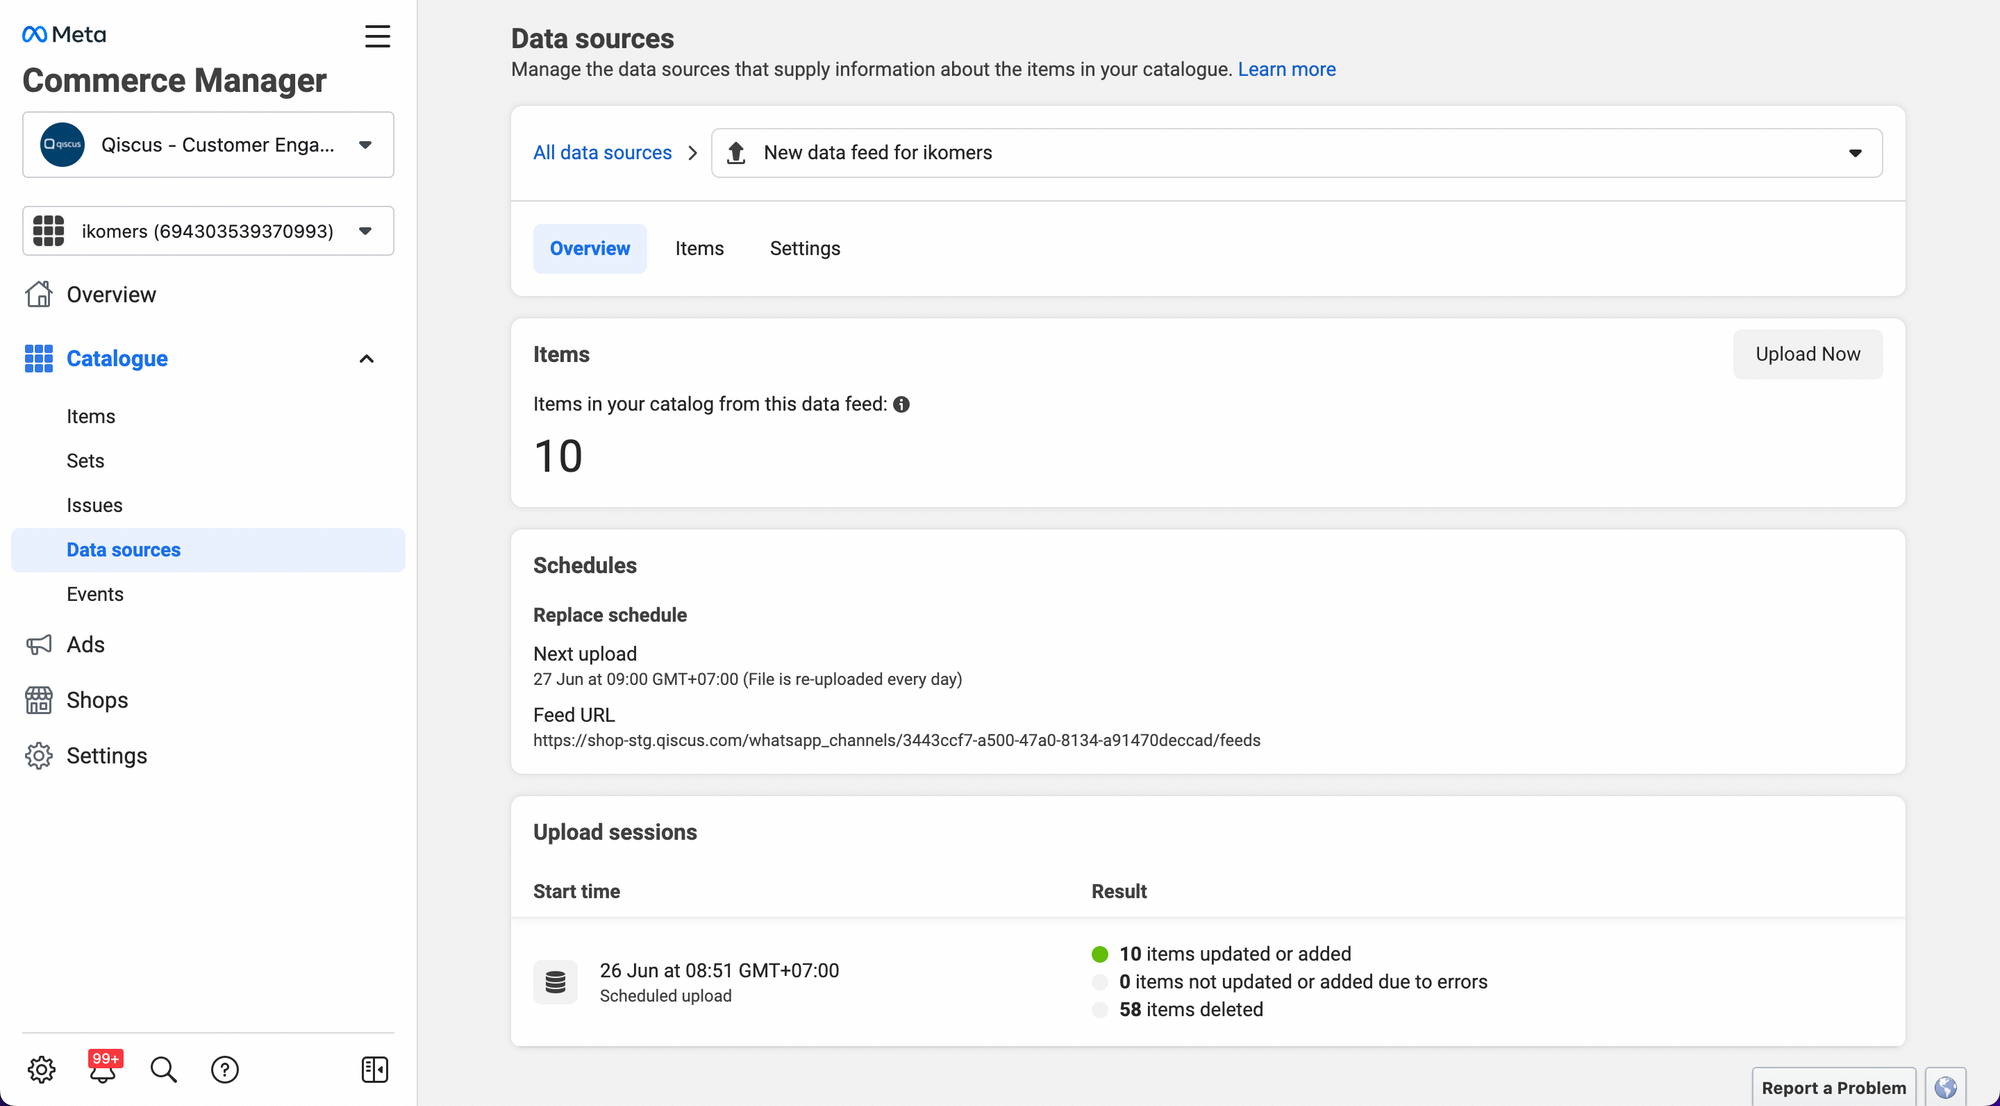
- You will see a progress bar indicating the uploading process of the items.
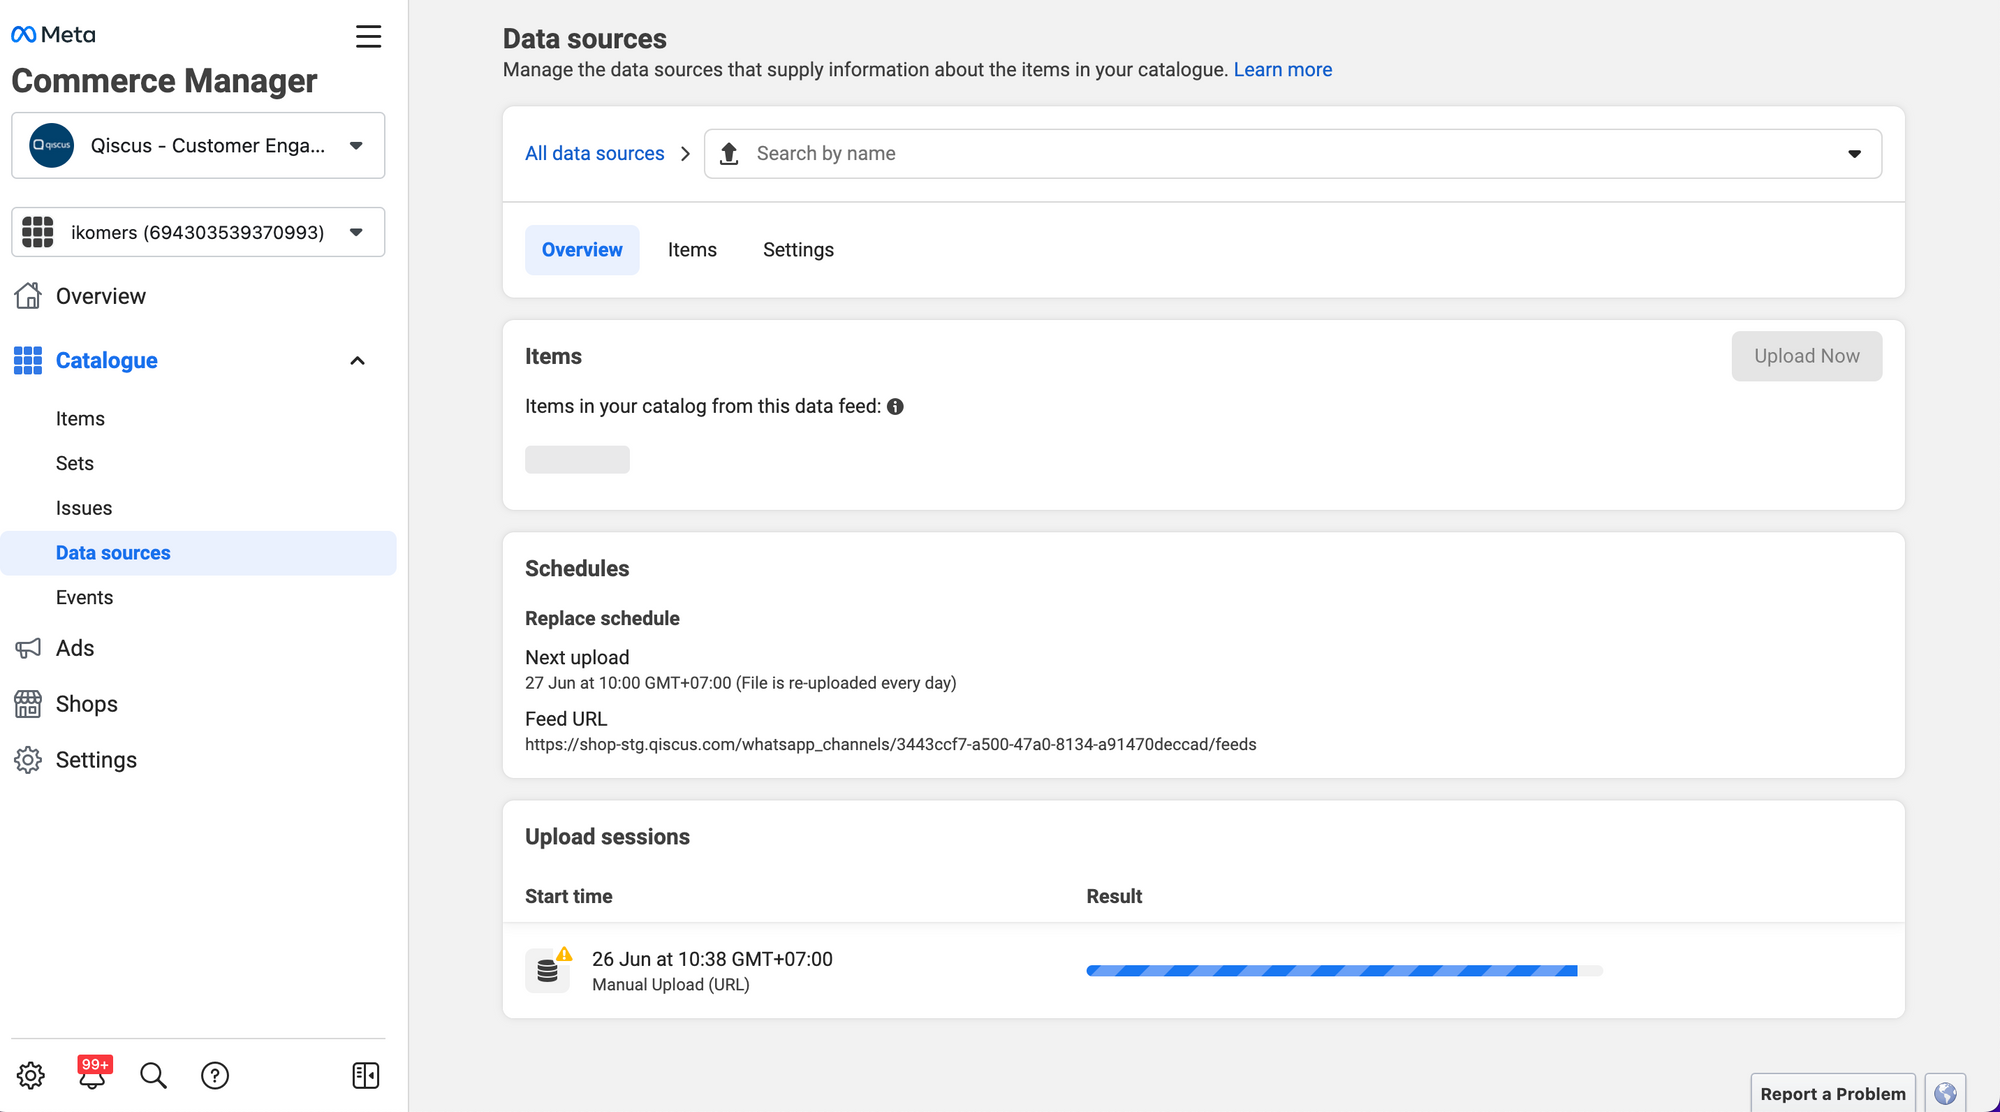
- Once it is completed, you will be able to see the number of successfully uploaded items, along with the information on the next scheduled sync for the products.
Widget Product Recommendation
The Qiscus Shop widget is an interface designed to assist agents in providing product recommendations to customers in the form of interactive messages. This product recommendation feature is specifically applicable to customers who come from the WhatsApp channel. You can operate the Qiscus Shop Widget as follows:
- Go to the Omnichannel Inbox.
- Open one of the rooms.
- Click the “Widget” button on the right-hand side under ‘Chat & Customer info.’
- Select “Qiscus Shop.“
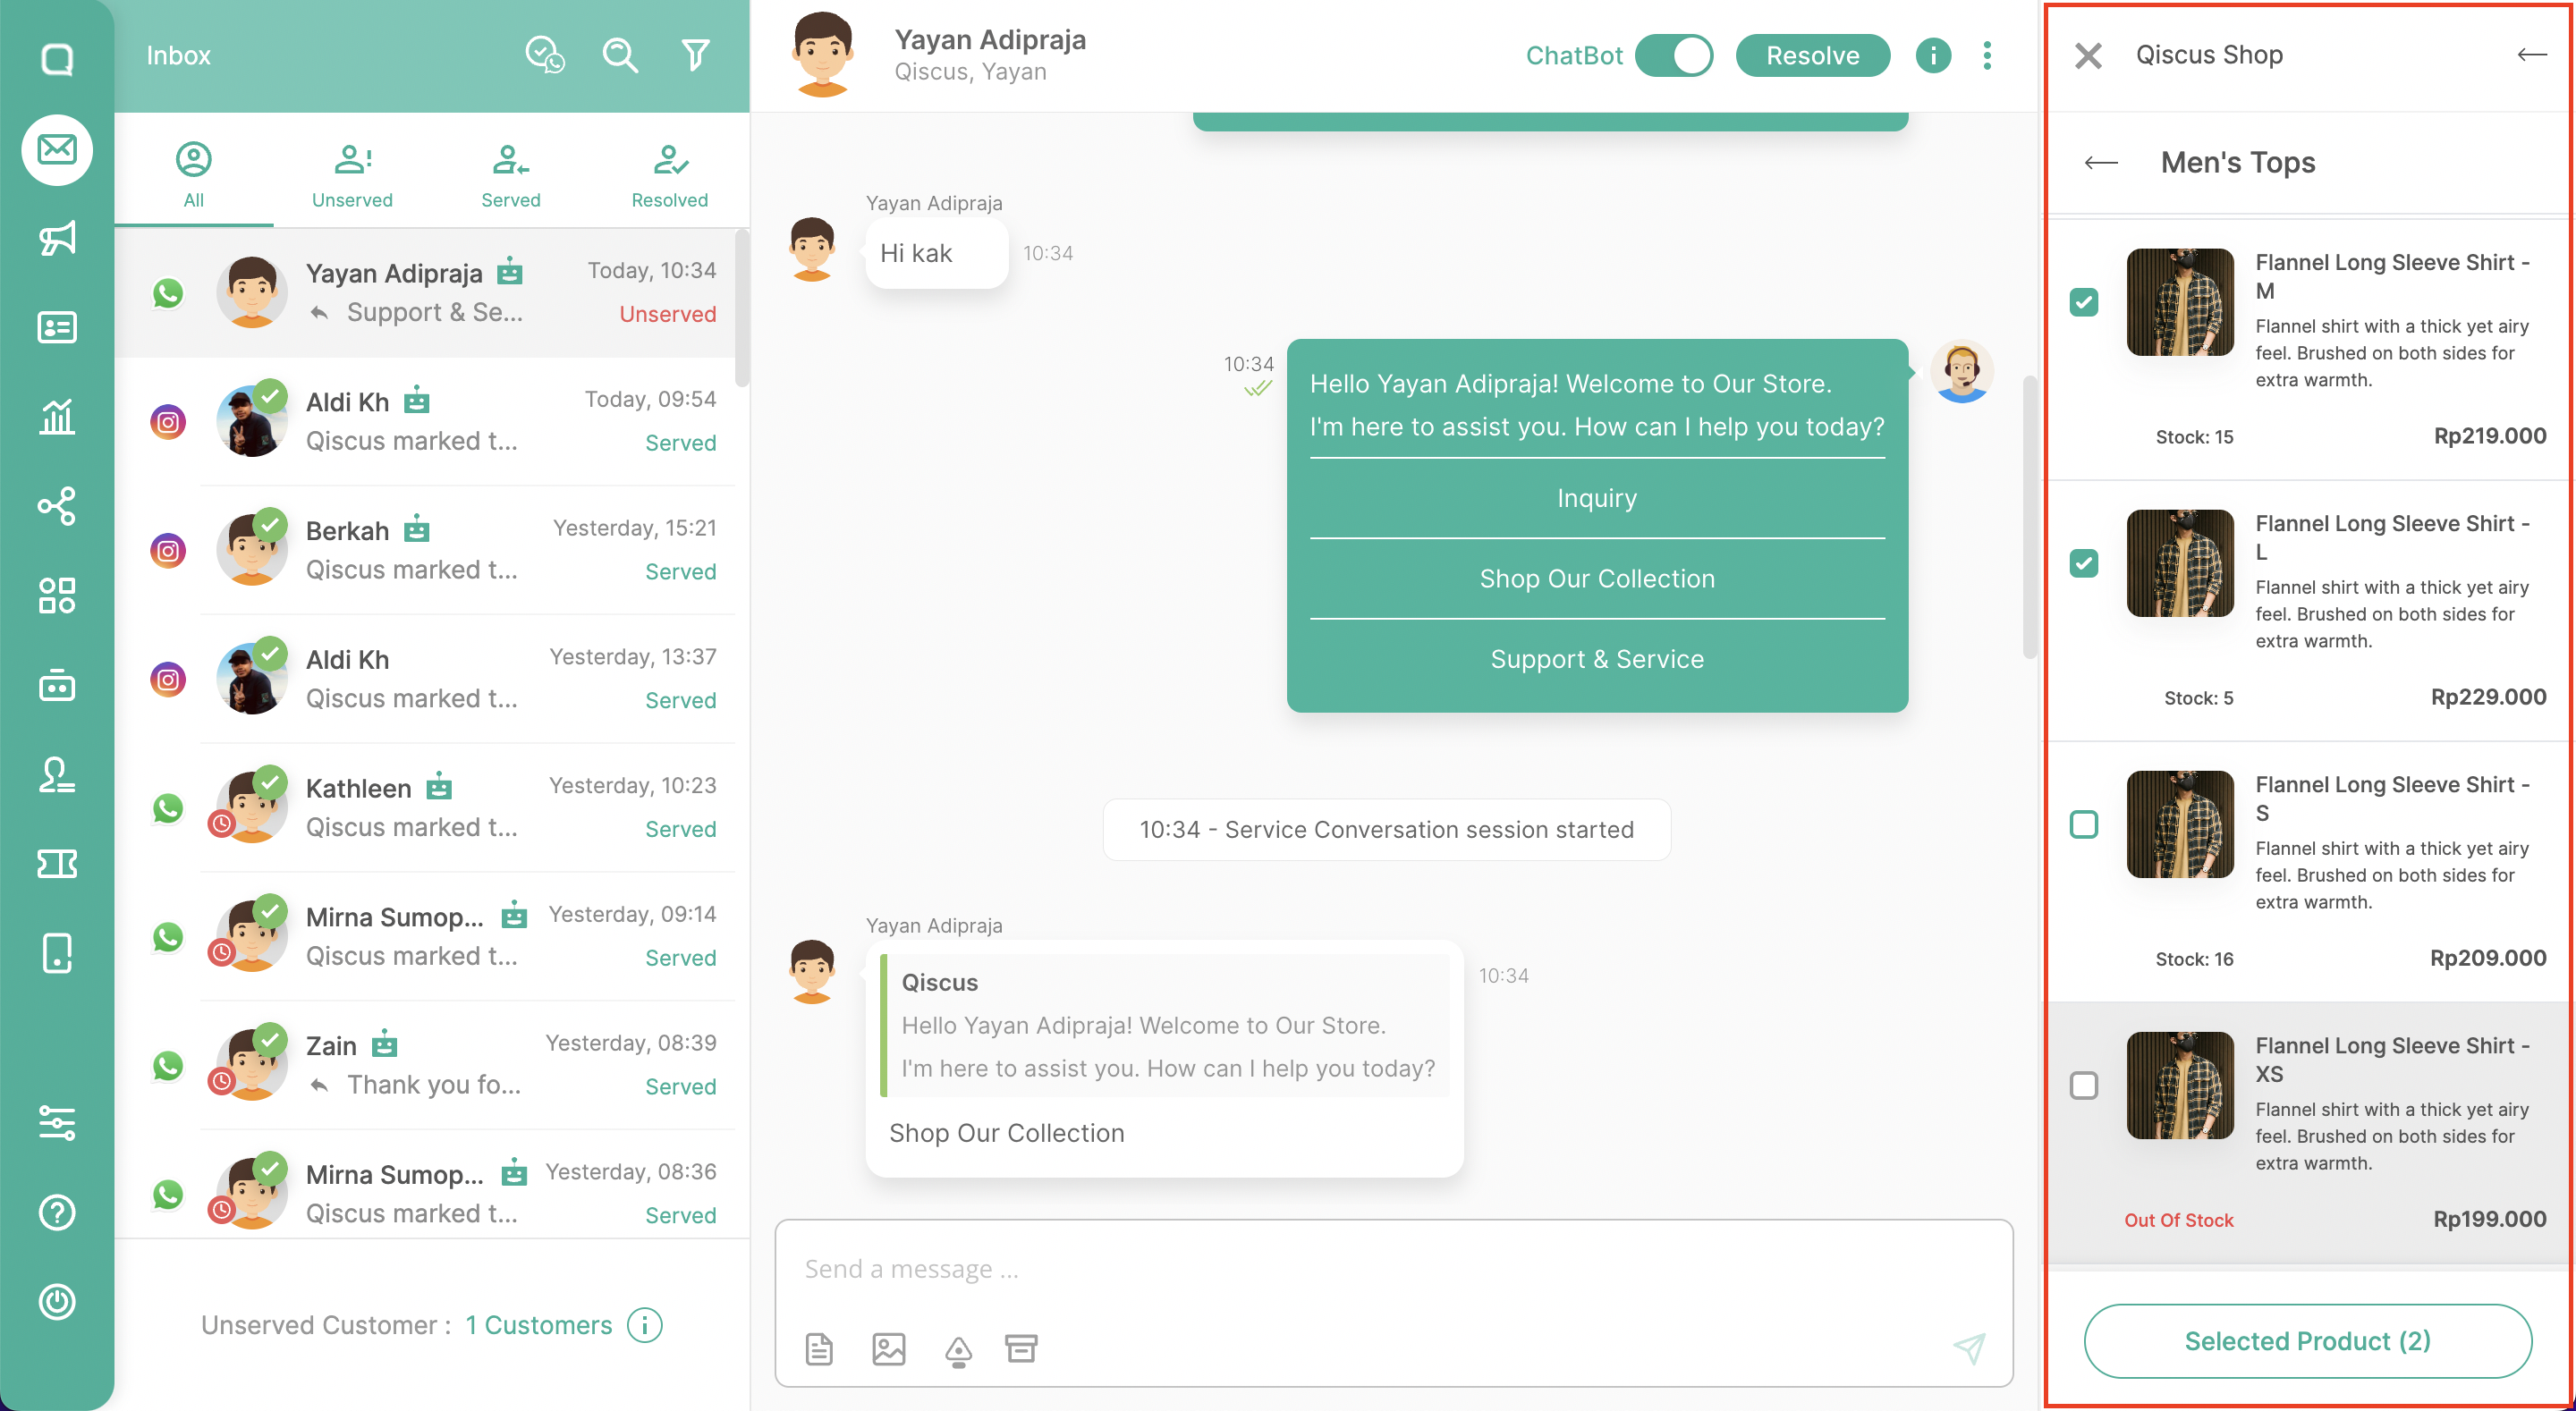
- The widget will display a list of products that have been onboarded through the Qiscus Shop Dashboard, provided you are currently in a room with a WhatsApp channel.
- Once the list of products is open, agents can choose one or several products.
- Send the product recommendations by clicking “Send Product Information”.
Leave a Reply